By David Fox
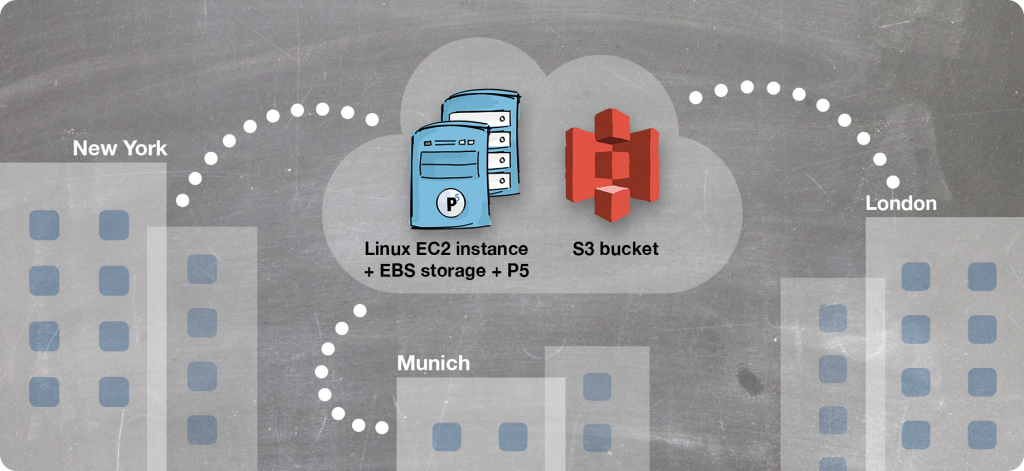
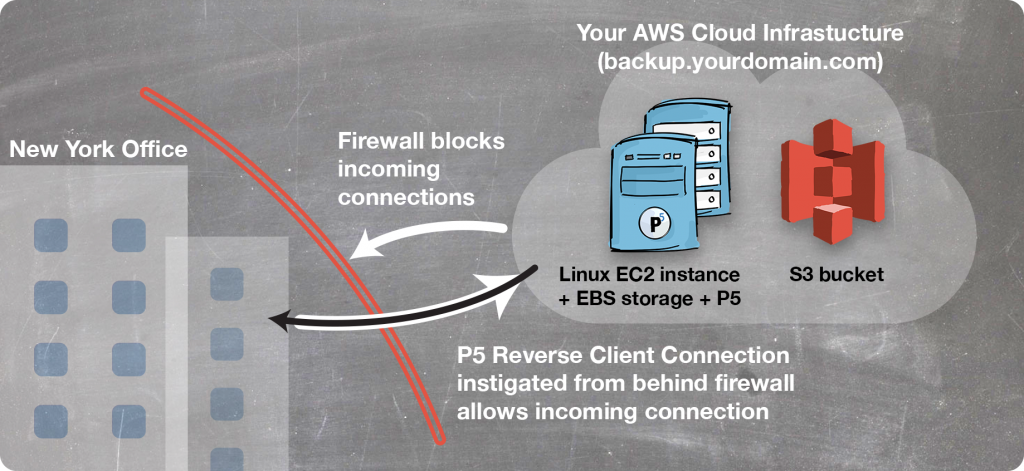
For organisations of all sizes, hosting a centralised P5 server in the cloud allows backup of multiple sites/offices back to a secure, centrally managed resource. This provides greater flexibility compared with using a commercial hosted solution. The P5 server can trigger backups of each remote office location using a technique we call ‘reverse client connection’. This allows bypass of firewalls and easy configuration – ideal for backup of multiple sites.
This article explores how this type of solution is set up and operated in a cloud infrastructure by running through some of the steps needed to set it up. We’ll use some details about Amazon Web Services (AWS) in our examples below but the same solution could be deployed with many different cloud vendors.
1. Deploying a Linux host and storage in the cloud
First, we need to set up our cloud computer and storage. We’ll use these three AWS services to create our cloud-based backup server. Similar services are available from any competing vendor.
EC2 – Elastic Cloud Compute – Create a Linux ‘instance’ (e.g. virtual computer in the cloud) which will run Archiware P5 and be contactable publicly so that we can back up to it from any location with an internet connection.
EBS – Elastic Block Storage – The ‘hard disk’ for the above Linux computer, where the operating system and applications will be stored, plus some capacity for caching backup data before it is sent to the lower-cost S3 cloud storage (see below).
S3 – Simple Storage Service – The final location for backups, where data is stored permanently. Charged according to how much is being used, so cost grows as we add more data. Typically this type of cloud storage is replicated and has very high levels of fault tolerance and security – ideal for backups.
2. Installing Archiware P5 on the cloud server
Our cloud computer, with its Linux operating system, is where we now install the P5 software. This will then become our central backup server, our remote offices will connect to this server and it will store all the backups centrally.
At this point, you’ll need to create the cloud computer, running some flavour of the Linux operating system. There are numerous decisions to make here that will affect the cost of this computing resource. The amount of CPU power, memory and storage will be the main factors that you’ll have to decide upon. The correct choices here are dependent upon how heavily loaded the backup server will be when being used for backups. As a minimum configuration for testing, configure your machine with 4GB of RAM and 100GB of storage. P5 is not particularly demanding of CPU resources unless a lot of compression and encryption is taking place, therefore start your testing with a lower-spec CPU and test to ensure you obtain your desired performance.
Once up and running, your Linux computer is managed remotely using the SSH protocol and Shell commands. Of course, if you don’t already possess these skills, you’ve some learning to do, or will need to find someone who can help! Fortunately, Archiware P5 can be downloaded and installed in a couple of minutes. To give a flavour of how simple this is, the following six commands will download, extract, install and run the product (replace XXX with current version of P5).
mkdir /usr/local/aw
cd /usr/local/aw
wget http://presstore_downloads.s3.amazonaws.com/awpstXXX.tgz
tar zxf awpstXXX.tgz
./install.sh
./start-server
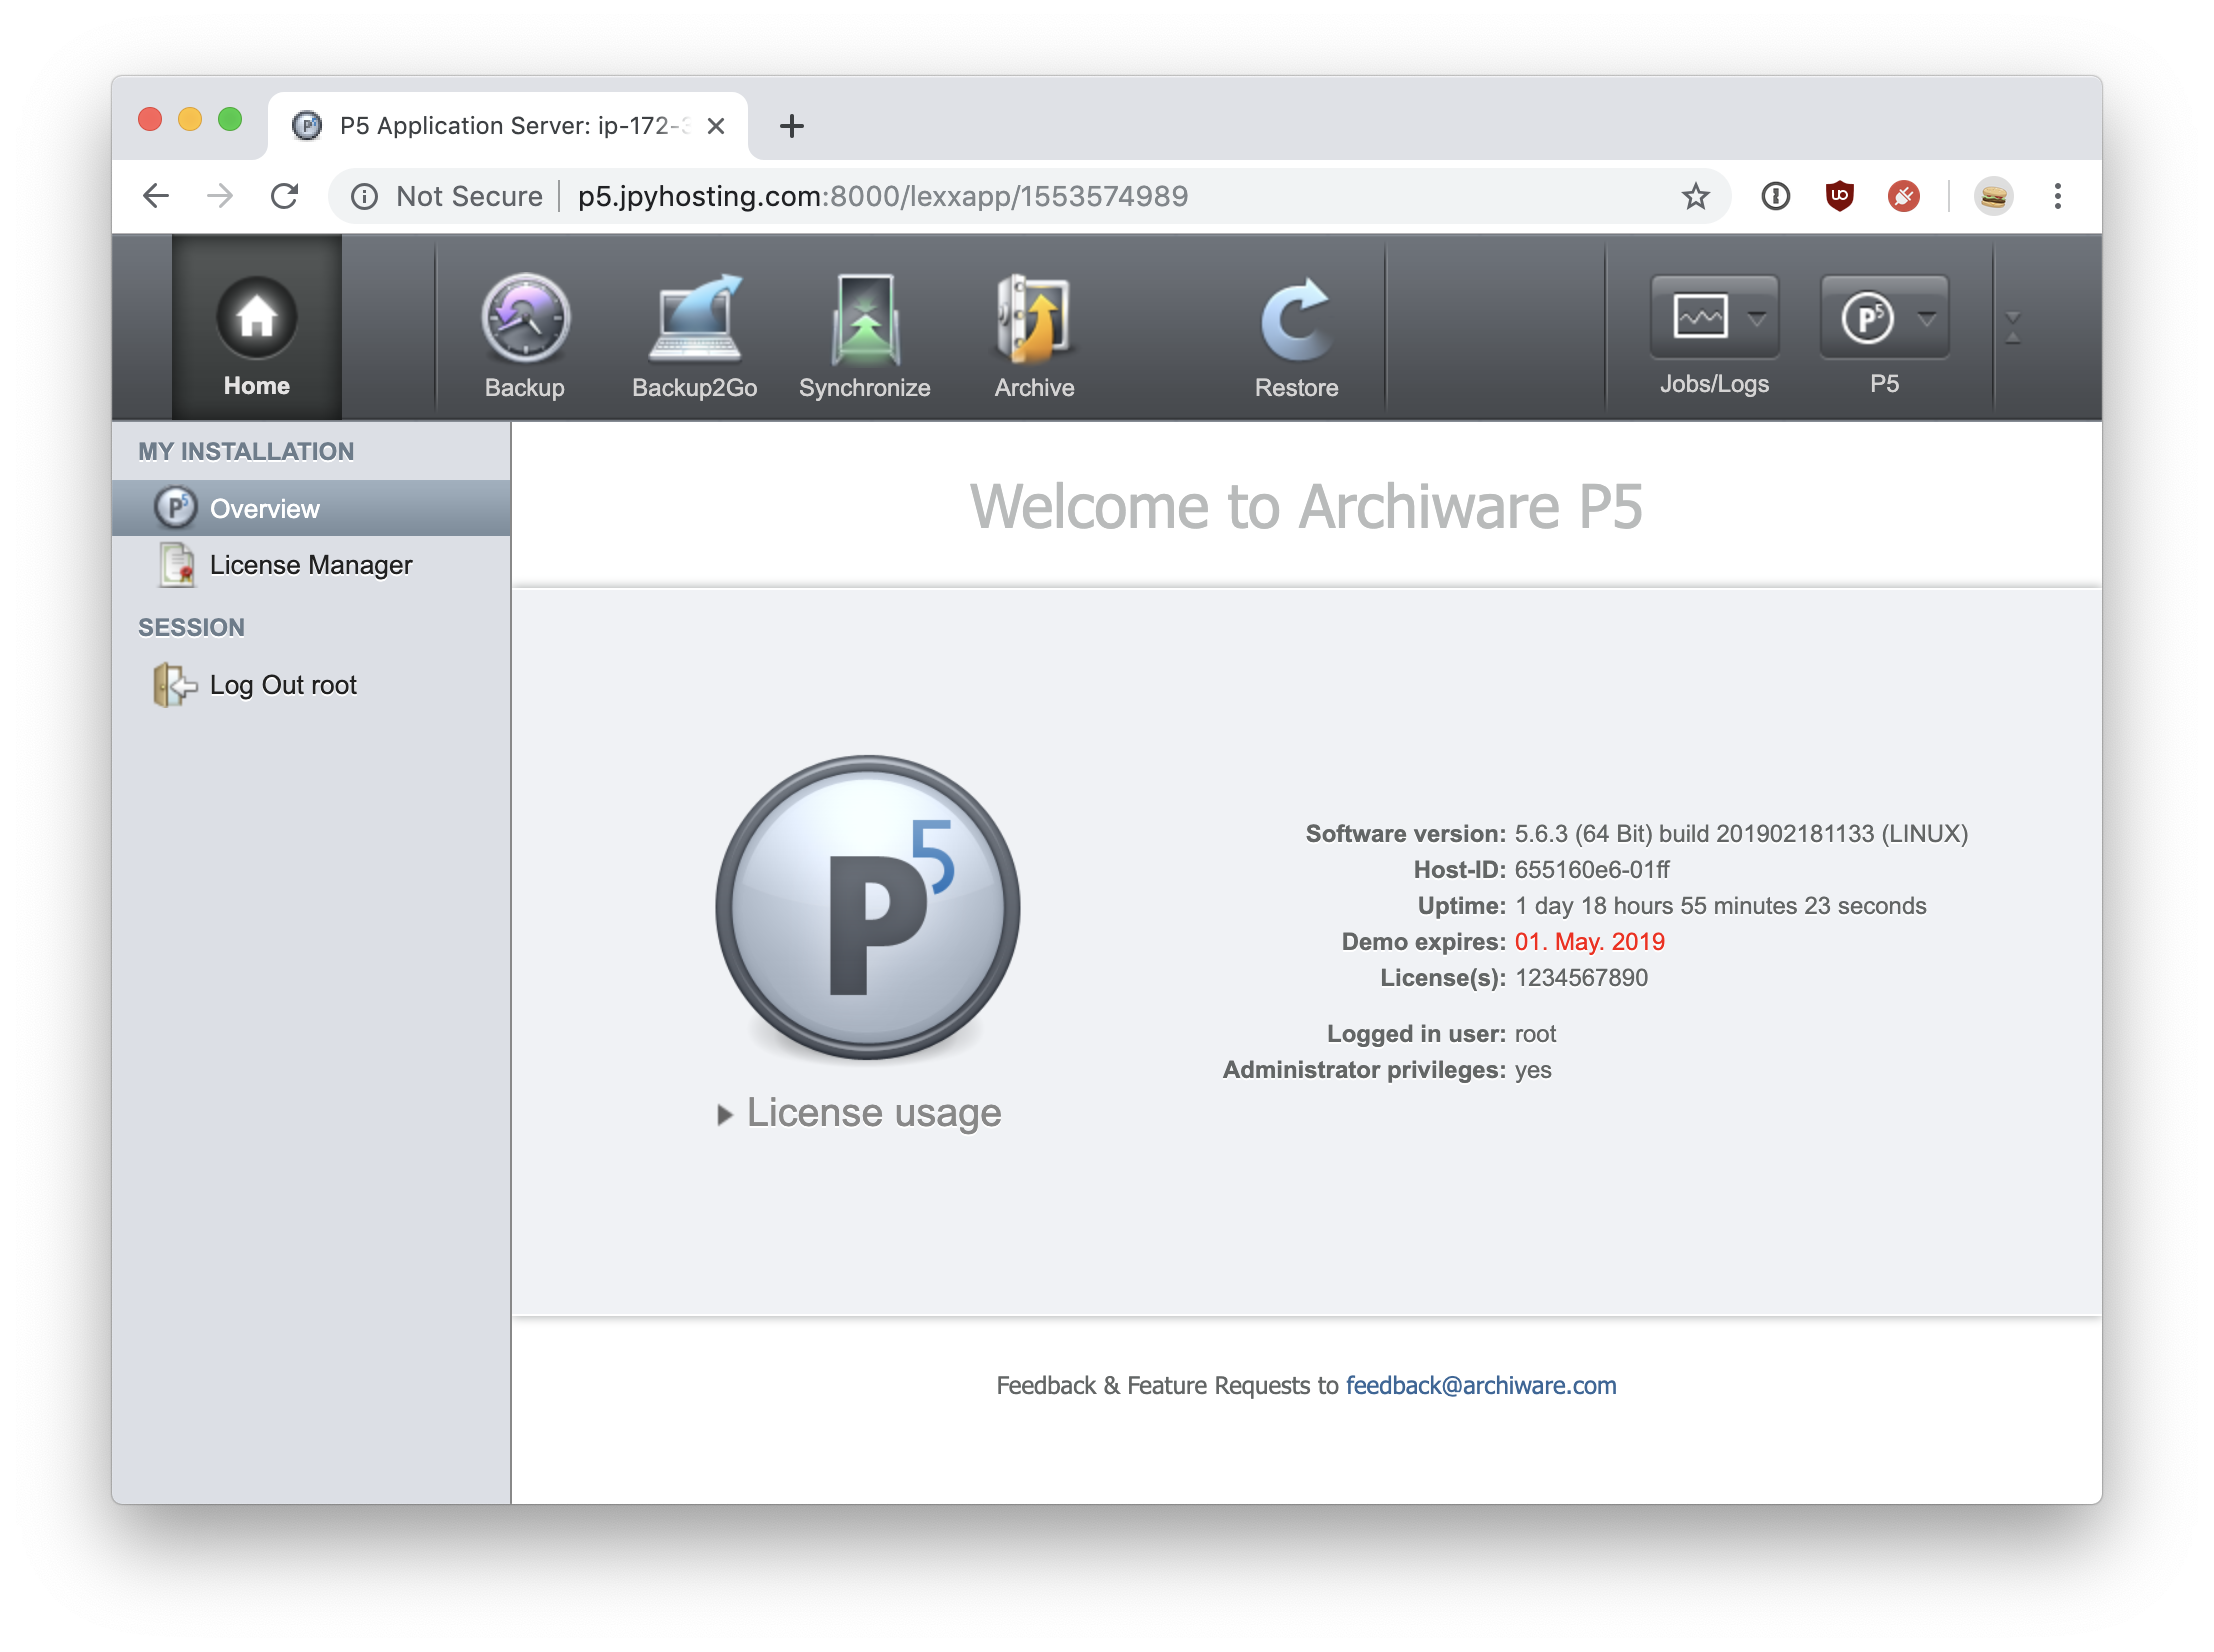
Once P5 is installed on your server and that server is accessible via a public IP address, everything can be configured using your local web browser. Creating a DNS record for the server, will allow configuration to be made using a name rather than a IP address – e.g.
http://p5backup.yourdomain.com.
Once installed, access P5’s web-admin interface in a browser to continue setup of the backup workflow.
3. Provisioning an AWS S3 Bucket

Amazon S3 or Amazon Simple Storage Service is a “simple storage service” offered by Amazon Web Services (AWS) that provides object storage. Each object in your S3 bucket will be managed by P5, so there’s no configuration required beyond creating the bucket by providing a name.
There are many different types of S3 storage available, which trade off the following properties against each other to arrive at different prices per GB per month.
| Durability | Availability | Redundancy |
| Minimum Duration | Storage Cost | Retrieval Cost |
Use this reference to better understand the S3 options
https://aws.amazon.com/s3/storage-classes/
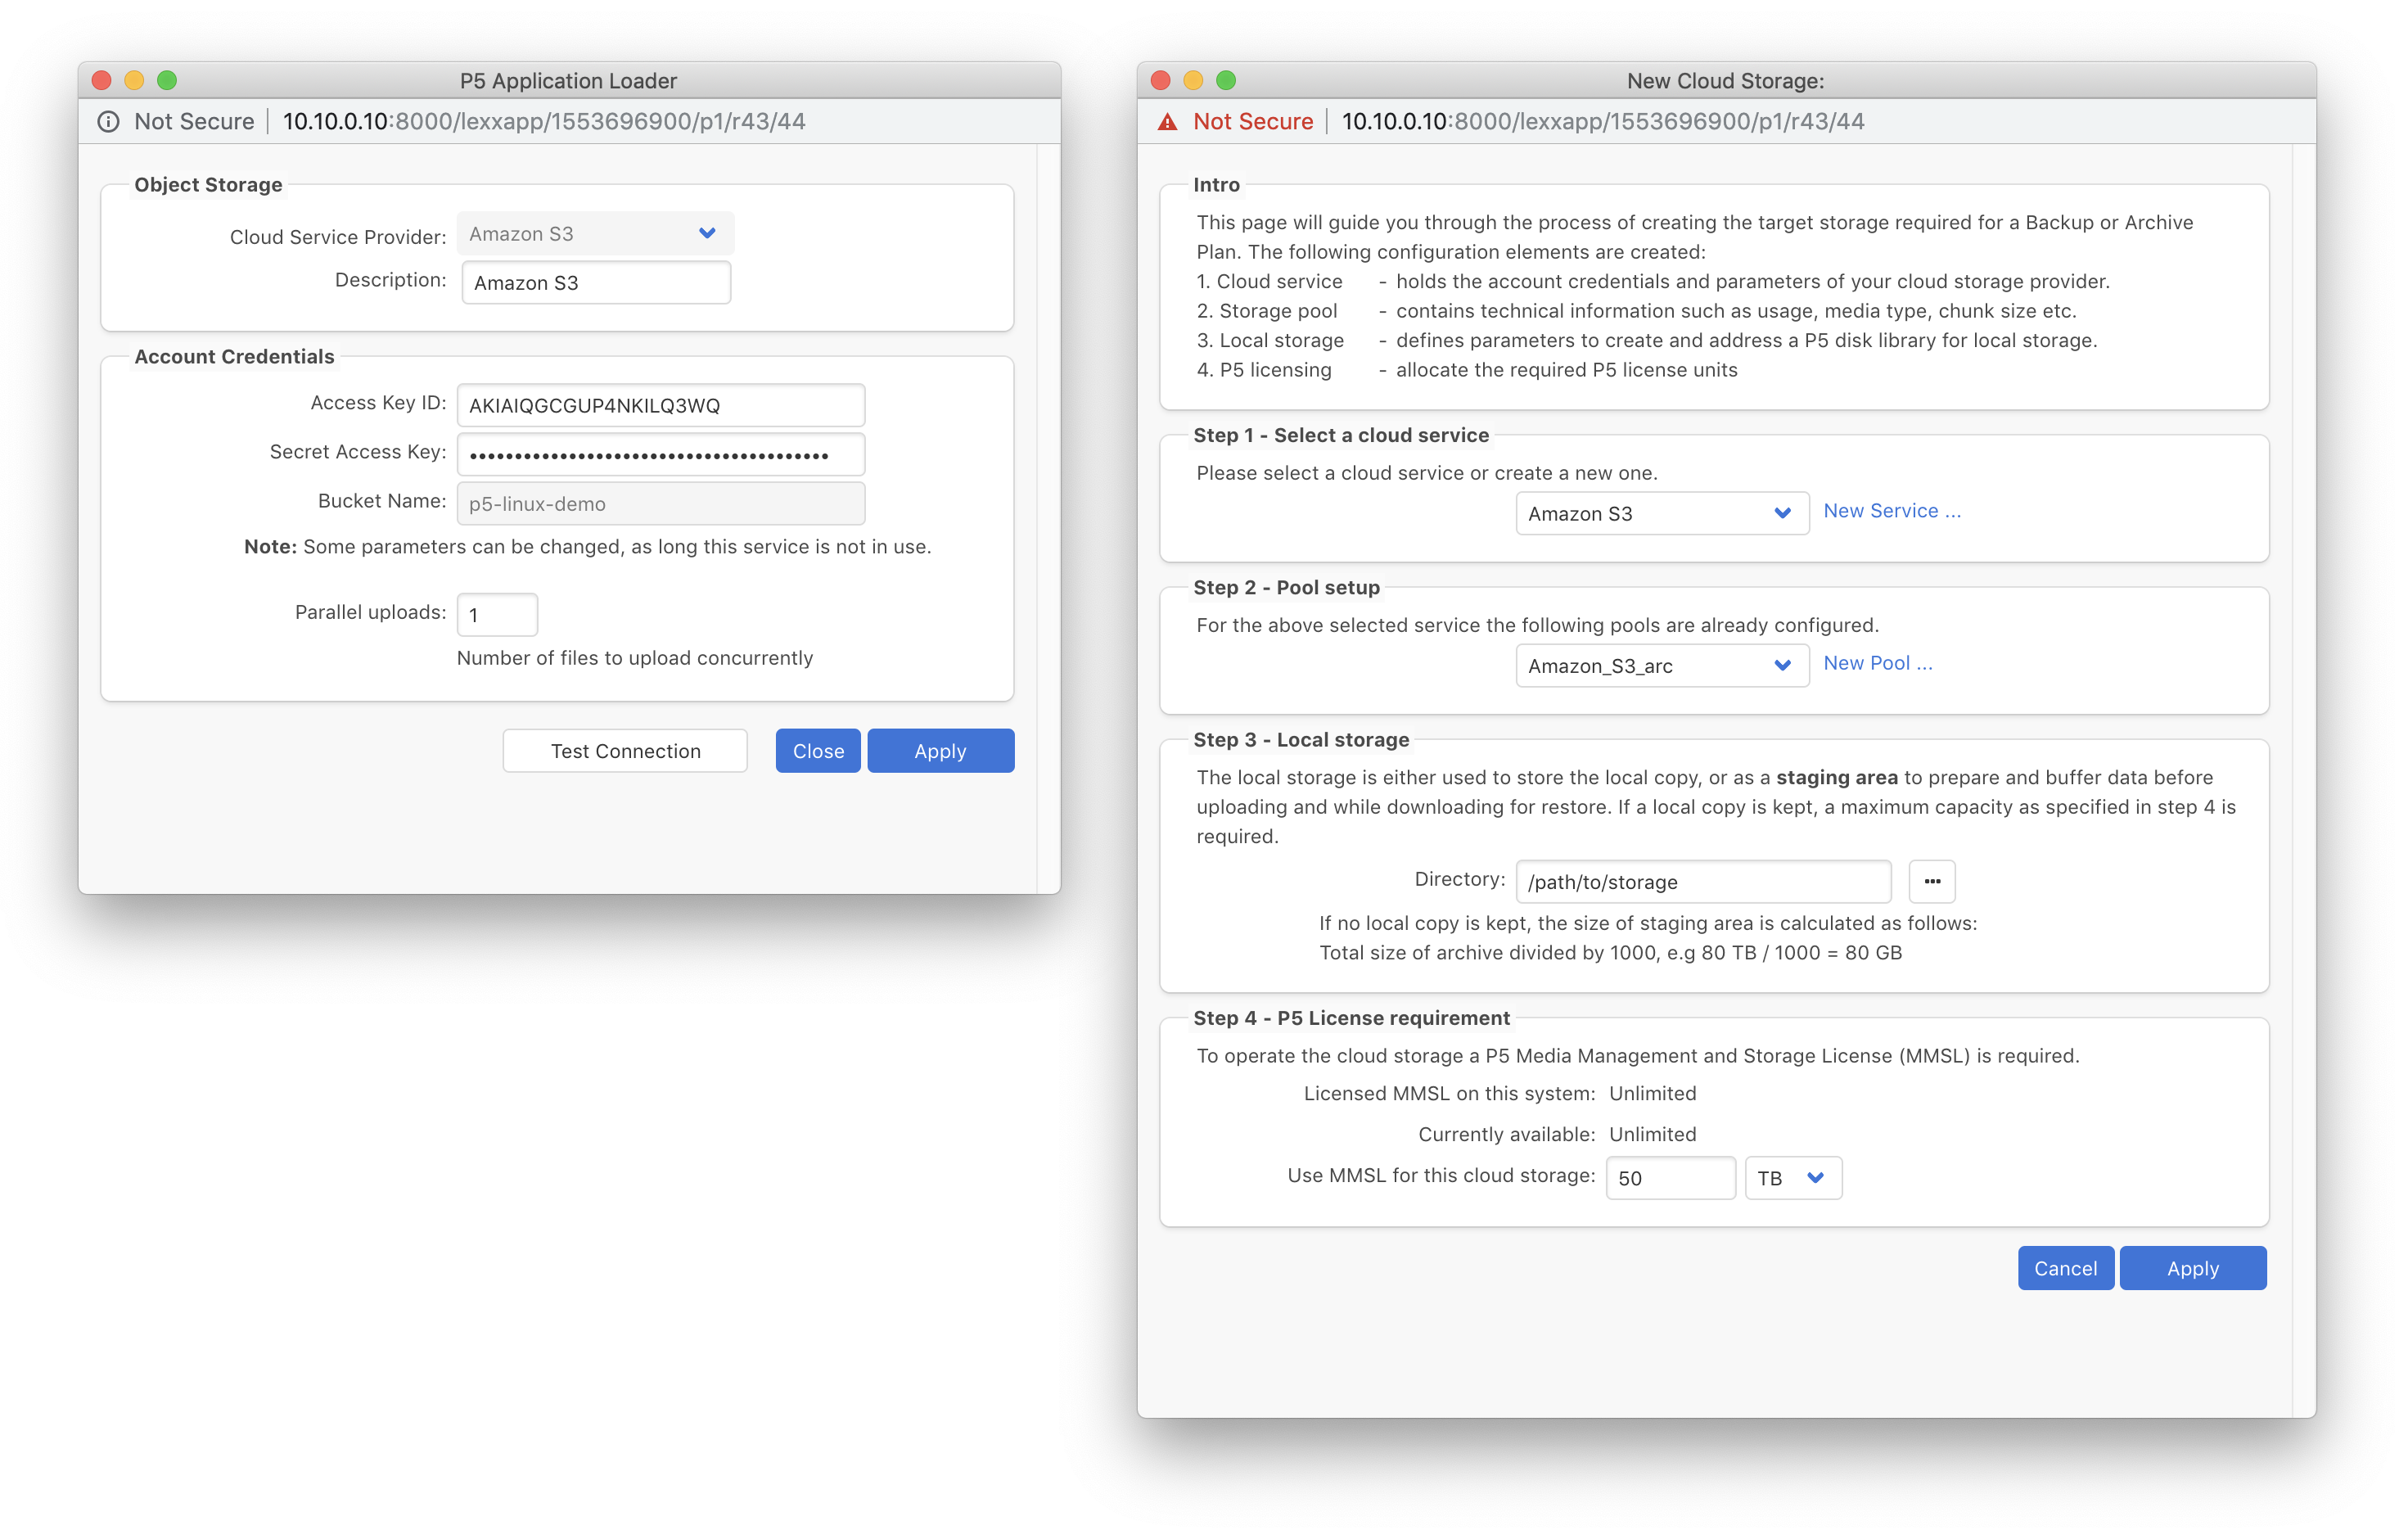
Having created our Bucket, we now attach our it to our P5 backup server. This is performed via two steps, in the first we provide our S3 authentication credentials and the name of the ‘Bucket’ that we created to hold our backups within S3. With that done, we configure our cloud storage by preparing a storage pool and deciding how much cloud storage we wish to use for backups.
Now we’re ready to add our first remote site.
4. Install the P5 remote ‘Agent’ at the remote site
Repeat these steps for each computer you wish to backup from – regardless of where it’s located. We will install P5 on each computer and perform a single configuration step that hooks it up to the backups server in the cloud. Note that no licenses are required to be entered on each of these computers we’re backing up.
Begin by installing P5. Download it via https://p5.archiware.com/download and follow the usual installation steps, depending upon the operating system being used.
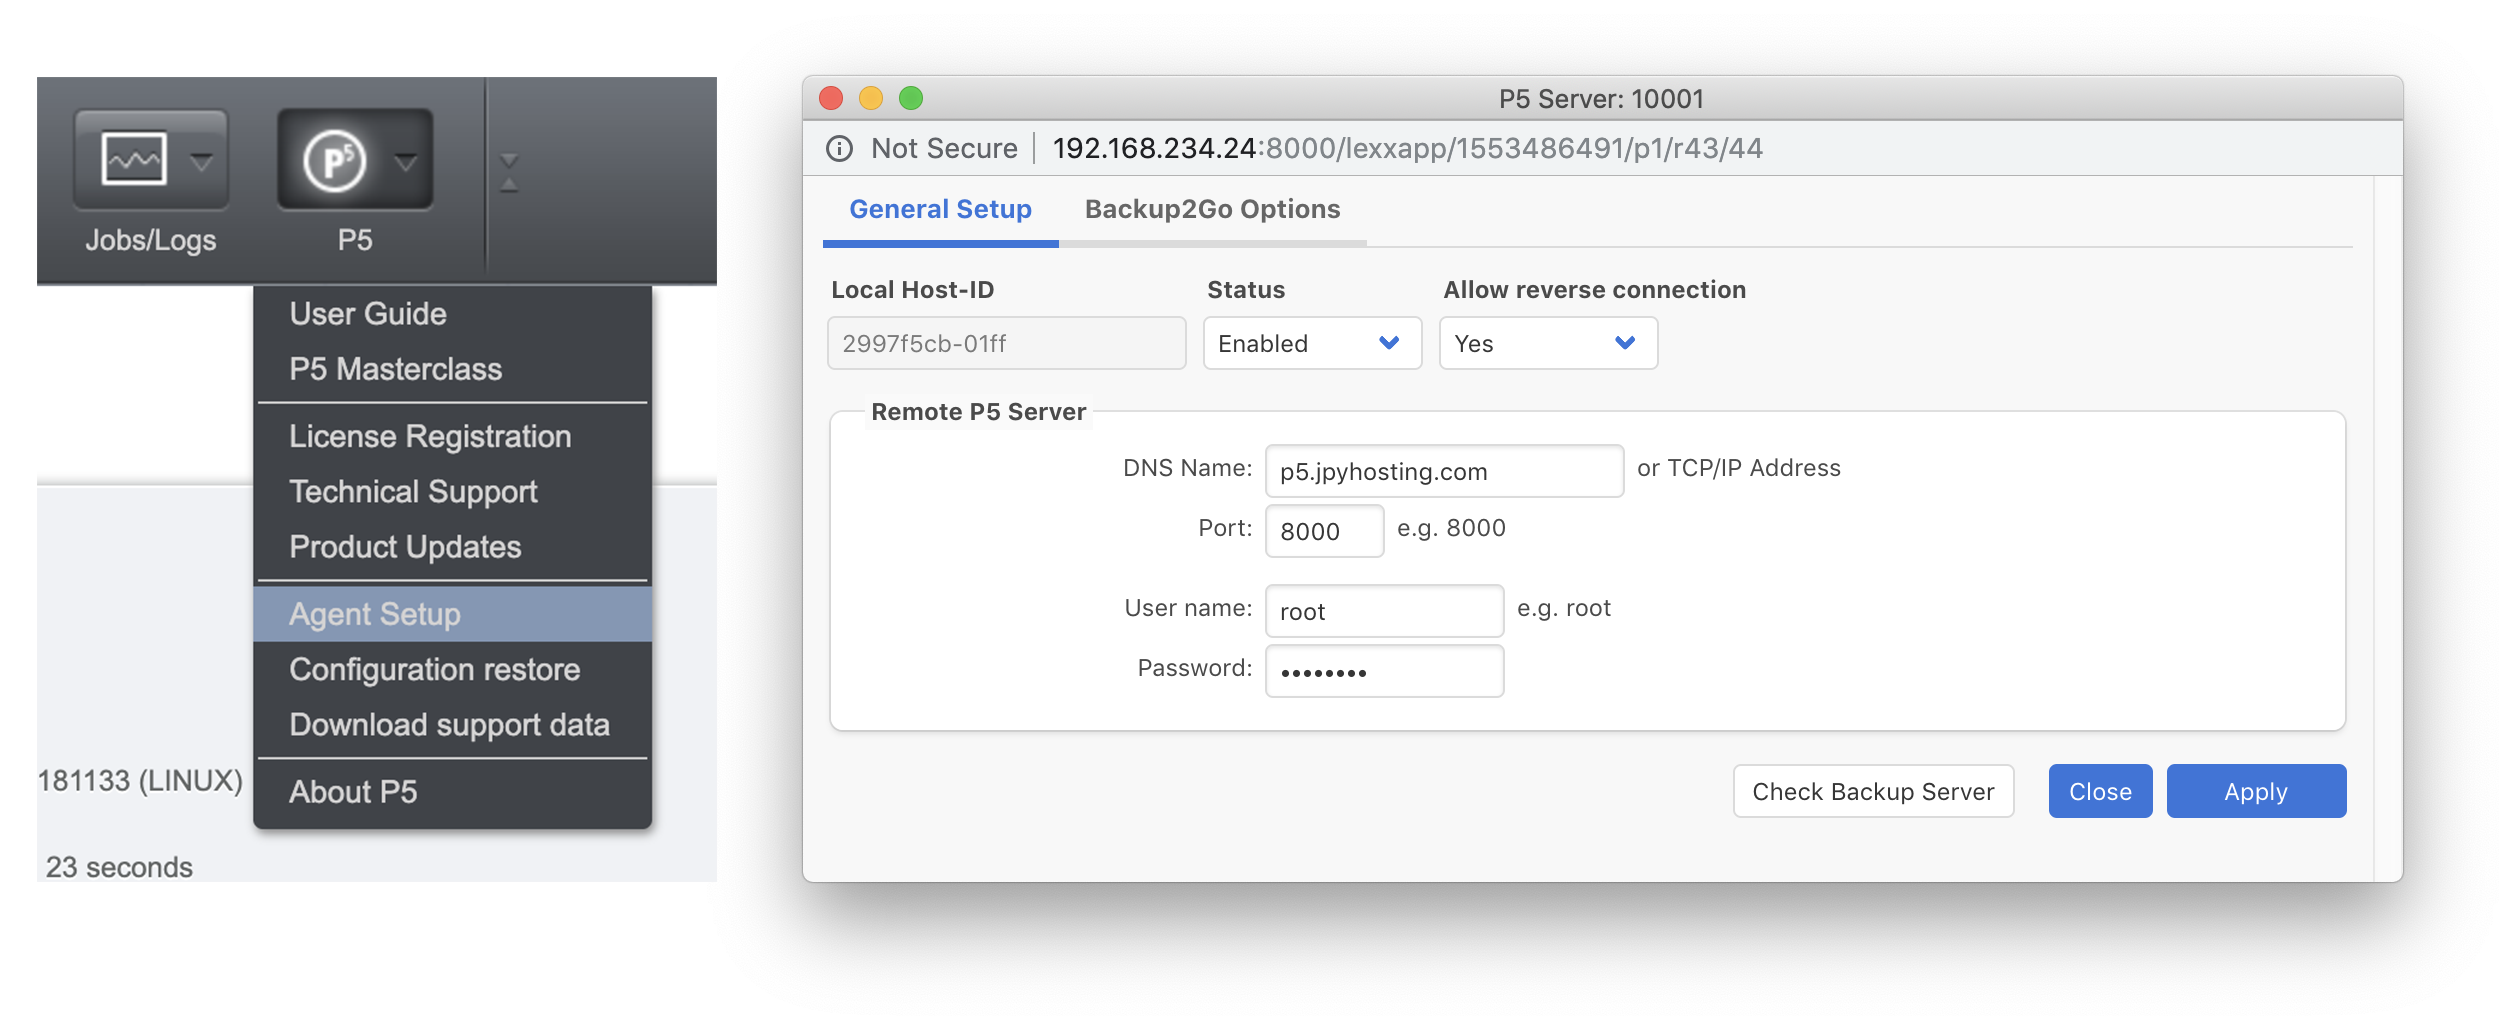
Next, select ‘Agent Setup’ from the ‘P5’ menu, click the ‘New’ button to create our connection to the backup server. In the window below, we provide the IP/DNS name of the backup server, and the login credentials. The ‘Check’ button allows us to test that this ‘agent’ is able to contact the backup server.
We now return to our cloud backup server, to add the remote client here to the central list. This requires a username/password on that computer. We can also configure compression and encryption here if required.
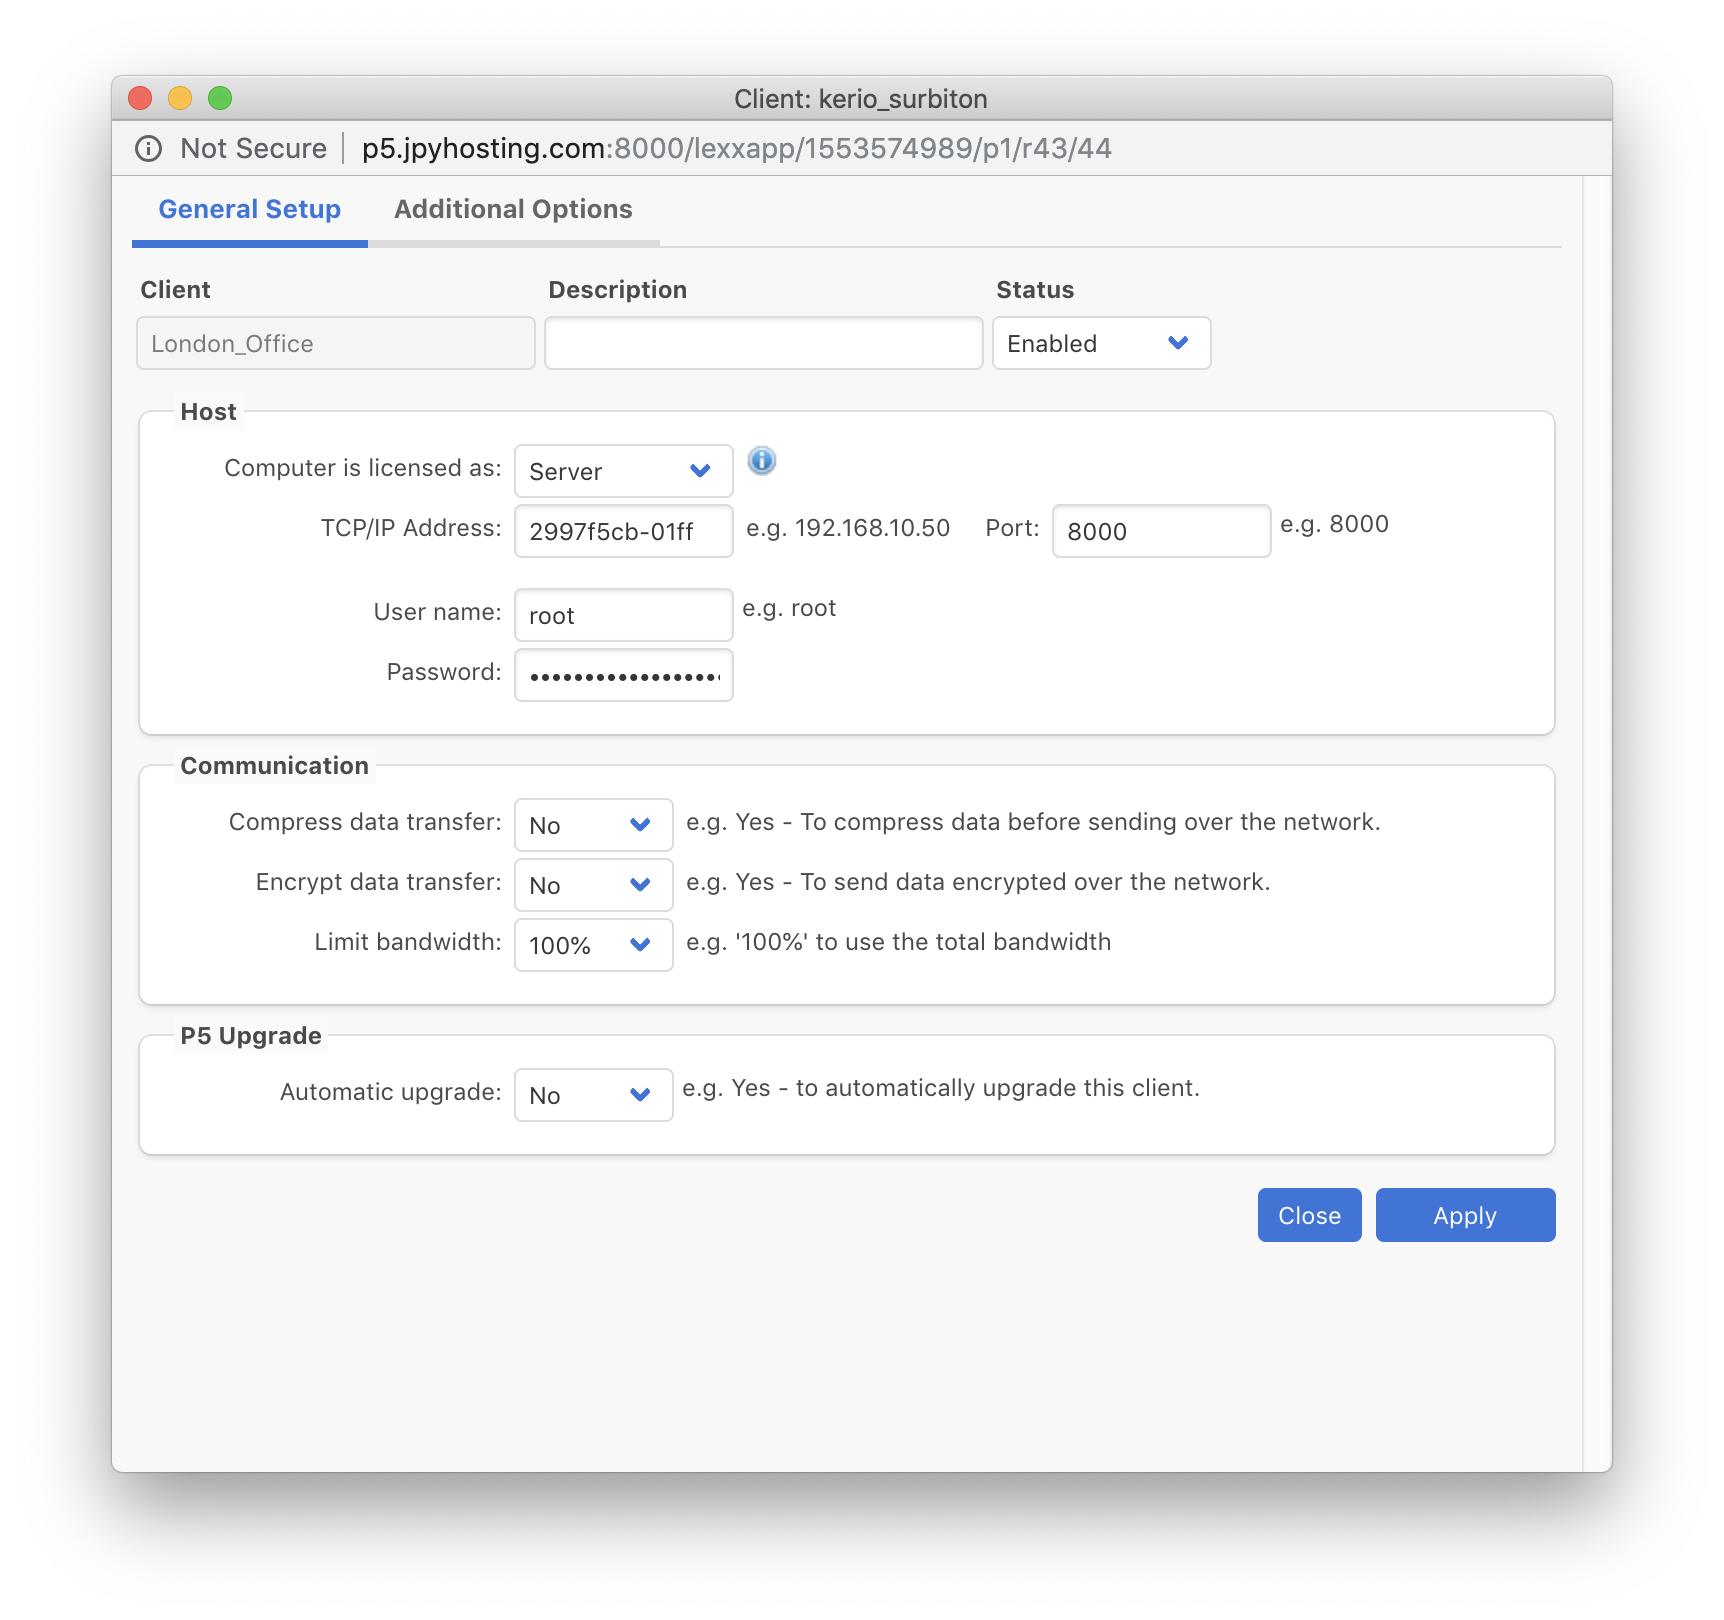
Once complete, this machine is now ready to be backed up to the cloud server. All further configuration regards what to backup and when is configured directly on the backup server – in the next step.
5. Configure Backups on the cloud server
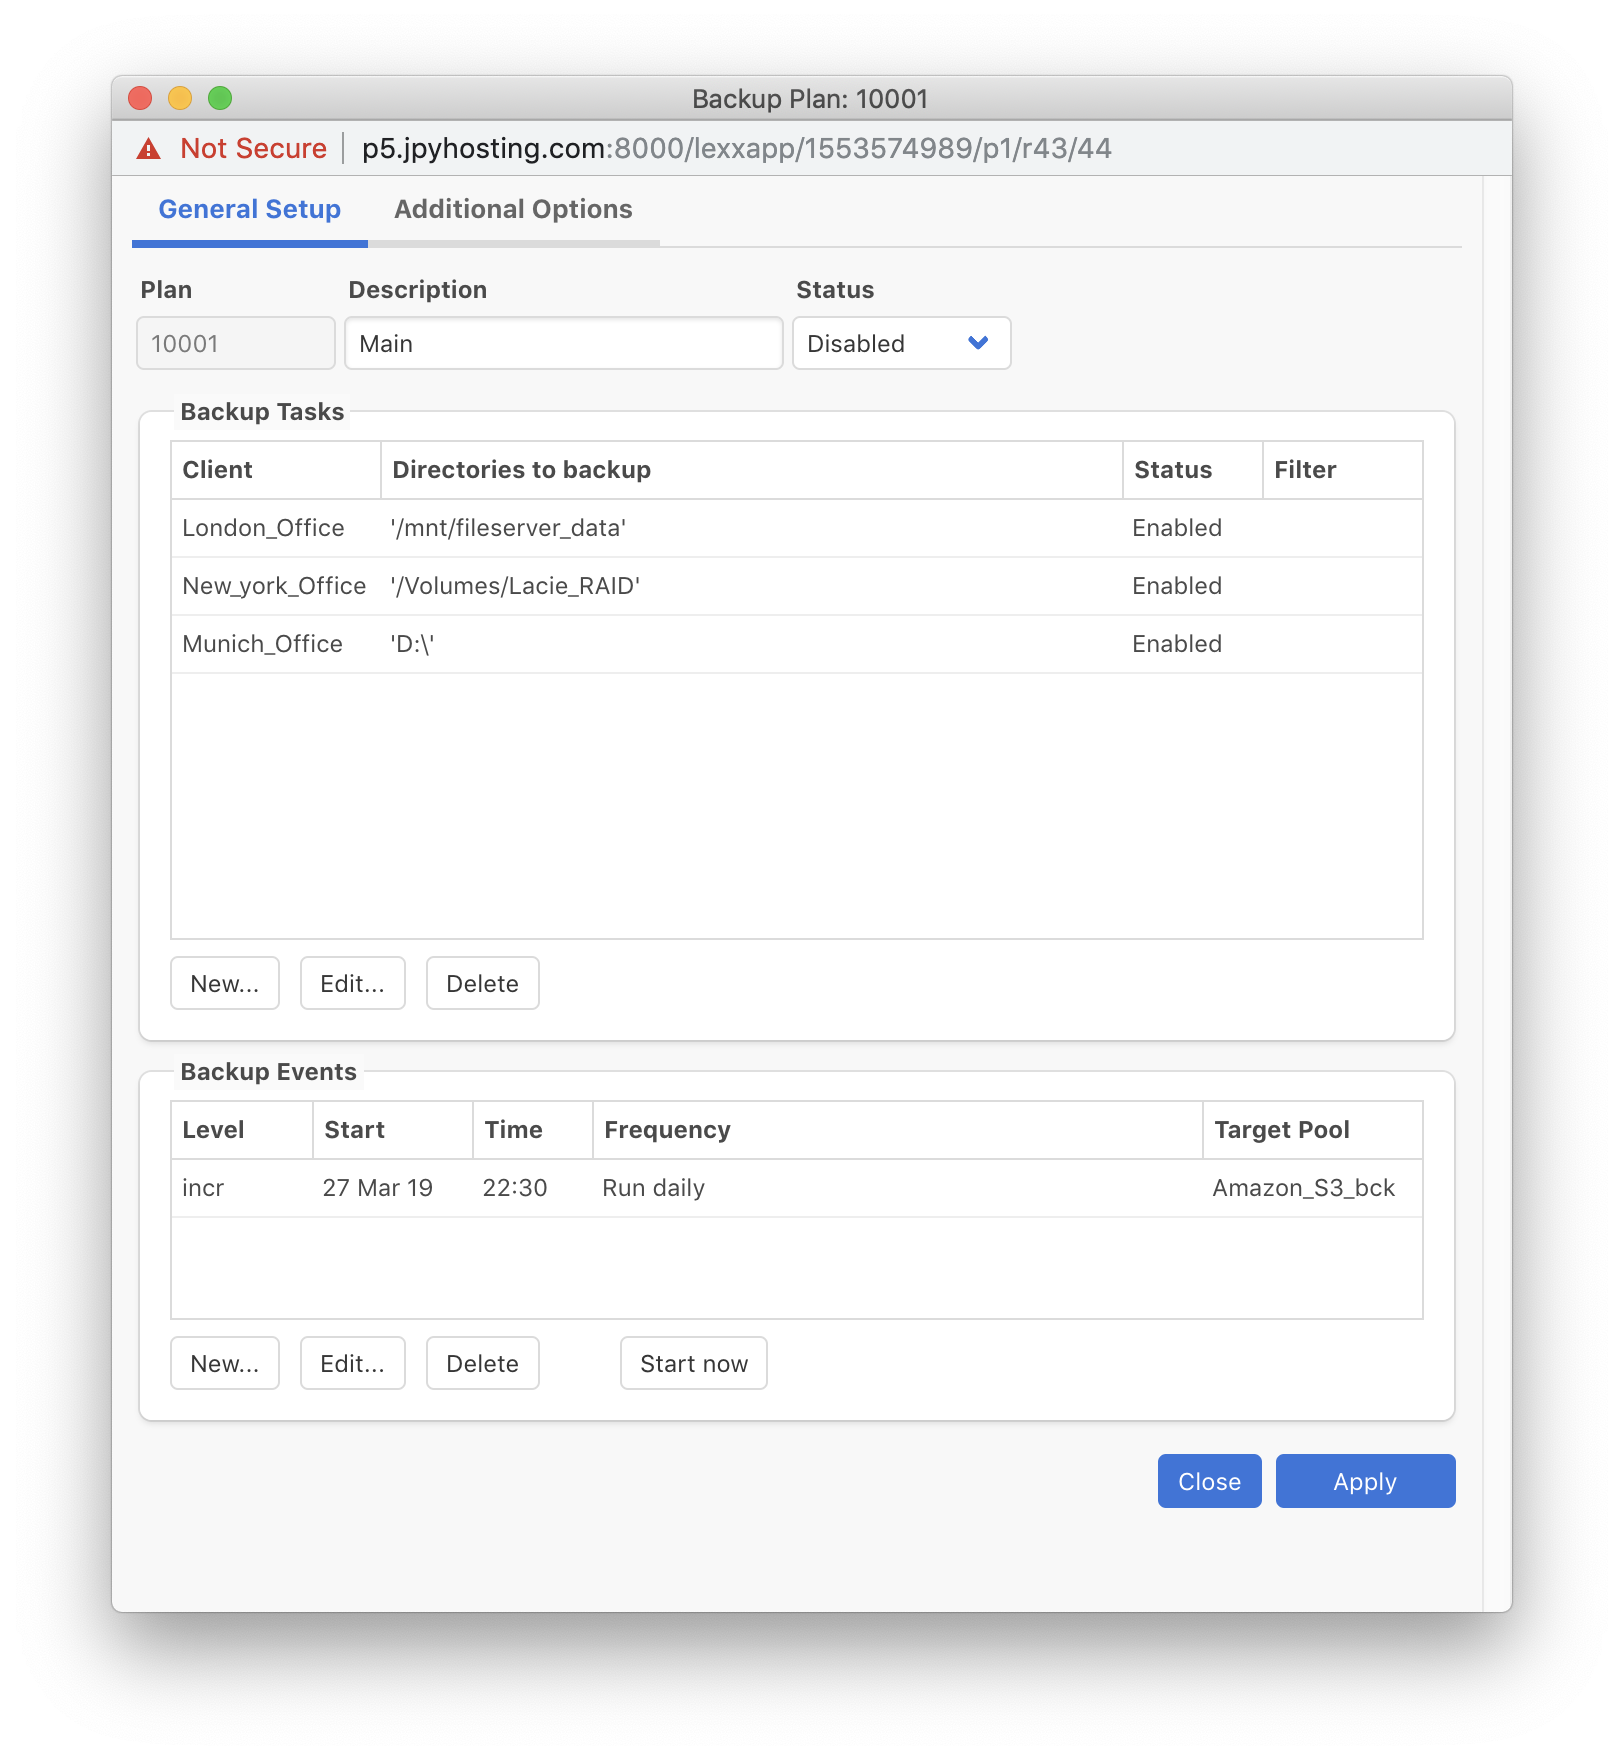
The final step in this workflow, is to add a ‘Backup Plan’ where we determine which remote machines should be backed up, at what times, and on what days. The screen below shows three different client computers, located at different offices, being backed up. The ‘directories’ column showing what we’re actually backing up. Our backup will run daily at 22:30.
Conclusions
P5’s reverse client connection feature makes it really simple to access remote locations from a central resource. Archiving is also easily setup in addition to backup.