Von Dr. Marc M. Batschkus
Preserving precious files for the long-term can be a challenge.
The longer data resides on spinning disk, the higher the risk that it is affected by either human error or malware affecting the storage. Human errors include accidentally re-naming or deleting files. Also, spinning disks have considerable cost for power, cooling, maintenance, etc. that are wasted on files that are only restored if needed.
But, there is a solution that addresses both dangers and offers the lowest cost per TB—LTO Tape. Tape has an air gap between the network and the actual storage medium/tape. This makes it impossible for any malware or infection to spread on the tape. Also, it is impossible for a normal user to delete anything on tape.
Additionally, tape has an extremely low price point per TB, starting at about 10 USD/EUR per TB. Growing and scaling are extremely easy by just adding tapes.
Learn more about the 4 Criteria to Choose the Right LTO Tape, Build an Archive & Save Money Along the Way.
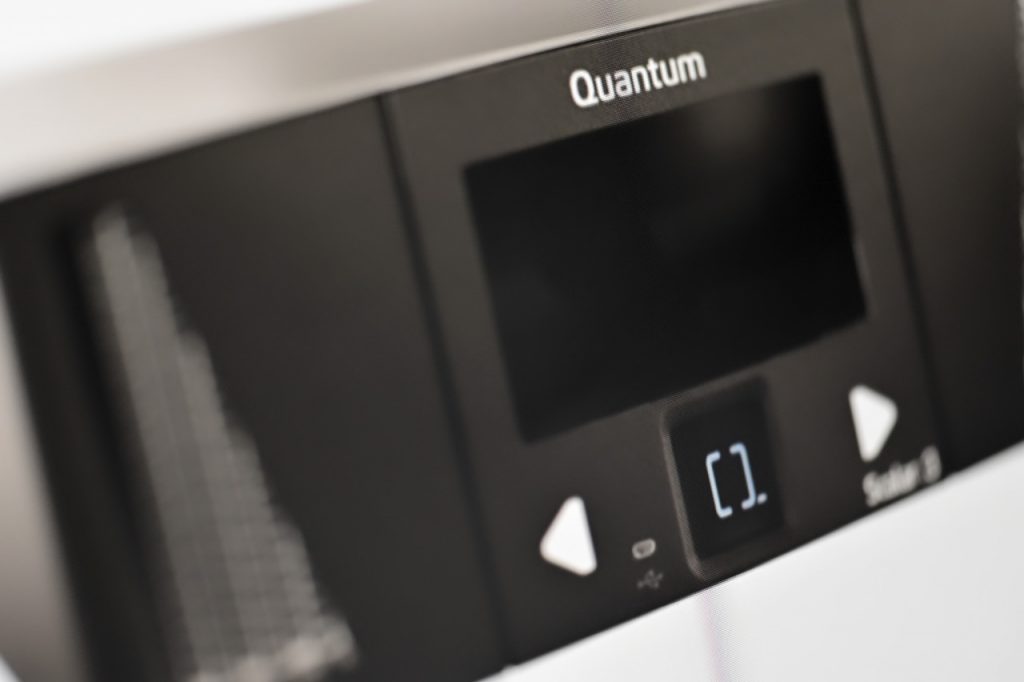
For larger amounts of data, the most comfortable way to work with tape is a tape library. A tape library contains slots for multiple tapes (from 8 to more than 1000) and can contain one or more tape drives. Quantum and Archiware have been partners for more than a decade, and there are hundreds of customers that use a Quantum tape library with Archiware software.
5 Steps To Archive on a Quantum Tape Library
Step #1
Download and install Archiware P5 on the server that is connected to the tape library.
Step #2
Request a 30-day trial license by selecting Get Trial License (if necessary, select License Manager in the left column first).
This 30-day free license offers tape library support and usage of all products (P5 Backup also works with tape and libraries). Enter the license that you received in the P5 interface.
Step #3
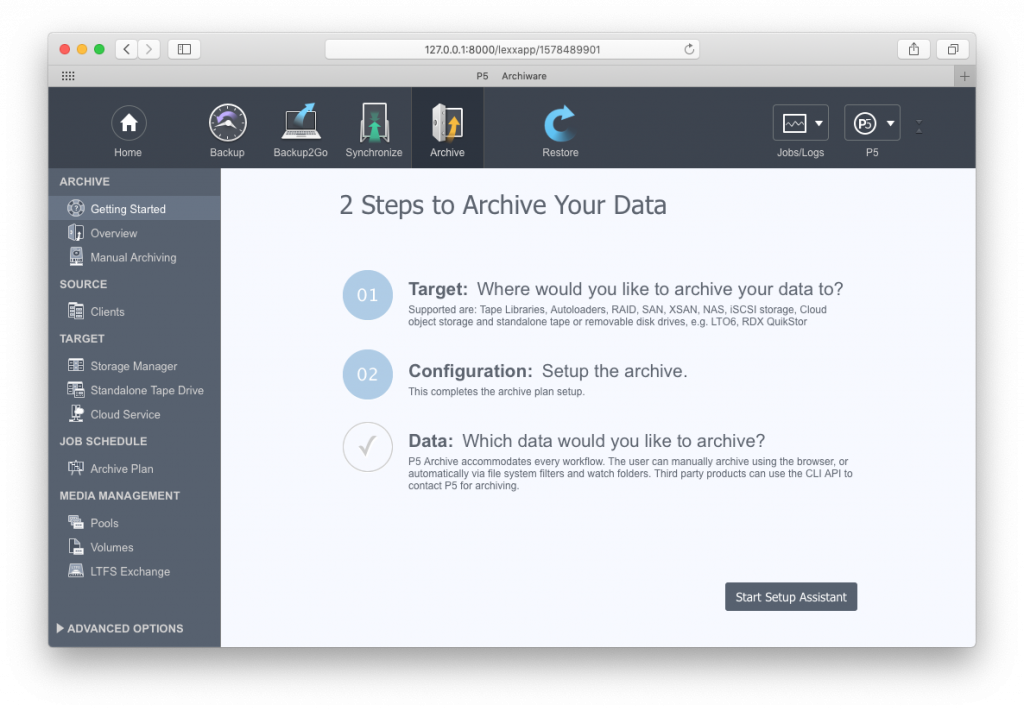
Start the P5 Archive setup assistant by selecting Archive on the top, followed by Getting Started in the left column. It will guide you through the process and configure the library and drives for you.
The first step is the Auto-detection of the library that is connected, switched on, and completely booted up (that process can take the library up to 10 minutes). The wizard displays available tape drives and slots of the Quantum tape library.
You just have to confirm in order to complete the configuration. Now, the library can be used for either P5 Archive and/or P5 Backup. Select Complete to finish the assistant. (To setup P5 Backup, use the respective getting started button in the left column after selecting P5 Backup.)
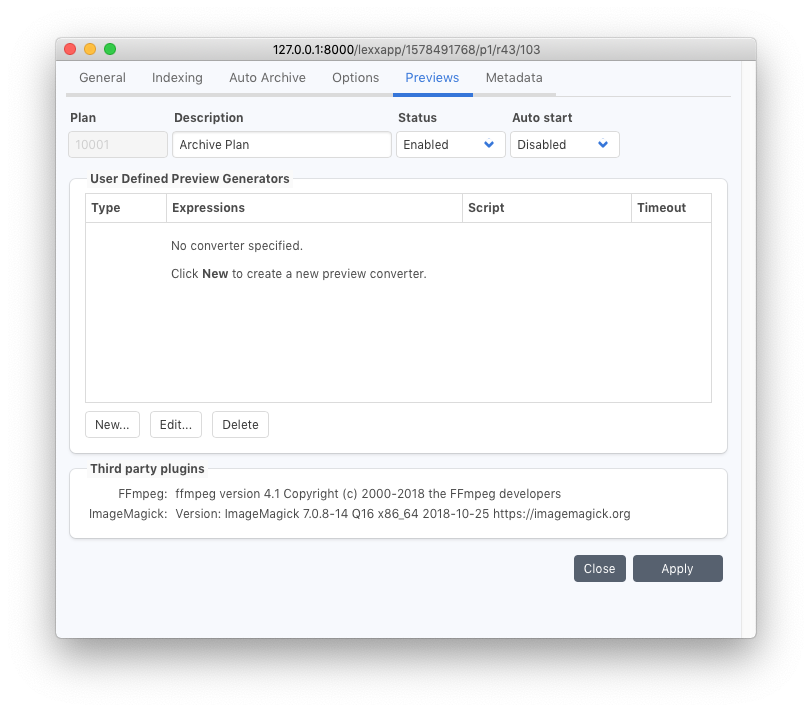
Step #3A (optional)
If media thumbnails and/or proxy clips of videos are needed for the video archive catalog, they can be configured in the Archive Plan. Select Archive Plan in the left column, double click the plan that shows up in the list. Select Previews in the top section.
In the lower part of the window, third party plugins are listed. ImageMagick is used for creating thumbnails of still images. FFmpeg is used to create proxy clips of videos. Both need to be installed to show up in the archive plan. Information on how to install them can be found on their respective pages:
If they are installed and listed in the third party plugins section, you can press New to configure them. There is a default configuration that fulfills most needs. It can be changed if necessary.
Step #4
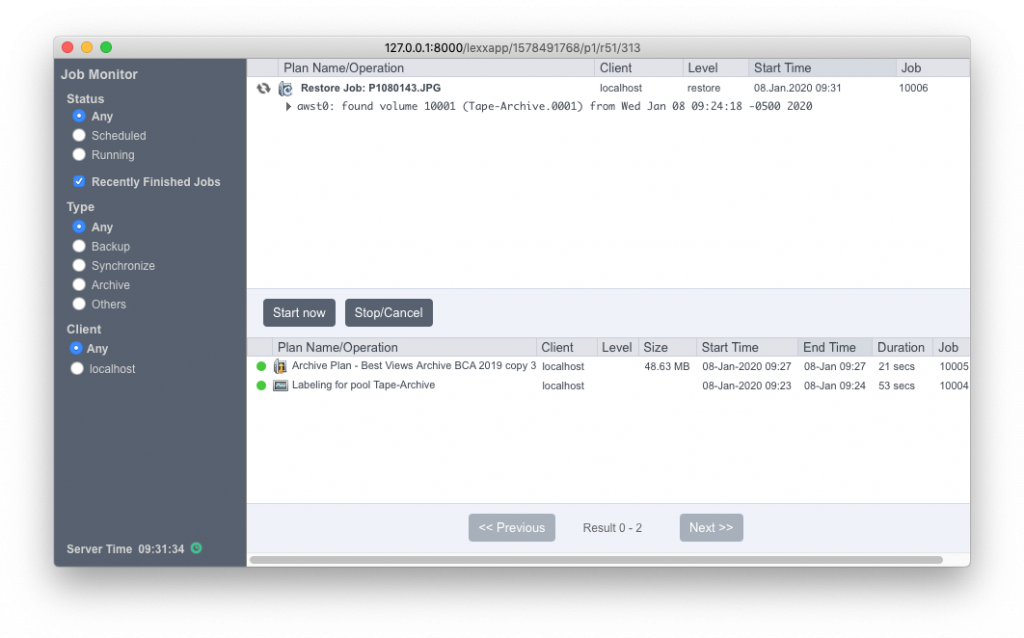
Select data to be archived. Browse the filesystem of the local file system. Select a file or directory and start archiving and switch to the Job Monitor to watch the process (optional).
When the job is completed, you can browse and search files in the archive catalog. If an additional data source like another server is needed, you can install P5 there. On the P5 Archive server, configure the other machine as a client. To do so, select Clients followed by New in the left column. After that, the P5 Archive server can “talk” to the other machine and can be selected as a data source for the archive.
Step#5
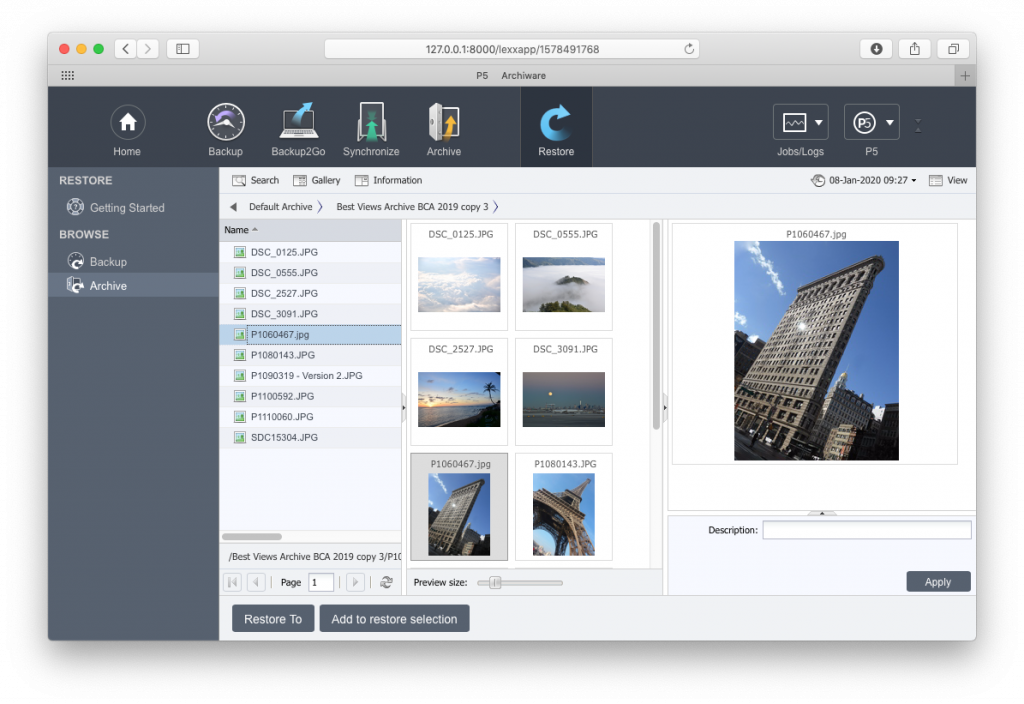
To browse and search files in the Archive Catalog/Index, select Restore followed by Archive in the left column. Select Default Archive.
In case you activated preview generation, you can see the previews after activating Gallery above the Default Archive entry. To see a single asset, including previews and metadata, activate Information.
Step #5A (optional)
P5 Archive offers customisable metadata fields and menus. To add fields and menus, go to Archive in the top section. Open the triangle at Advanced Options in the lower-left corner. Select Manage Indexes. Select Default Archive and right-click on it until a popup shows. Select Fields.
Now, you can add names for fields and menus that will show up below the single asset in the archive catalog. Complete the process for each field by clicking + to add the respective field.
Switch back to Restore followed by Archive and double-click on Default Archive to see the added fields in the archive catalog.

Step #5B (optional)
To search for any files after you archived them, select Restore followed by Archive (in the left column) followed by double-click on Default Archive. Now, you can activate Search above the file list. You can search for any name, type, archive date, modification date, size, description, and any metadata field that you created.
Fazit
In minutes, you have installed and configured the Quantum Tape library with P5 Archive—a powerful archive with MAM-like features like thumbnails and proxies, browsing, and combined searching using the customisable metadata fields and menus.
For maximum security, P5 Archive offers tape cloning when two drives are present in the library. This way, two identical tape sets are written. One can be stored off-site to protect data from local incidents.
For maximum throughput requirements, P5 also offers tape parallelisation. This means that multiple drives write simultaneously almost to multiply the throughput (each LTO-8 drive can write up to 360MB/s).
Finding files years after they have been produced becomes easy with P5 by using visual browsing and combined searching. This simplifies the road to reuse, referencing, and monetisation of already created files.