Note that this article refers to P5 version 7, released July 2021. For previous versions of P5, refer to this article for configuration of the AWS Snowball und this article for configuring P5 for use with a Backblaze Fireball.
In this article, we explore how to use ‘transfer devices’ from AWS and Wasabi, to quickly seed backup or archive data into cloud storage. Instead of beginning a backup or archive workflow by sending a large quantity of data to a cloud bucket using your WAN connection, these devices are used by Amazon and Wasabi and others to speed the process up. These devices are ordered via the same web-administration interfaces that the cloud storage is managed. For a fee, you will be shipped a device containing disk storage and network hardware that you can connect up to the P5 host on your LAN.
Amazon’s transfer devices come under their ‘AWS Snow Family‘ banner. Different products are available according to your needs.
Der Wasabi Ball from Wasabi is a Netgear NAS device with 100TB of storage.
Both products work in broadly the same way and our instructions below apply to both. These transfer devices both use the S3 network protocol for data transfer. Our instructions below assume that you already have an account with AWS or Wasabi, have setup payment, you know how to create a ‘bucket’ and you have general familiarity with the platform. Cloud storage can be used with both P5 Backup and P5 Archive, the same technique can be used for either.
For instructions on how to use the Backblaze Fireball transfer device, which uses a different network protocol, refer to this article.
1. Create cloud storage bucket and request data transfer device from cloud vendor
These interactions with the cloud vendor will be via their respective web-administration website. Begin by creating (if it doesn’t already exist) the bucket that will be used for the data transfer using the transfer device. This will be the bucket that the transfer device will be linked to. The data copied to the transfer device will be copied to this bucket once returned to the cloud vendor.
Having created the bucket, you’ll be able to request the transfer device. Order more than one if the capacity of a single device doesn’t cover your requirement. You’ll be charged for the loan of the device, which will be couriered to you.
3. Configure transfer device on local network
Upon receipt of the transfer device, follow the vendors instructions to make the storage available, via the S3 protocol, to the host where your P5 Server runs. The AWS device requires installation of a ‘snowball client’ software onto the P5 server that acts as a gateway to the transfer device. Follow the vendor supplied documentation.
2. Configure P5 to work with the transfer device
Within P5’s web-admin interface, visit the Backup or Archive tab to begin connection to the transfer device.
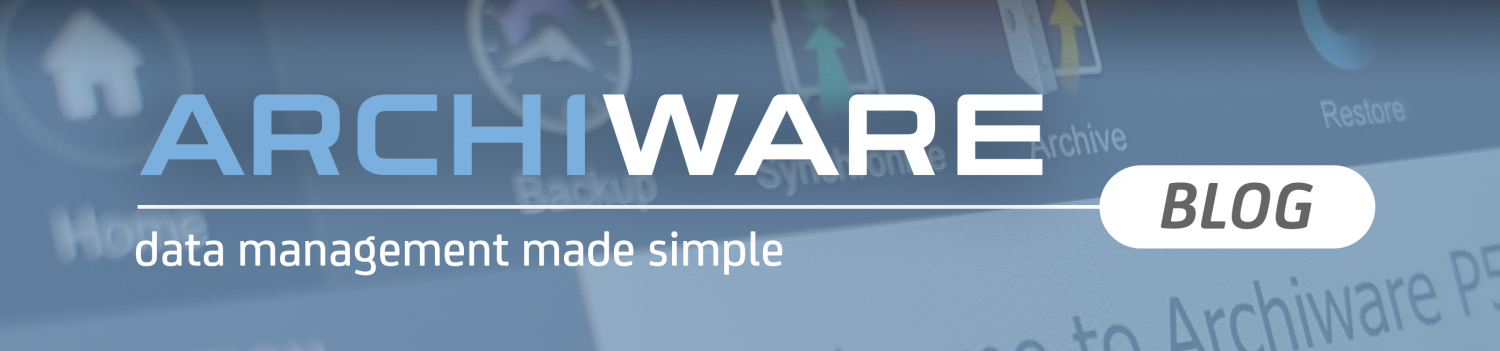
Click through Storage Manager ➜ Container Storage ➜ Add Cloud Storage and click the ‘New Service‘ link next to the drop-down menu. This opens a new window in which you will create a new service to connect to the transfer device’s S3 service. Choose either ‘Amazon Snowball’ or ‘Generic S3’ for Wasabi Ball. Pay attention to the ‘Service URL’ field, which will include the IP of the transfer device (Wasabi) or the location where the ‘cloud connector’ software runs. Enter the credentials for local S3 connection to transfer device, use the ‘Test Connection’ button to establish that the connection to the device is working.
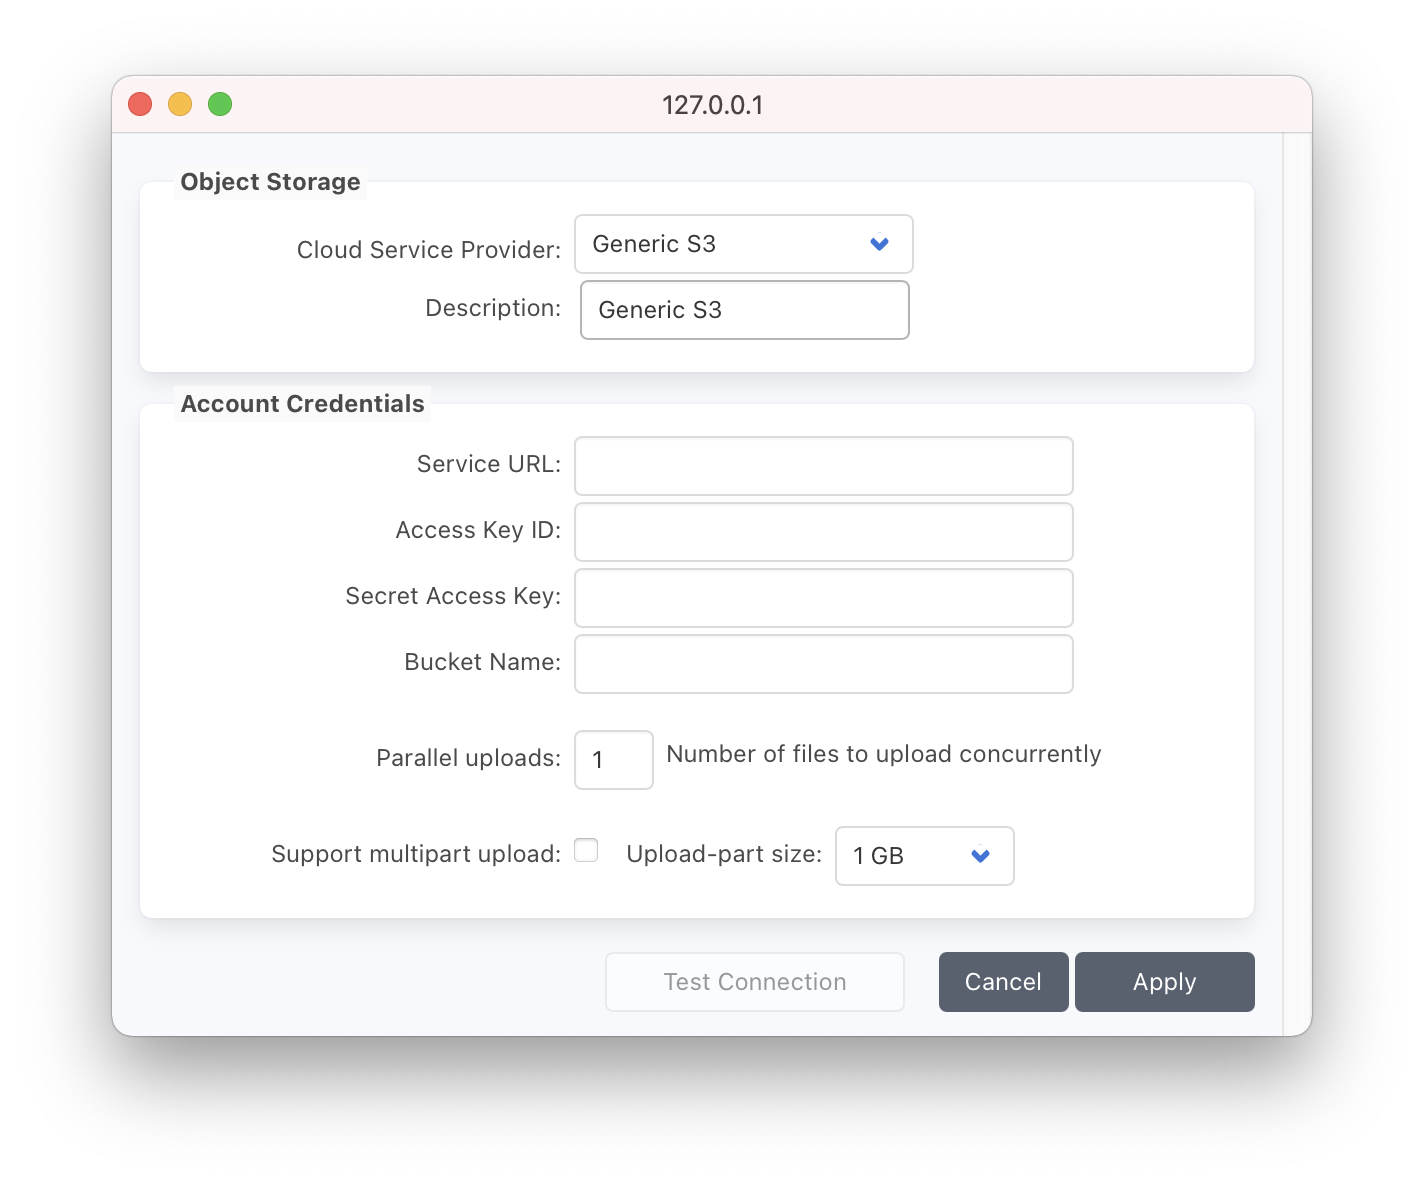
Specify the ‘Local Storage‘ directory in the ‘Add Cloud Storage‘ window, this should be a local folder. It will be used for caching data while reading/writing to the transfer device and later the cloud bucket. This folder remains the same throughout this process. Allow for at least 20GB of storage, maximum of 50GB. Files are stored temporarily, when no jobs are running, no storage will be used.
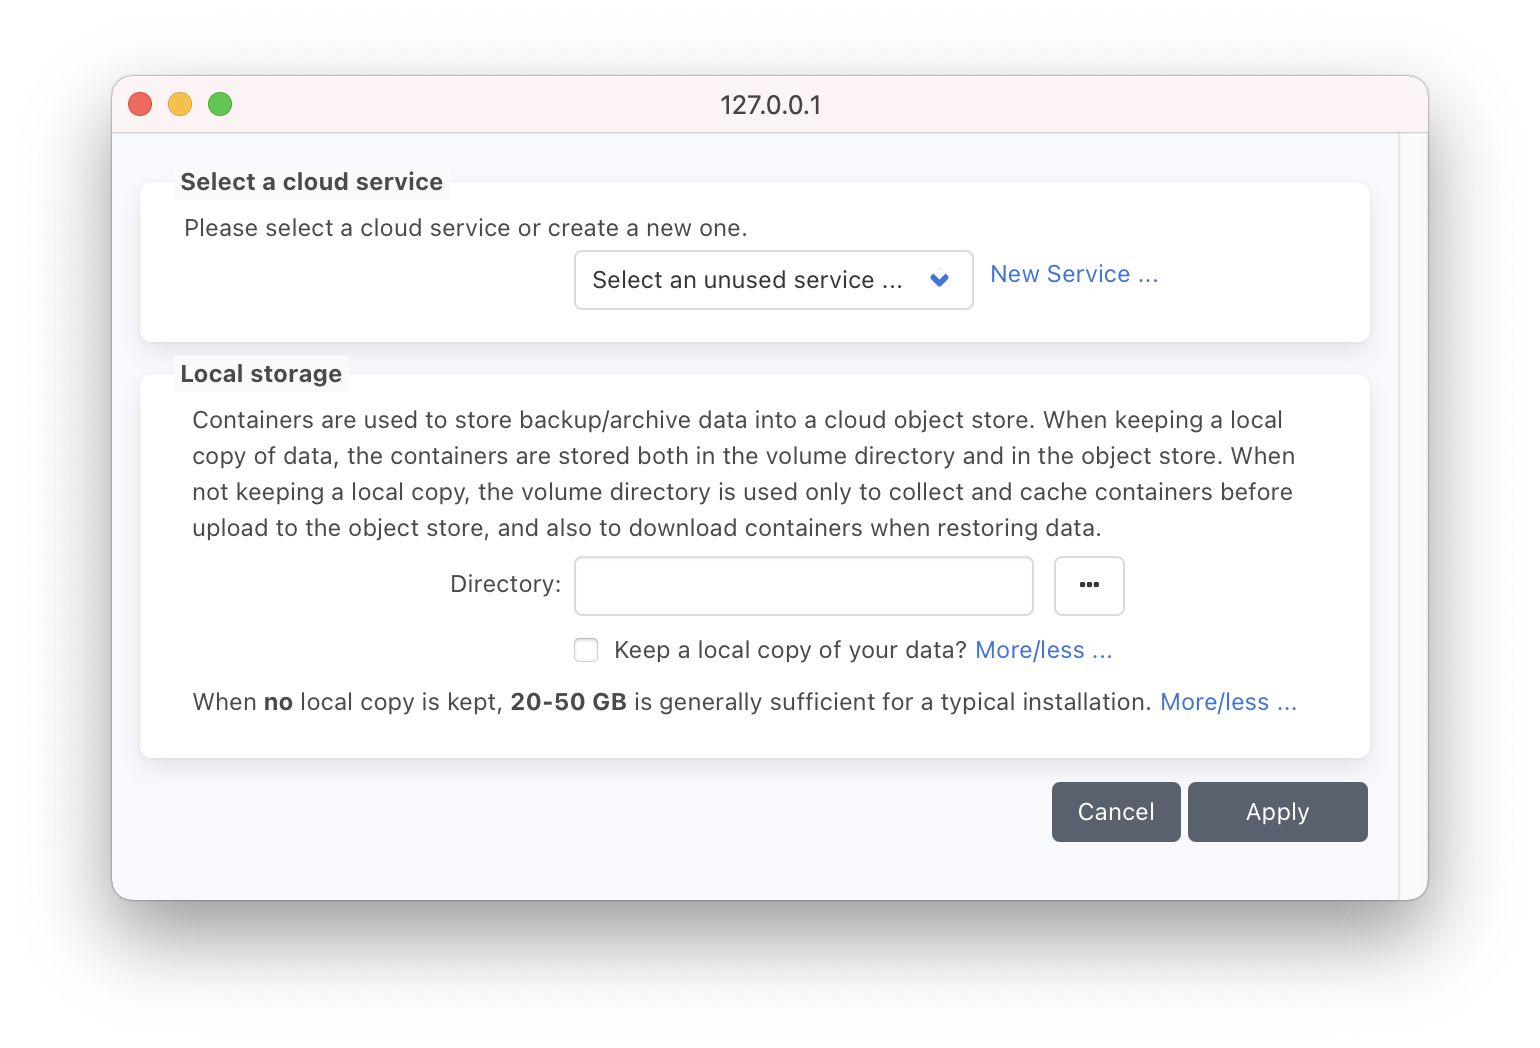
Click Apply, both the corresponding ‘Container Volume‘ and ‘Pool‘ are also created in P5. The latter will be used as the target storage for any Backup or Archive jobs that you run.
Now you may create your P5 Backup / P5 Archive jobs as required to write data to the transfer device via the S3 connection. Configure the job to write to the pool that was created in the previous step.
Note that the amount of data being written to the transfer device must not exceed the remaining capacity on the device. You should be aware of how much backup/archive data you have to transfer and order additional transfer devices from the cloud vendor if necessary.
You can control how much data will be written by a backup job by using the ‘Start Now’ button to manually start a job. You’ll be prompted to enter a size limit for the job. In order to control how much data an archive job will write, limit the contents of the source folders selected according to the remaining capacity of the transfer device.
Connect each transfer device in turn, adjusting the credentials stored in the P5 Cloud Service as necessary. Repeat Backup / Archive jobs to each transfer device until all data is stored.
3. Return transfer device(s) to AWS/Wasabi
When all data is written by P5, return the transfer device(s) to the cloud vendor as documented by the vendor. Await confirmation that the data written to the transfer device(s) is now available in a single cloud bucket, note the credentials required to access the cloud bucket.
In P5, Storage Manager ➜ Cloud Service ➜ New Service, add new service using credentials for the cloud bucket where your data now resides.
From the ‘Cloud Service Provider’ menu, choose ‘Amazon S3’ for S3 buckets or ‘Wasabi S3’ for Wasabi buckets. Use the ‘Test Connection’ button to check all is working.
In P5, Volumes ➜ Tab <Pool Name>, Edit Volume by double-clicking on it and assign newly created cloud service from previous step.
4. Test connectivity by performing a restore.
Select some data from your P5 Backup / P5 Archive index and restore back to disk. Your restored data will be downloaded from the cloud bucket, small container objects within the container volume will temporarily be stored in the local storage directory and then deleted once the job completes. Further backup / archive data will now be saved directly to the cloud bucket.