By David Fox
Version 2.0 – December 2020
Recent P5 versions allow large datasets to be archived to cloud storage by first obtaining a physical disk storage device from the cloud provider for archiving locally across your LAN, and then having this device shipped back to the cloud storage provider.
Read our deeper dive into using the Amazon Snowball here.
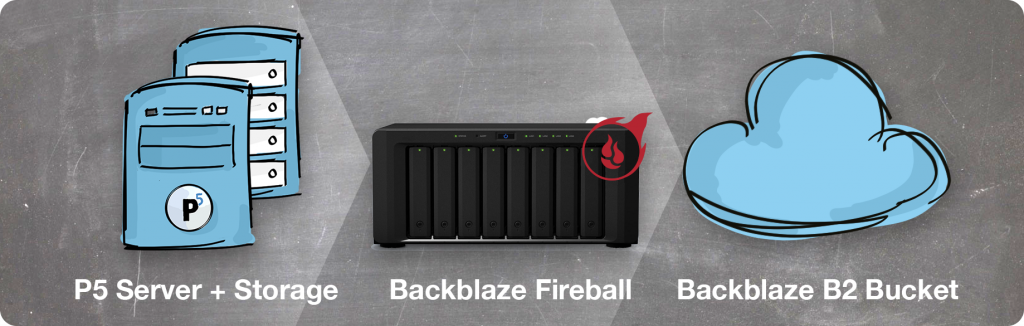
In this article, we’ll look in detail at how to use the Backblaze B2 Fireball device to quickly transfer data up into the cloud. A detailed step-by-step is also available on our YouTube channel.
There are a number of steps involved in this process, including interactions with Backblaze Fireball and the Backblaze website using your Backblaze account.
- Request and receive a Backblaze Fireball (Synology NAS device), choose a cloud storage bucket that will be associated with the Fireball
- Connect device to LAN, locate IP and configure the Fireball storage so that it’s shared with the host where P5 runs (via SMB)
- Use Archiware P5 Archive to write archive data to the Fireball
- Detach Fireball storage from P5
- Return Fireball to Backblaze, await data in nominated B2 bucket
- Attach B2 bucket (cloud storage) to P5
- Test!
This guide assumes some knowledge of the Backblaze B2 cloud storage product. You should familiarise yourself with B2 by setting up an account at www.backblaze.com and learn how to create B2 storage ‘buckets’ and perform some basic operations on them.
Let’s now go through the whole process in more detail.
A – Configuring shared storage on B2 Fireball
A1. Once unpacked, and connected to power and your LAN, you’ll need to discover the IP of the Fireball/Synology device. Point your web browser at http://find.synology.com to run a utility that will scan your LAN and provide the IP of the device which you can then use to further configure. Your Backblaze B2 account login will provide the login credentials required to login to and configure the Fireball.
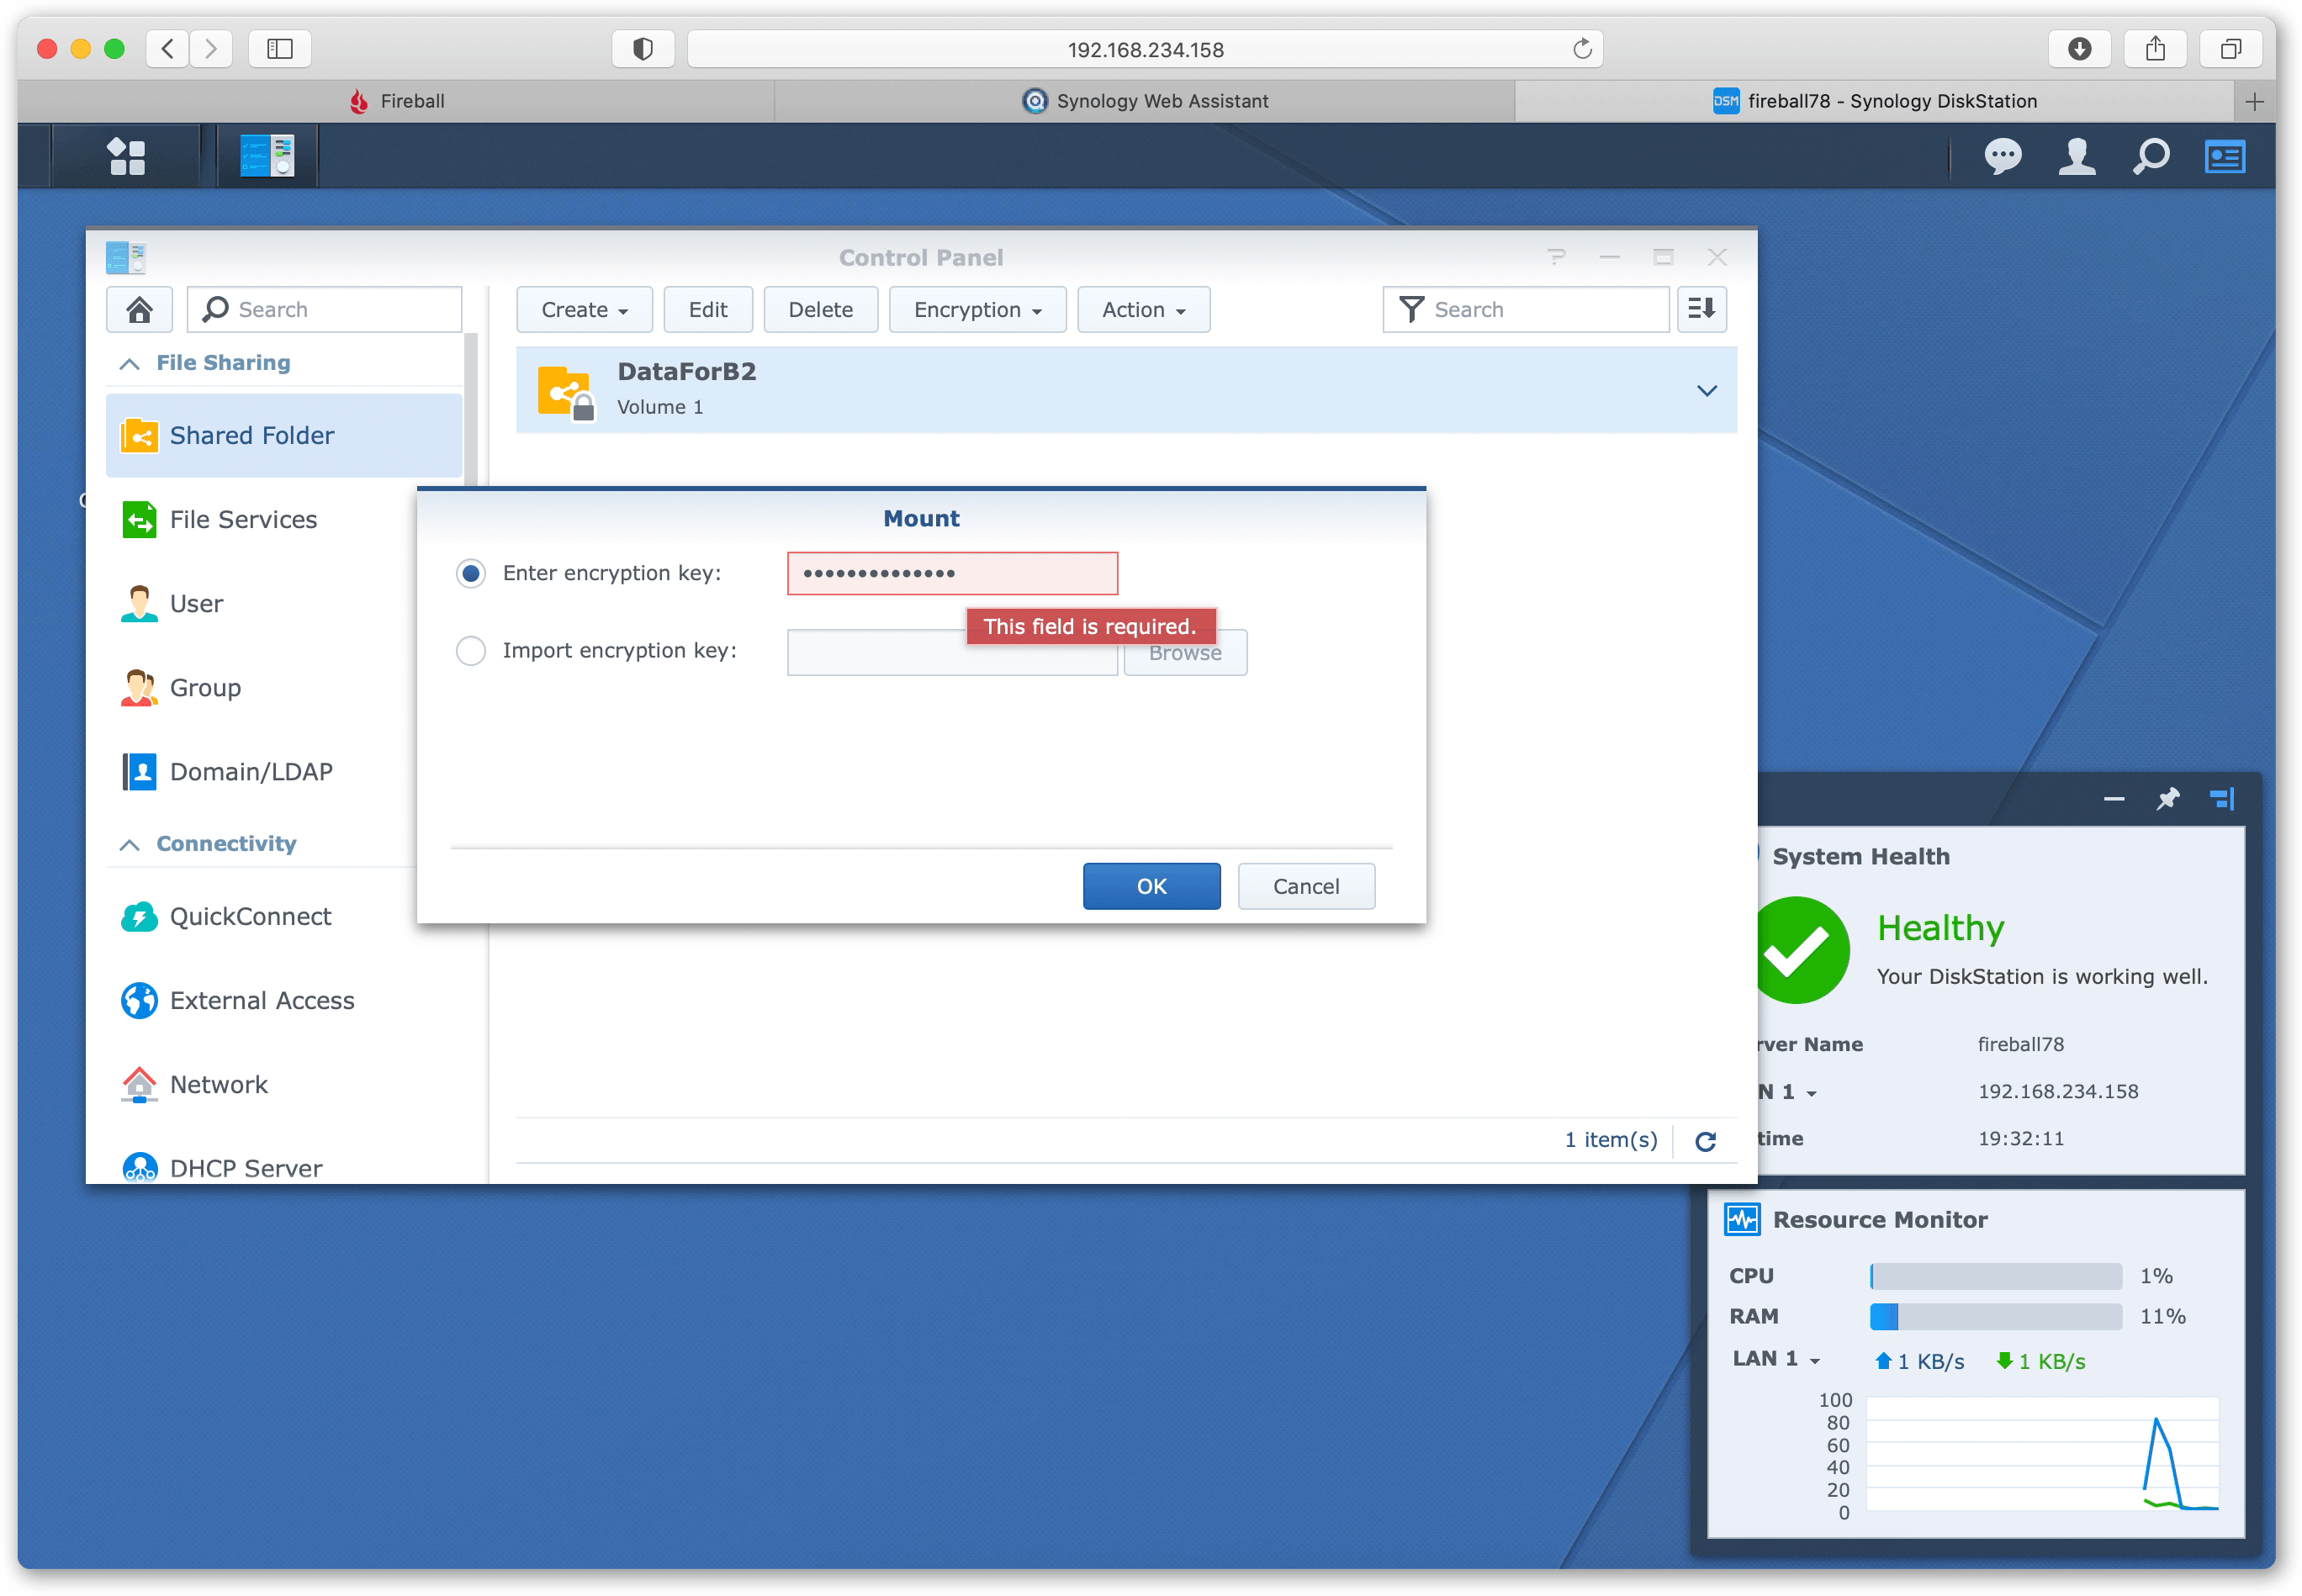
Once connected to the web-admin interface of the Synology device, click on the Control Panel and then ‘Shared Folder’. In here you’ll find a pre-configured share called ‘DataForB2’. This shared volume is encrypted by Backblaze so that any data you write here will remain encrypted as the device travels back to Backblaze. In order to write to this share, it must be temporarily de-crypted using the ‘Encryption Key’ password available in the Backblaze B2 website.
Highlight the DataForB2 share, and select ‘Mount’ in the ‘Encryption’ menu. You’ll be prompted for the Encryption Key password. This will unlock/decrypt the share, you’ll now be able to mount this share via SMB from other hosts on the LAN.
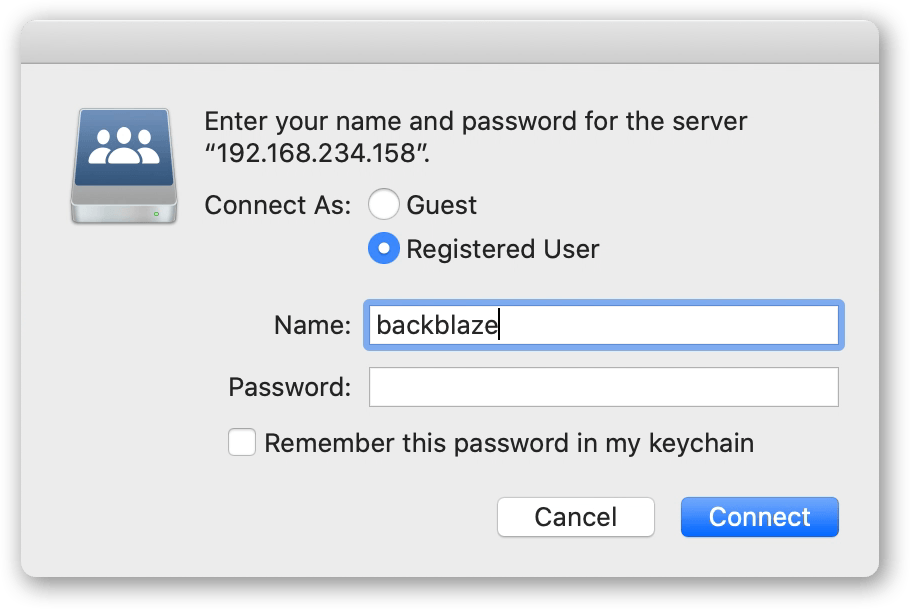
A2. Now that you have your Synology device configured, go to the host running P5. In our example we’re using a Mac. Connect to the SMB share by providing the IP of the Synology device. Provide the authentication information from the B2 website to connect to the DataForB2 share. This will now become mounted within your operating system. P5 will now be able to write to this storage.
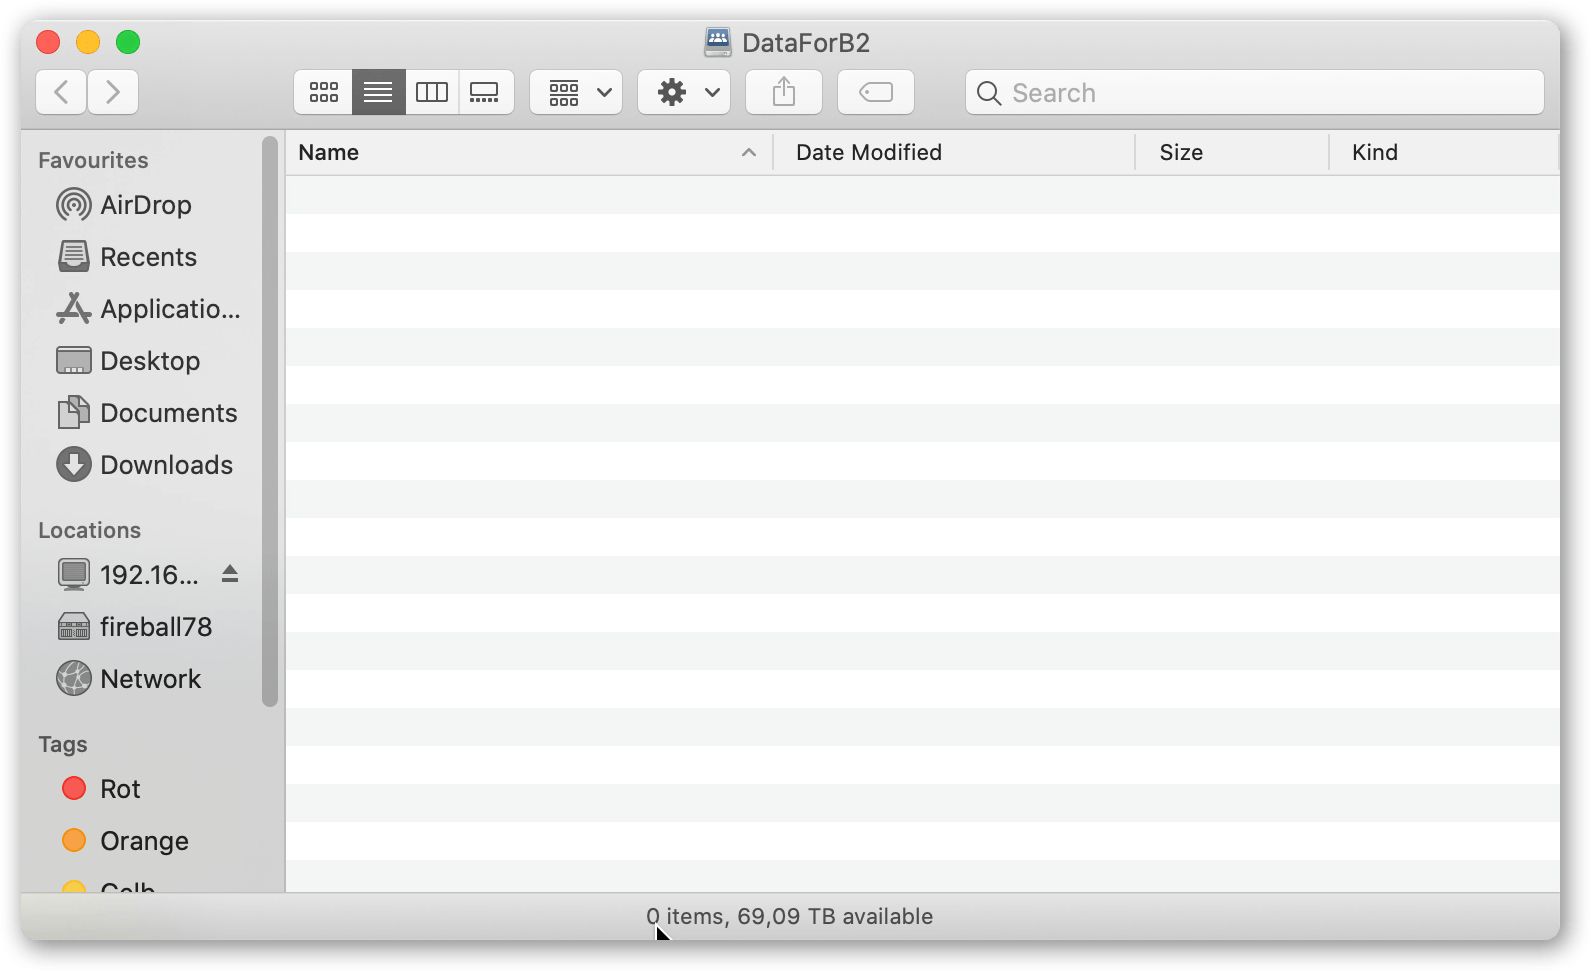
Archive and mount the share such that you can read and write to it. Make sure you begin with a completely empty share.
Note the ‘mount point’ where your OS has mounted the NAS share. You can use NFS/SMB/AFP.
B – Configuration of P5 Archive
In this section, we configure an Archiware P5 Archive workflow, via configuration of storage and creation of an Archive Plan. This will allow archival of data accessible by the P5 system. This data will later be moved to B2 cloud storage.
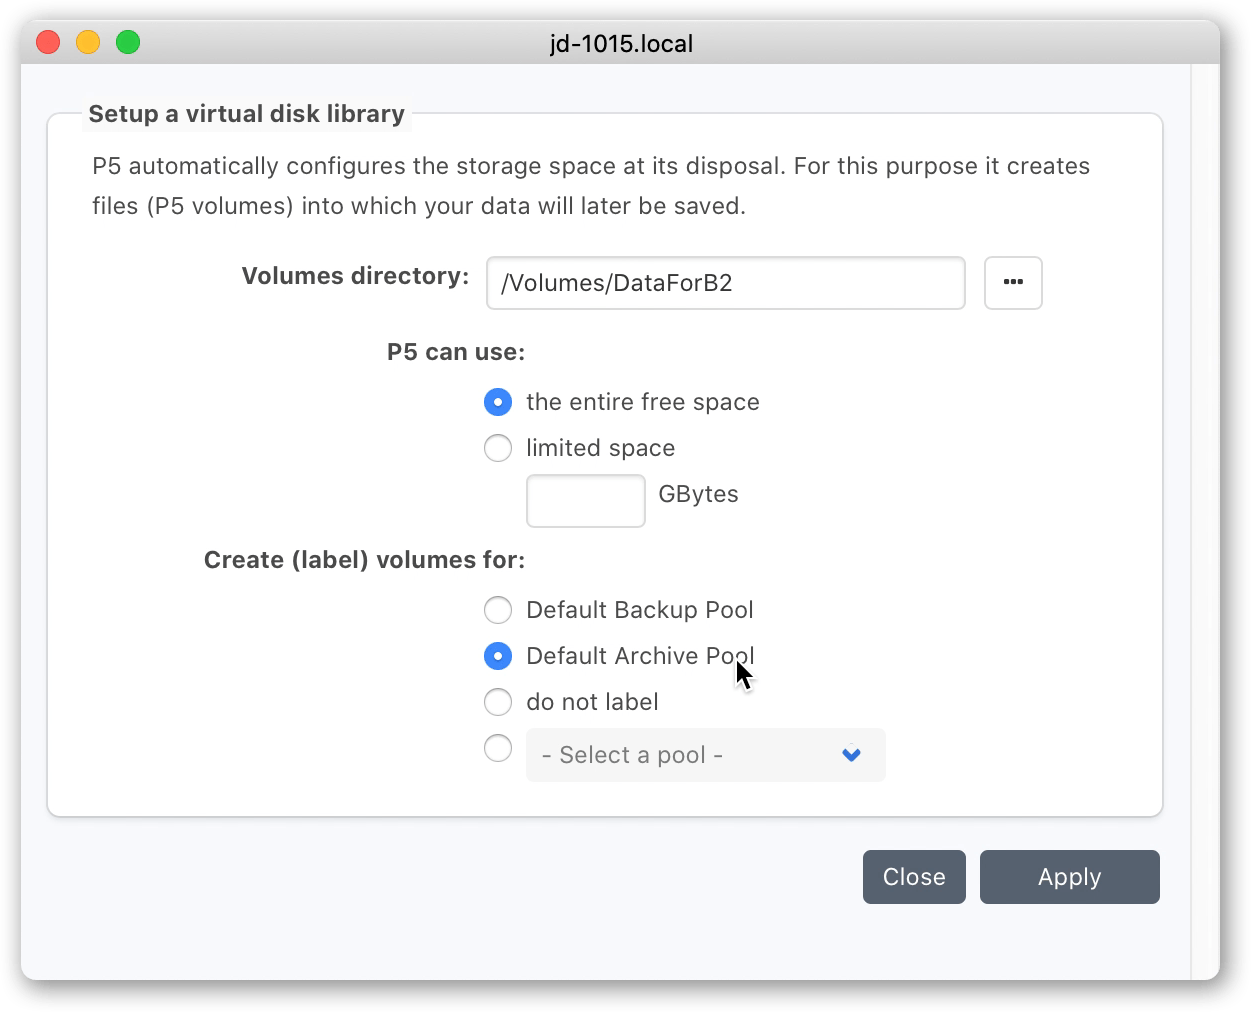
B1. Connect to the Archiware P5 web-admin interface. Within the P5 Archive tab, click on ‘Storage Manager’ and then the ‘New Disk Storage’ button. This Disk Library will create virtual tape volumes on the Synology NAS volume that is mounted. You’ll therefore need to select the folder where the SMB share is mounted. Allow P5 to use ‘the entire free space’ and click to label the volumes into the ‘Default Archive Pool’.
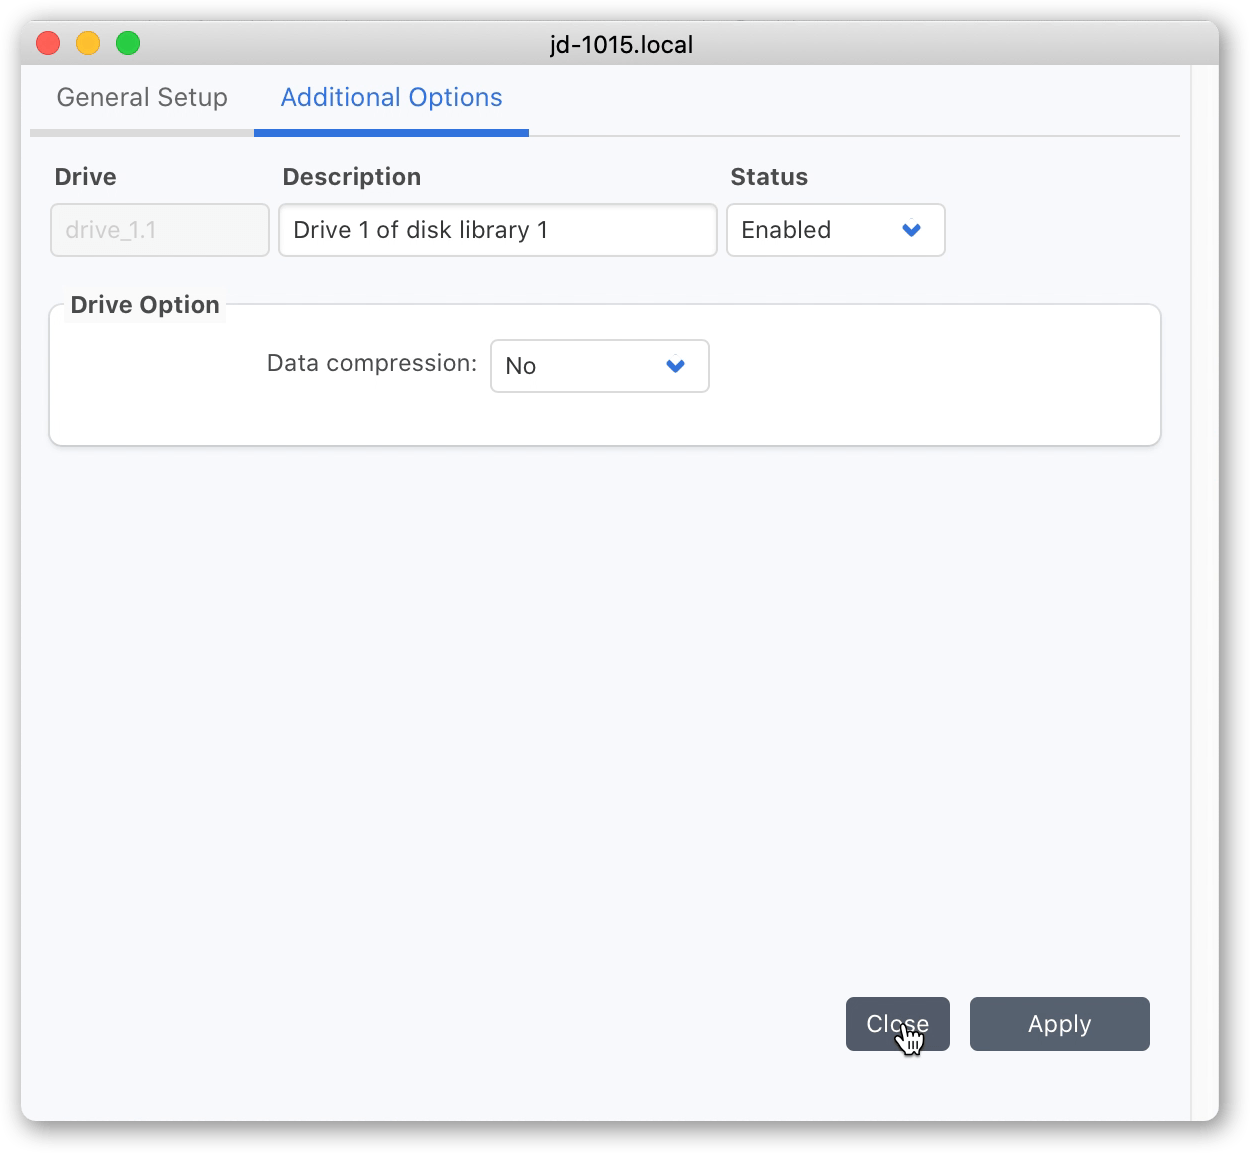
B2. An extra step is required to avoid P5 compressing data before it’s written to the Synology/Fireball device. Avoiding have the P5 host needing to compress everything written to the Synology, allowed best possible write performance.
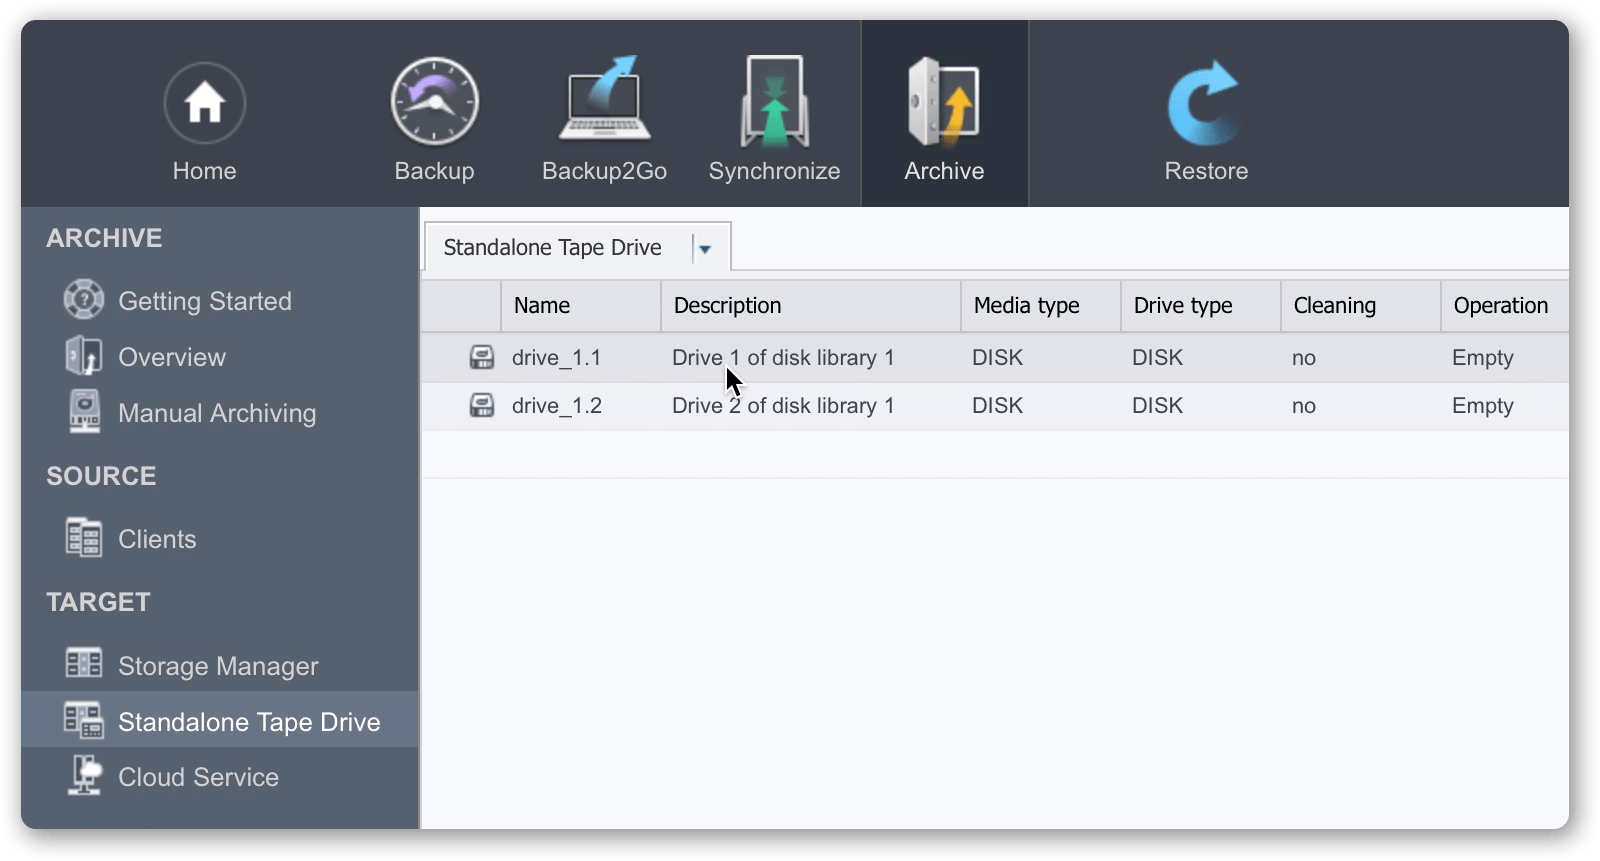
Visit ‘Standalone Tape Drive’ to edit the virtual tape drives. In here you’ll find two drives. Double click on each in turn, and set ‘Data Compression’ = ‘No’ for both of the drives.
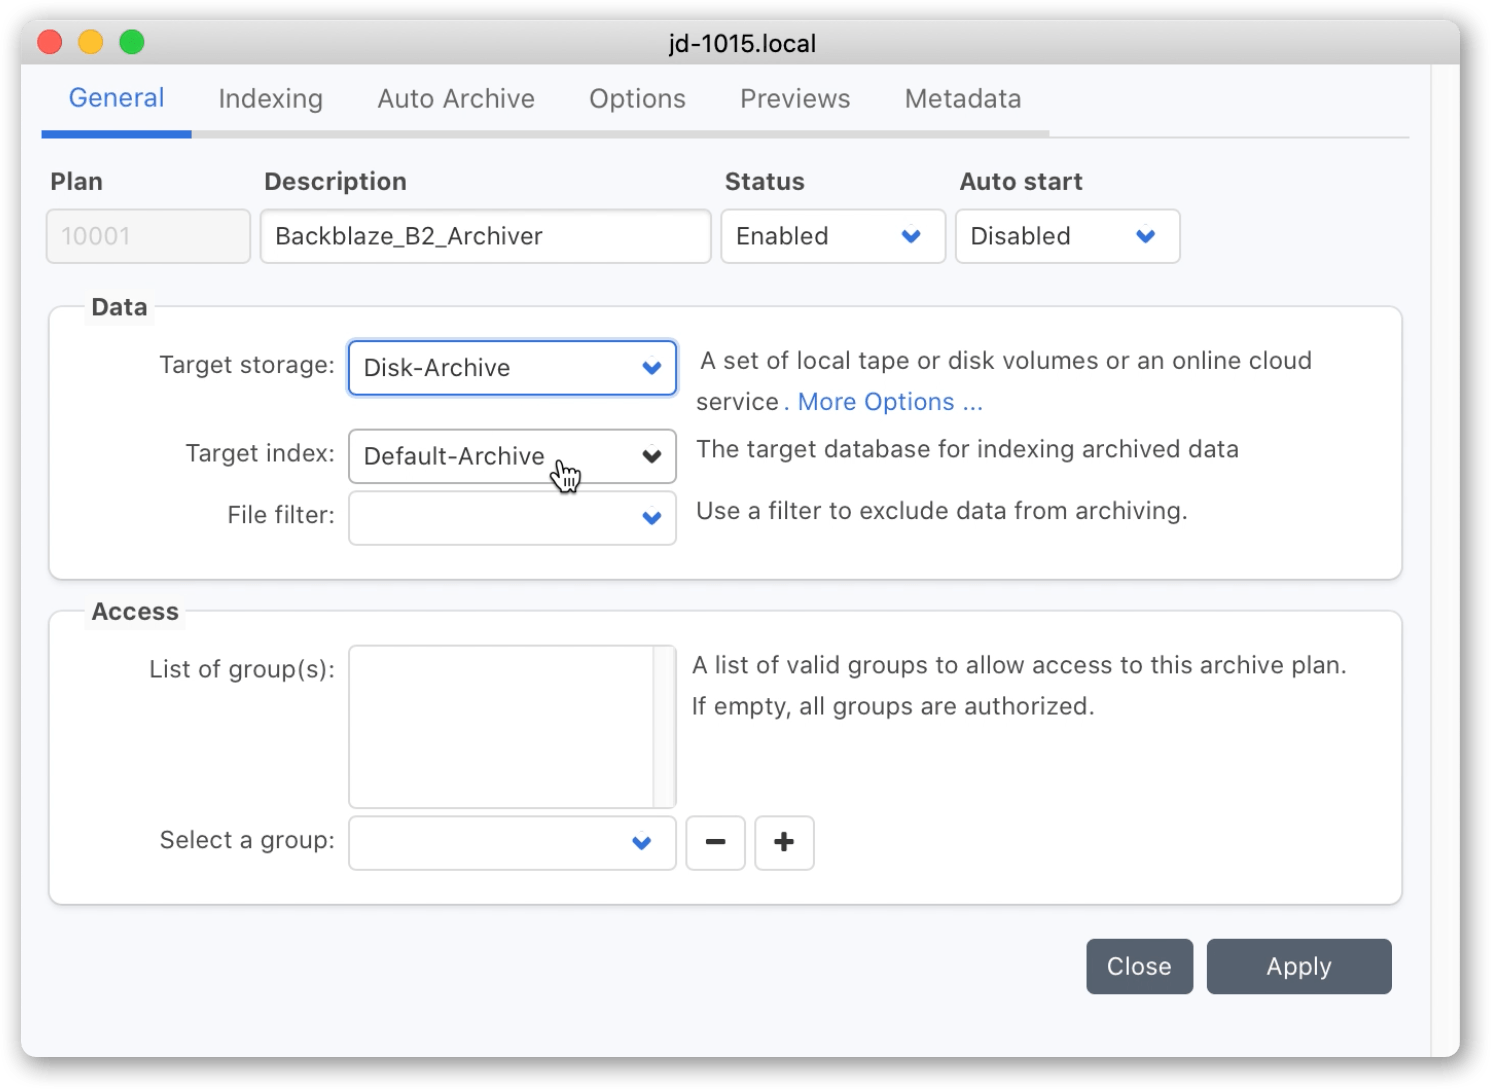
B3. Create an archive plan, selecting as Target Storage the ‘Disk Archive’ pool. If needed, create your own index (rather than the ‘Default – Archive’ index), and configure meta-data fields and preview generation according to your requirements.
Indexes, previews and meta-data will be stored within P5’s index databases and ‘Clips’ folders and remain part of the P5 installation on local storage within the installation directory. Only the Volume folders are migrated to cloud storage.
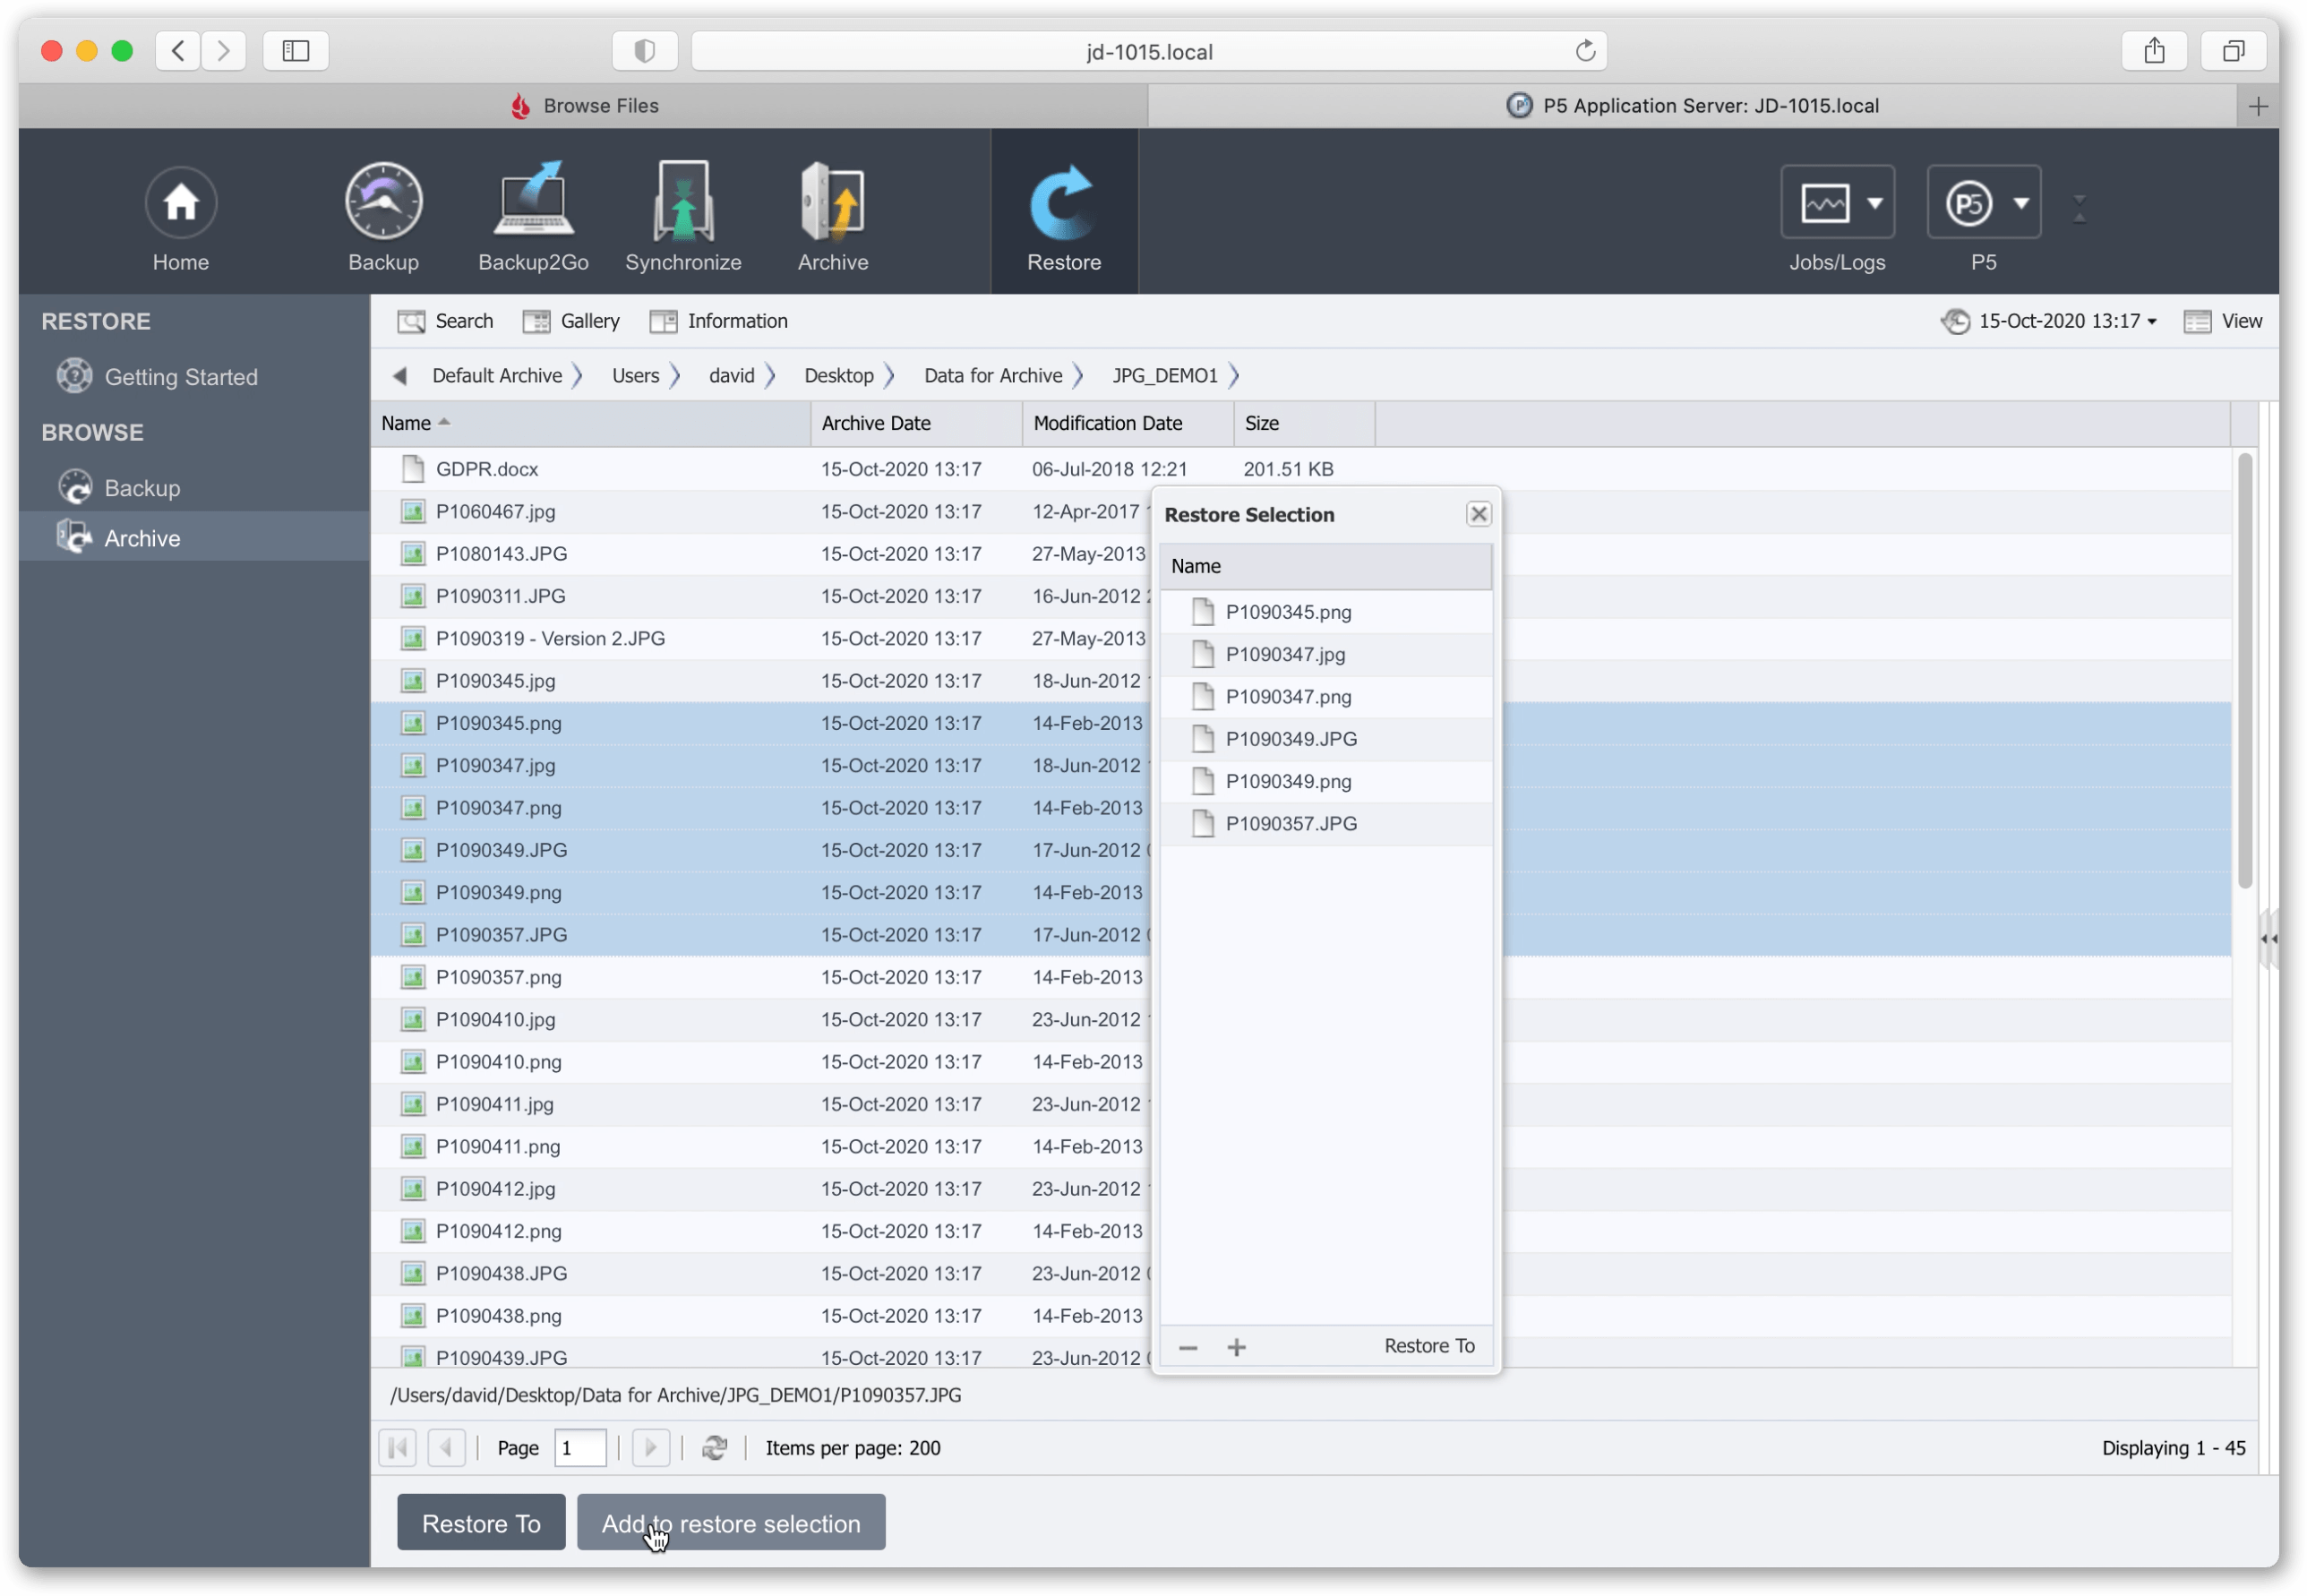
B4. Using the Archive Plan that you just created, archive your data. Use ‘Manual Archiving’ to browse local or remote filesystems and select the data you wish to archive. Trigger the archive job using the plan you created in the previous step.

B5. After the archive job completes, look at the used storage on the Synology/Fireball device and confirm your data is correctly being written.
Browse the archive index and verify you can see your archived data inside. Previews and meta-data captured will also be visible if you configured this in the archive plan setup.

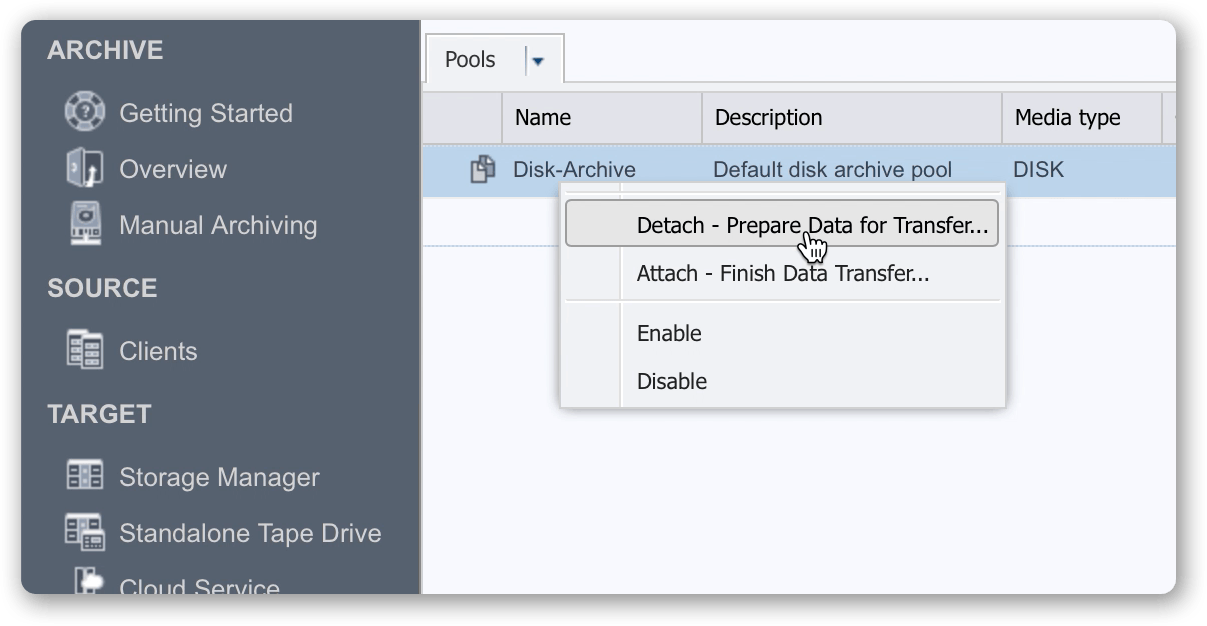
B6. Once all archiving is complete, highlight the Pool and select ‘Detach’ from the cog menu at the bottom of the window.
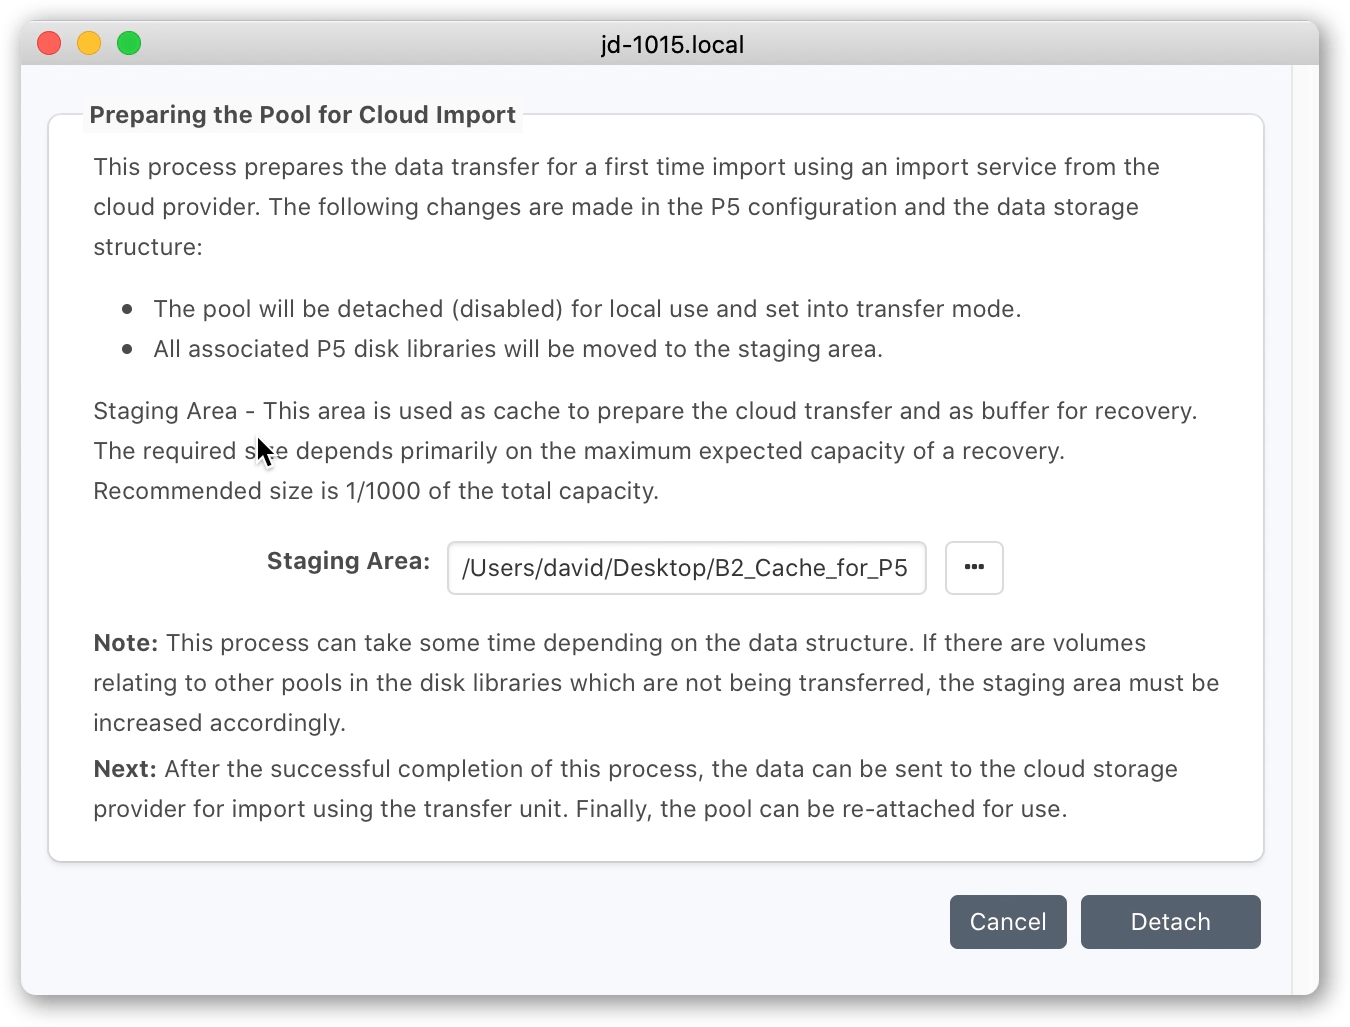
You will be prompted for a local folder that will serve as a ‘Staging Area’. This area is used as a cache where data is stored temporarily before upload to cloud and volumes are cached during restores. The recommended size is 1/1000 of the transfer capacity. If using version 6.1 or later, considerably less storage is required for the staging area. Refer to 6.1 release notes for further details.
You will be prompted for a local folder that will serve as a ‘Staging Area’. This area is used as a cache where data is stored temporarily before upload to cloud and volumes are cached during restores. The recommended size is 1/1000 of the transfer capacity.
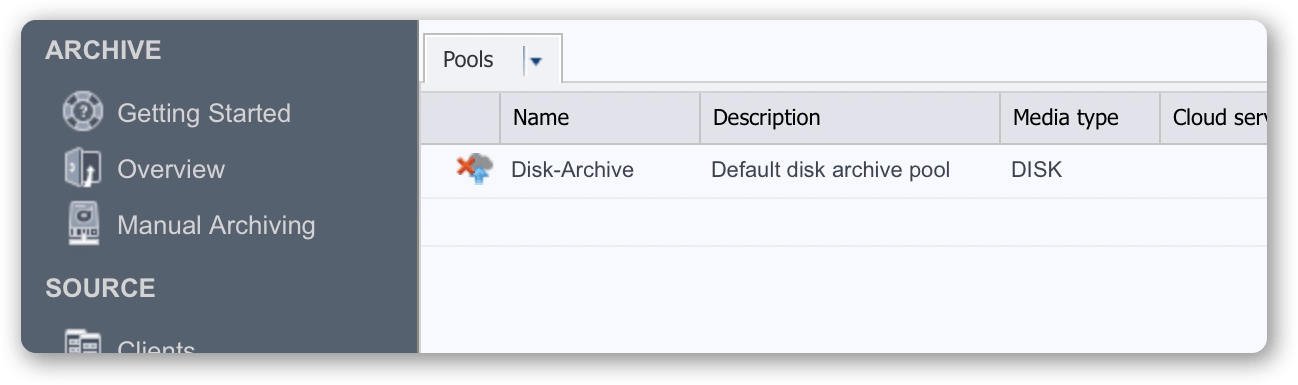
B7. Verify pool is now detached – it will show within the P5 UI as disabled, along with all the volumes contained within it. Later, when the volumes are moved to cloud storage, we will re-attach the pool, causing the volumes to be enabled and available to use.
C – Return Fireball to Backblaze, await data in nominated B2 bucket
C1. We now prepare the Synology/Fireball device to returning to Backblaze. Re-visit the web-admin interface for the device, highlight the shared volume ‘DataForB2’ and click on ‘Unmount’ in the ‘Encryption’ menu. Unmounting the volume allows the encryption to protect your data stored on the volume during transit.

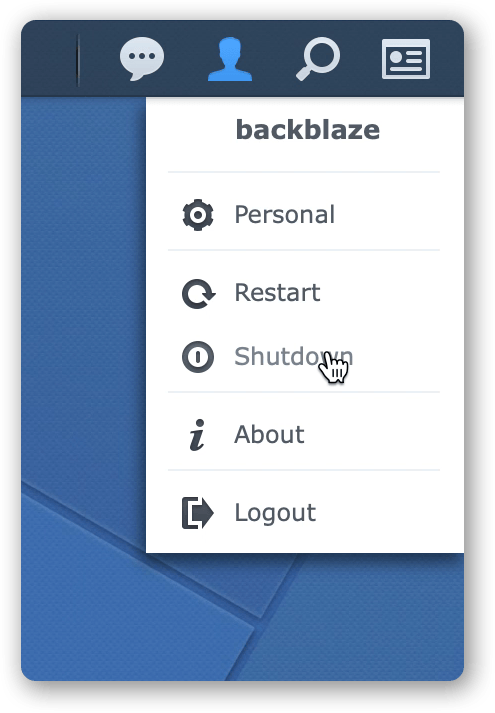
C2. Shutdown the device, using the command in the user menu (top right). Repackage according to the instructions provided and arrange pickup by Backblaze.
D – Await news from Backblaze, re-attach the pool to connect to cloud service
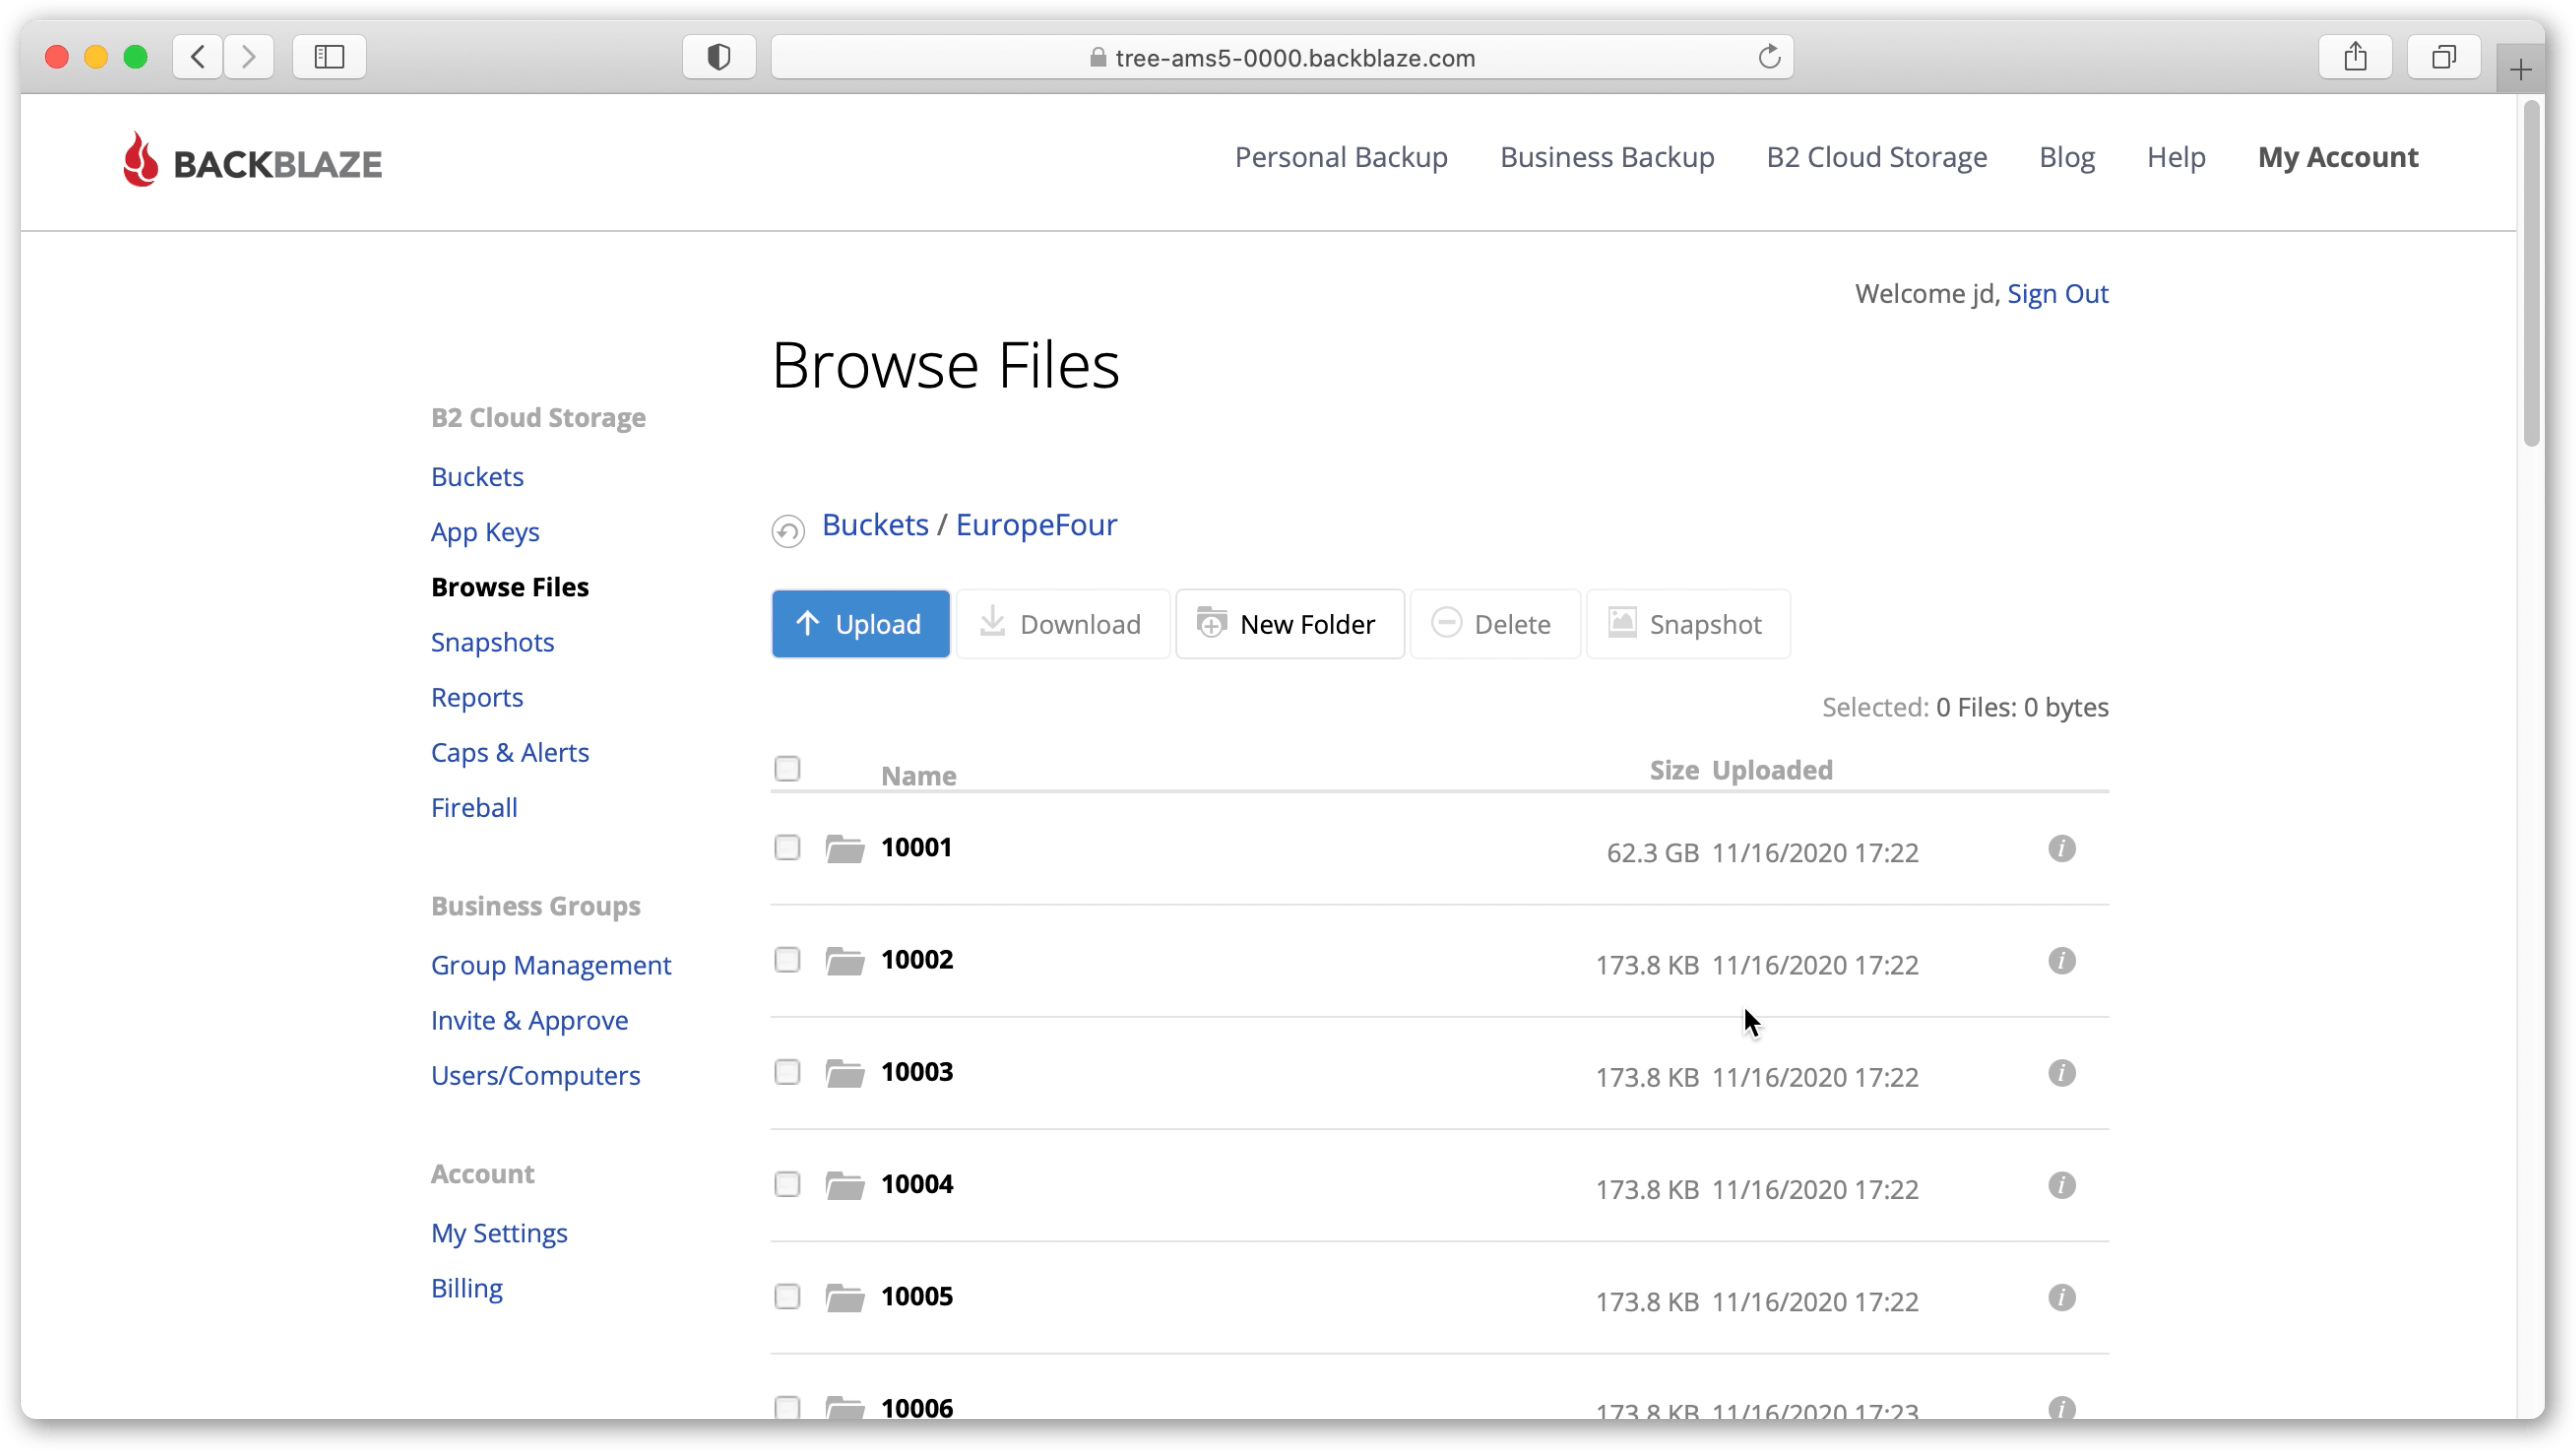
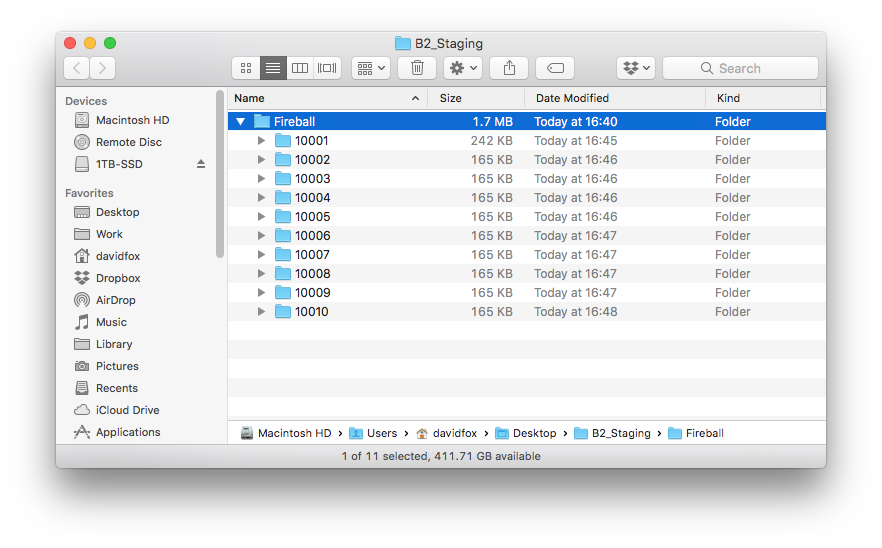
D1. Once the Fireball has been received by Backblaze, they will copy its contents into the B2 Bucket you specified when ordering. When you receive an email letting you know this has happened, login to your B2 account and browse the bucket. You should see volume folders that were written by P5 Archive.
D2. Once you’ve confirmed you can see the volume folders, back in the P5 web-admin interface, visit ‘Cloud Service’ under the P5 Archive tab and add the credentials to allow access to the B2 Bucket where your data resides.
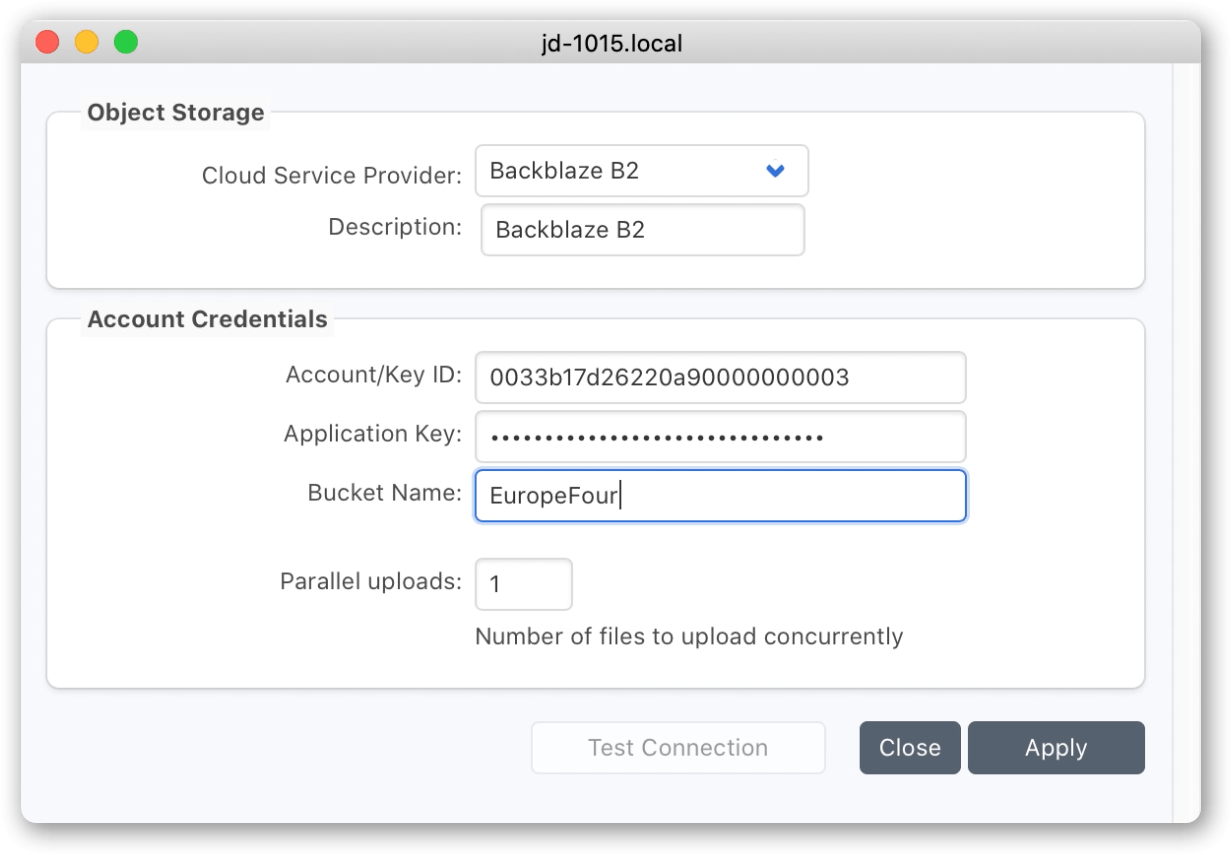
Use the ‘Test’ button to verify P5 can connect to the cloud service before proceeding.
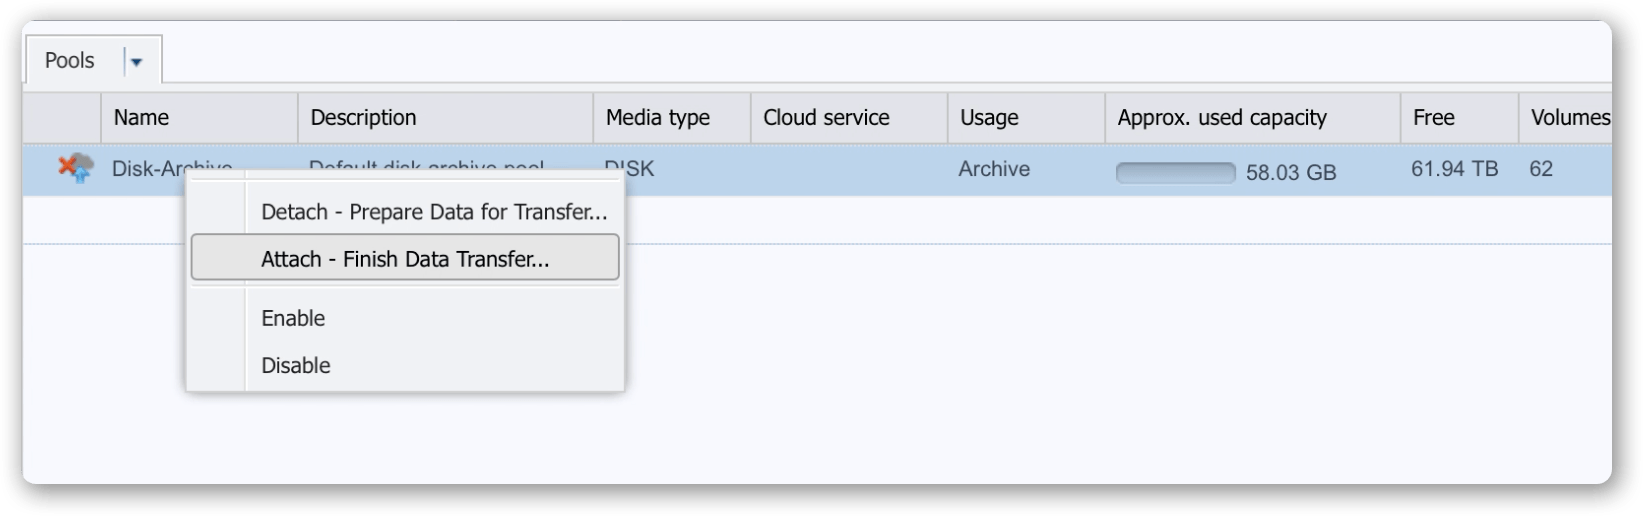
D3. Highlight the previously detached pool, and select ‘attach’ from the contextual menu.
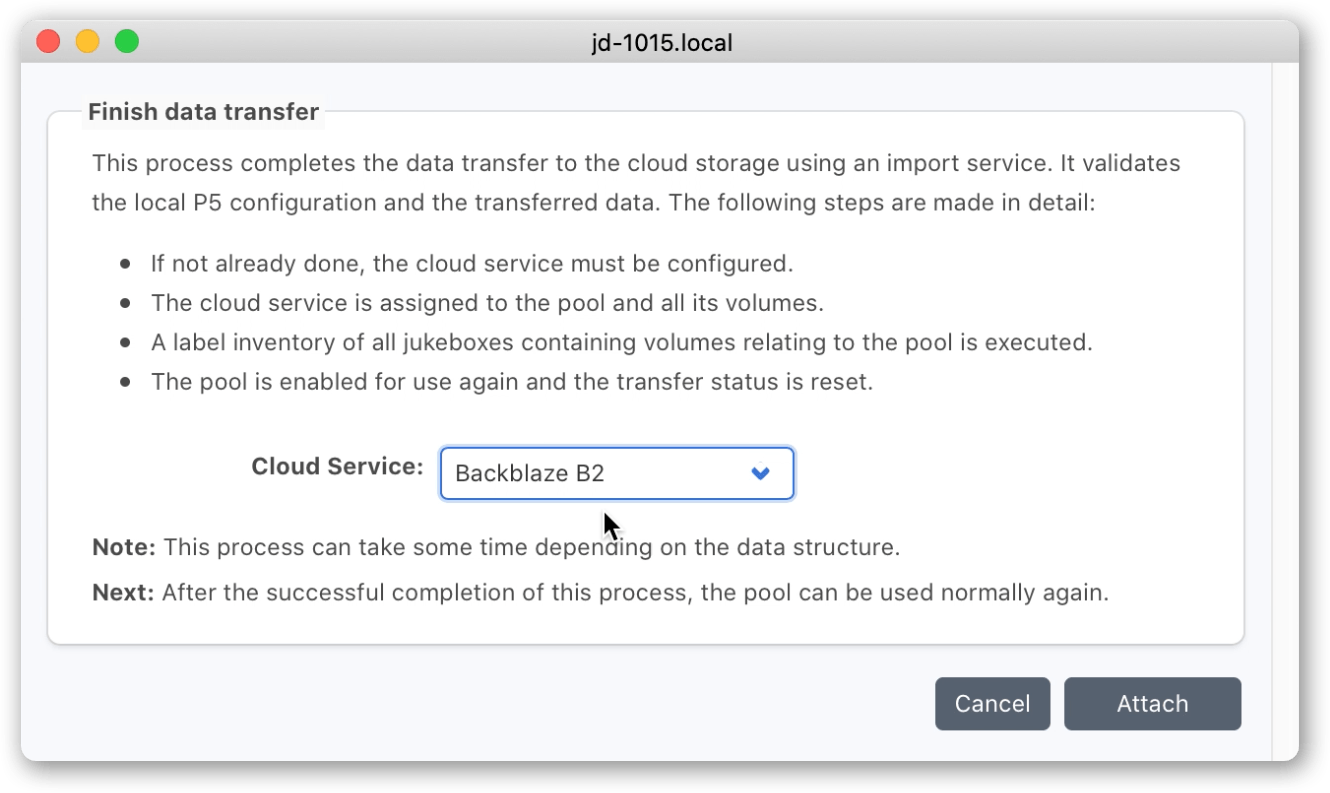
You will be prompted to select the Cloud Service that you set up in the previous step.
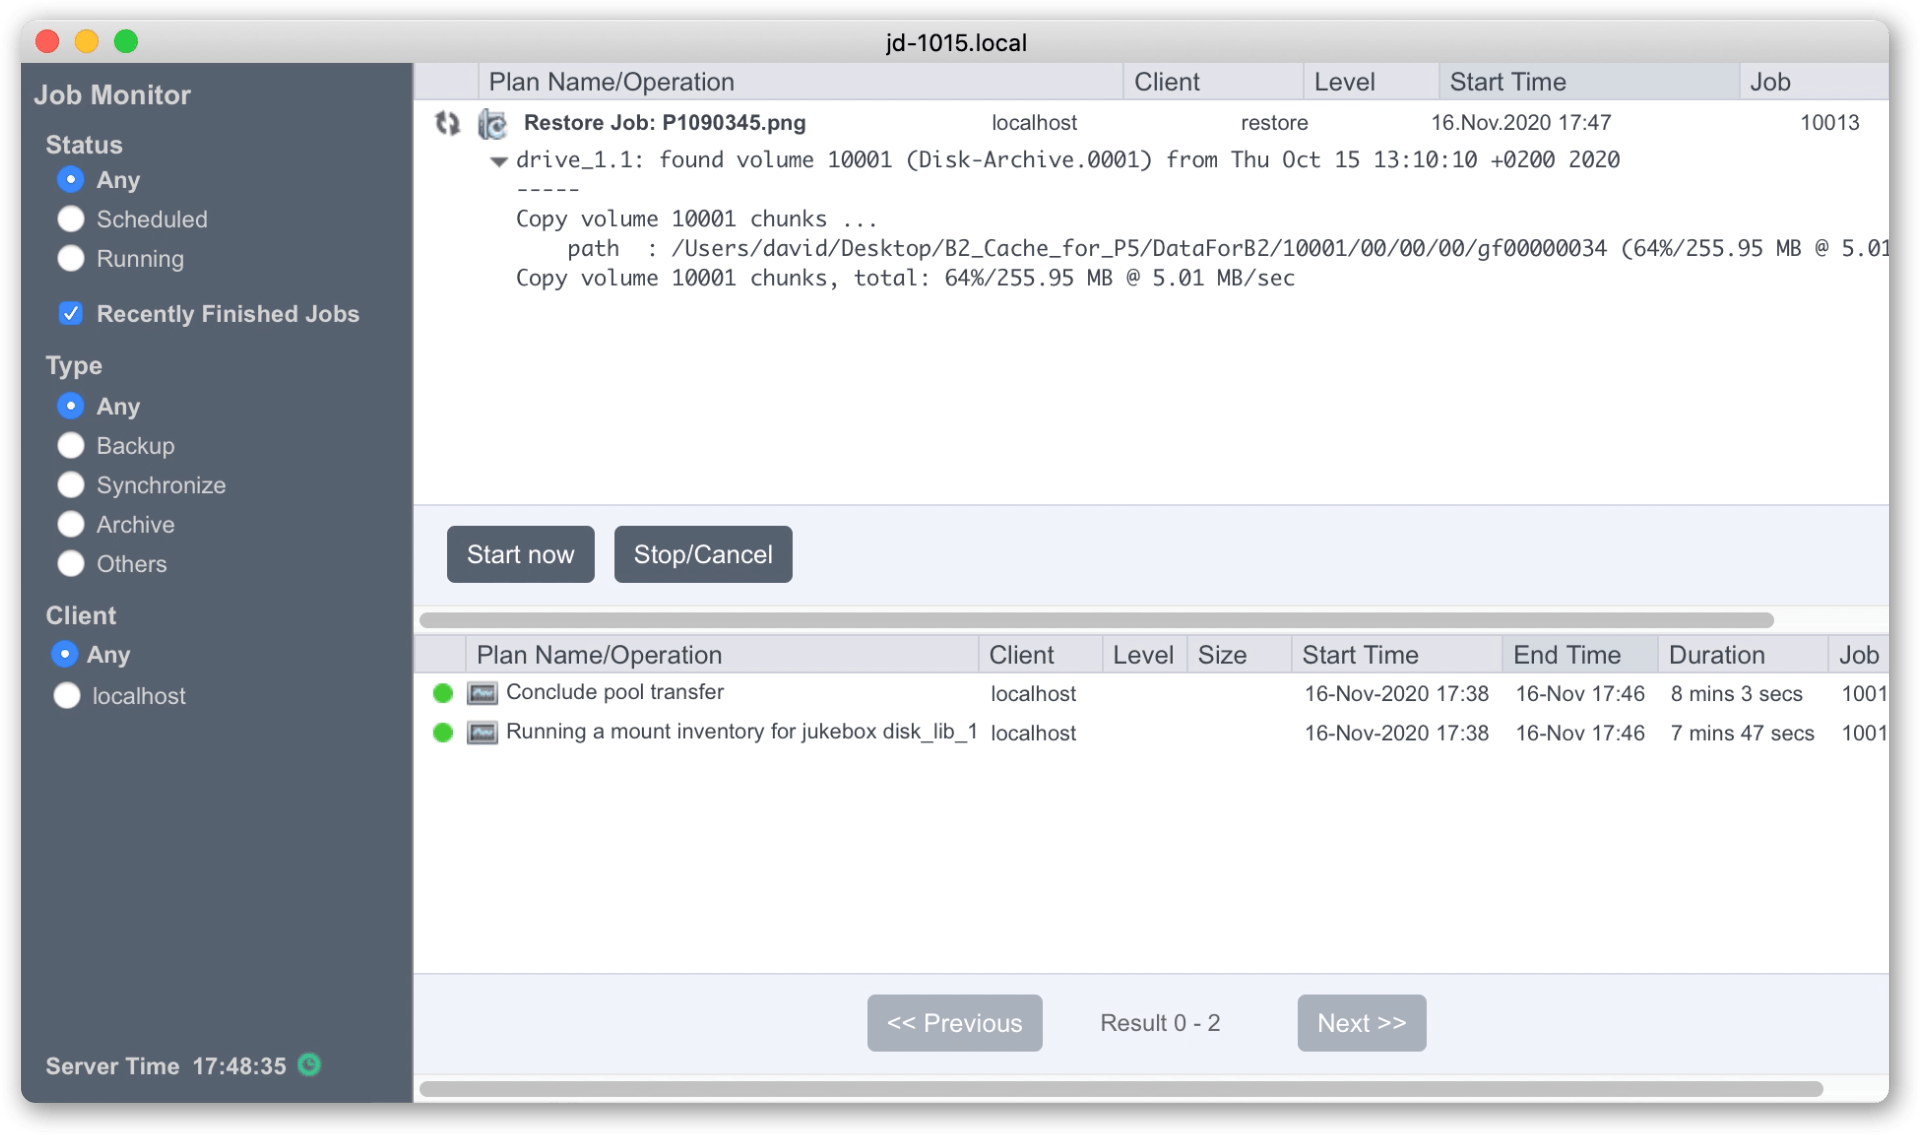
D4. The attach process that you just started will run a couple of jobs, visible in the Job Monitor window. Monitor execution of these jobs to completion.
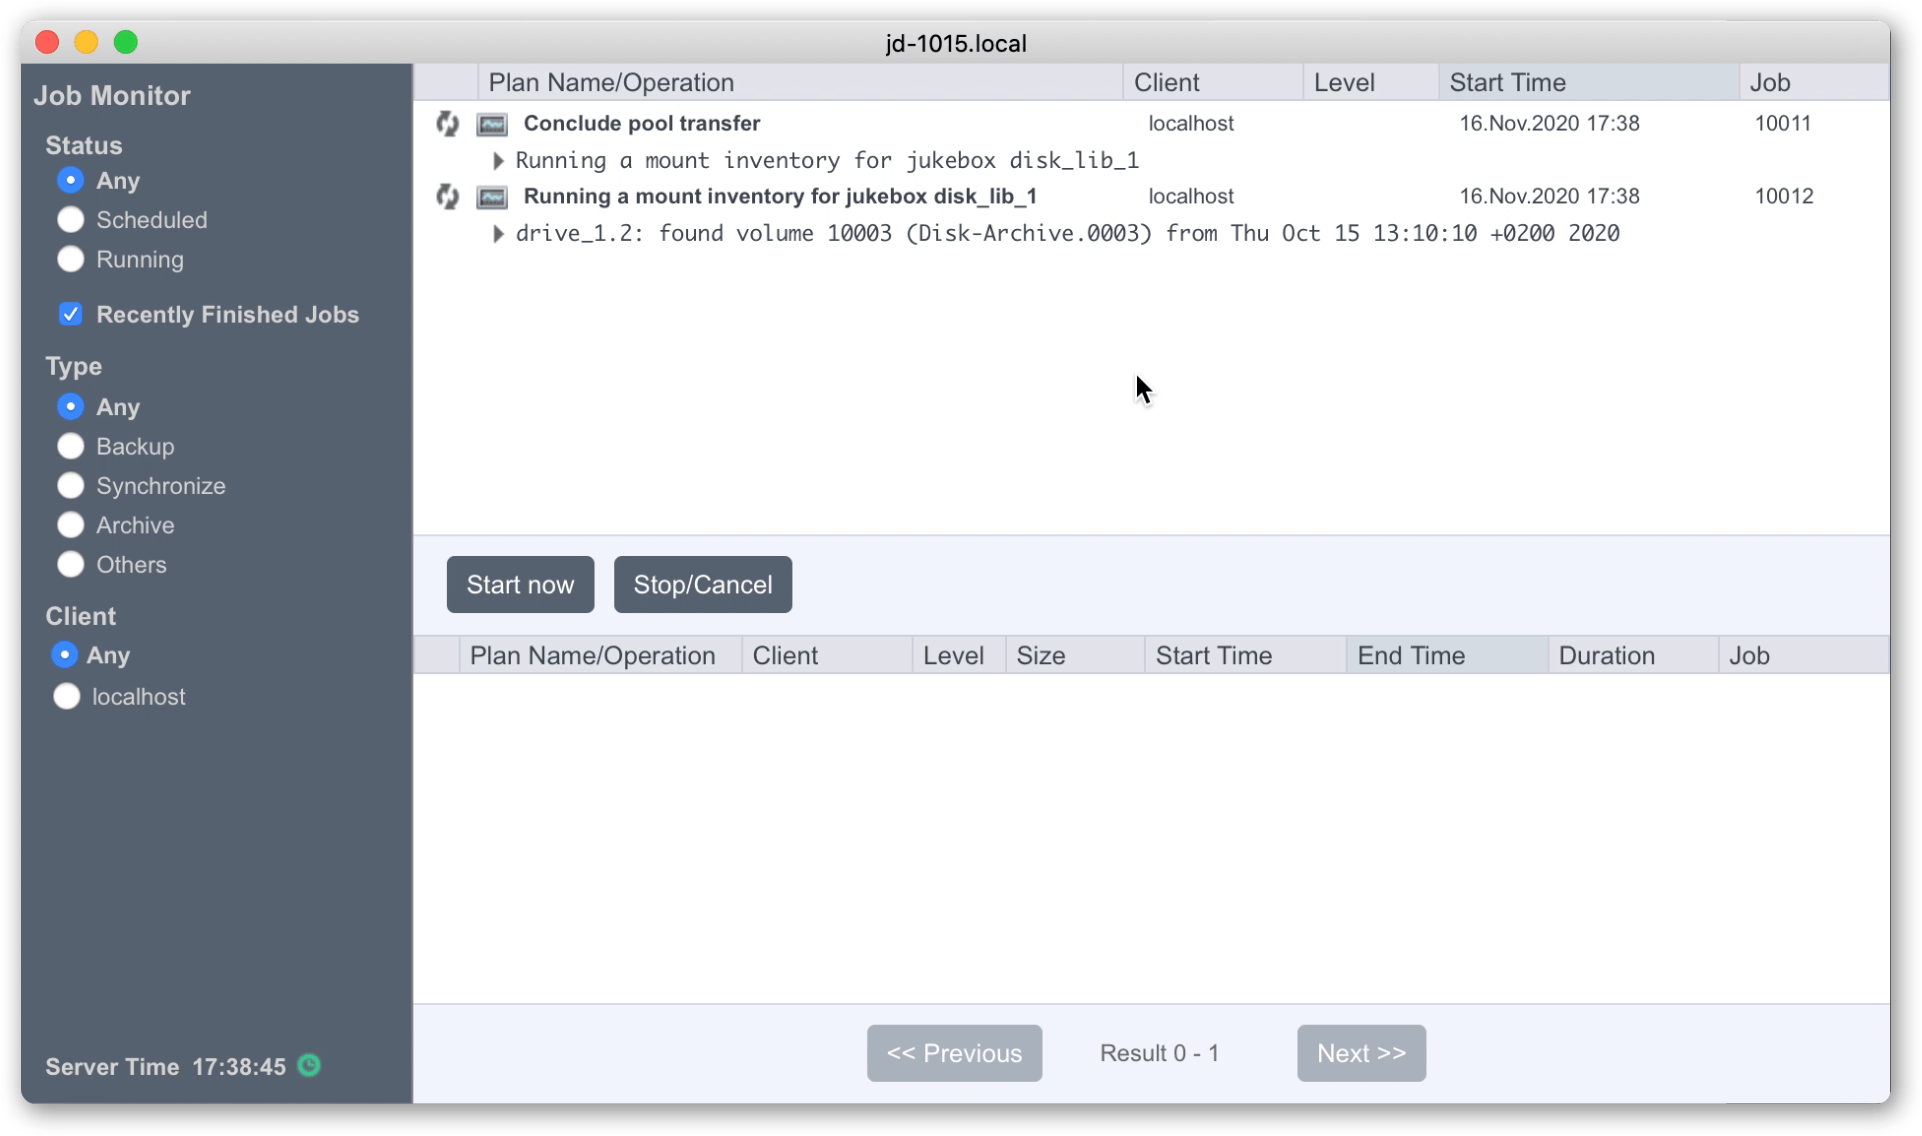
This process connects and reads metadata information from the volumes stored in the cloud and copies some of this locally.
D5. Verify that the pool is now enabled, and all the volumes within it are also now enabled and ready for use.

D6. Perform a test restore. Data will be downloaded from cloud. Monitor the running restore job and confirm data is being downloaded from the cloud bucket.