P5 Archive allows large datasets to be archived to cloud storage by first obtaining a physical disk storage device from the cloud provider for archiving locally across your LAN, and then having this device shipped back to the cloud storage provider. This is sometimes referred to as ‘seeding data’ to the cloud.
In this article, we’ll look in detail at how to use the Wasabi Ball Transfer Appliance to quickly transfer archive data onto Wasabi cloud storage.

Step 1 – Obtain your Wasbi Ball appliance
Visit the link below, and follow Wasabi’s guide to getting your appliance.
https://wasabi.com/wasabi-ball
Once received, plug in the appliance and connect to your LAN. By default an IP address is obtained using DHCP. Use the screen on the front of the appliance to discover this IP address, you’ll need it in later steps.
Step 2 – Obtain S3 credentials for connection to the appliance
In order for P5 to connect to the appliance and write archive data onto it, it will use the S3 network protocol. This is the same protocol that P5 uses to connect to cloud storage, so the process is familiar to those who have previously used P5 with cloud storage.
The information that P5 requires to connect to the appliance is as follows:
- Description – Defaults to ‘Wasabi Ball’, do not change.
- Service URL – this will take the form http://ip-address-of-appliance
- Access Key – see below
- Secret Access Key – see below
- Bucket Name – this will be ‘wasabi-s3’ without the quotes
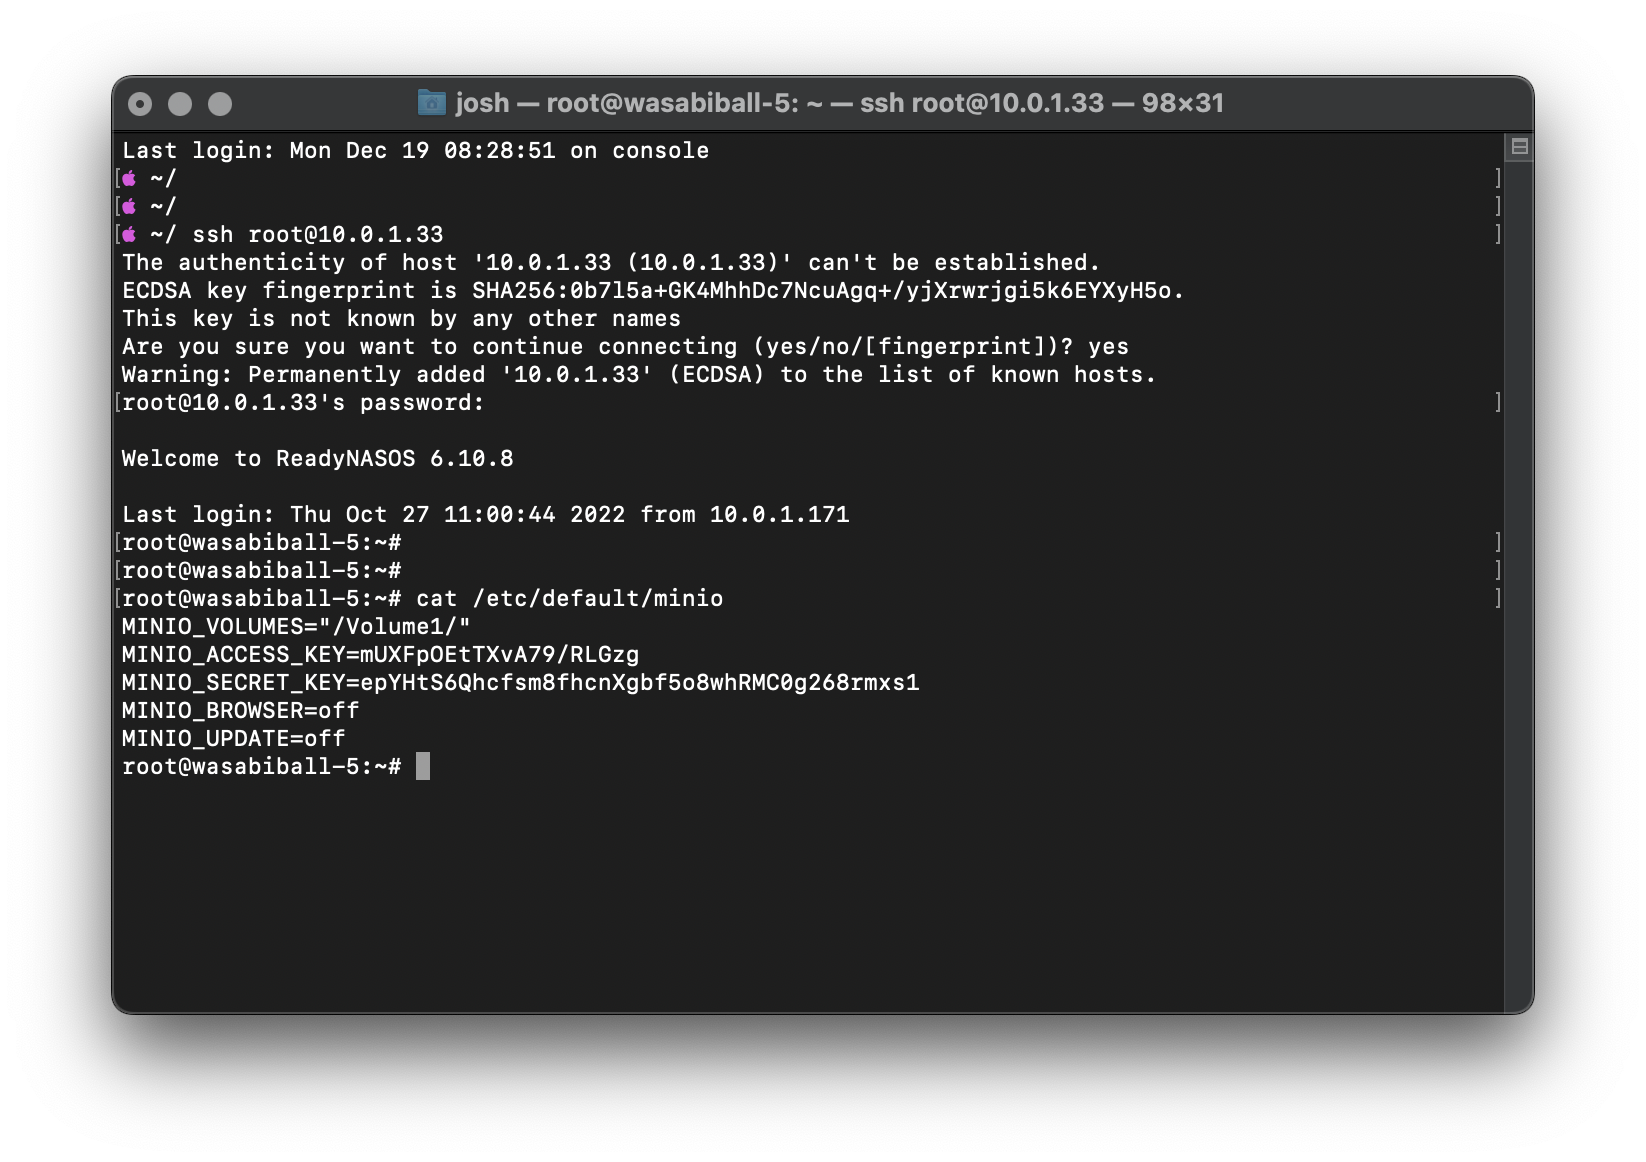
The two keys above are accessed by using an SSH client to connect to the appliance, and then displaying the contents of a file containing these credentials. Many online resources are available explaining how to use SSH on your operating system. Use SSH to connect as the ‘root’ user, and use the default password provided with the appliance.
Once you have an SSH connection to the appliance and can interact with the Linux Shell, output the file by typing:
cat /etc/default/minio
You’ll now see the following displayed in response:
MINIO_ACCESS_KEY=KIs81POL1LOls8LlvWPcMINIO_SECRET_KEY=/dsP/dZa/qP9zGImTtYv4KX63WSL798T9b8xBWl8
Some additional lines may also be displayed which can be ignored. Make a note of this information as it will need to be entered into P5 to make a connection.
Step 3 – Connect P5 to the appliance
The next steps will assume that you have a host computer, running a current P5 version, and connected to the same LAN that the appliance is connected to. It is also assumed that you’re familiar with configuring P5 using the web-admin interface in your browser.
Enter the P5 admin interface, visit the ‘Archive’ tab and then click ‘Storage Manager’ on the left hand side. Select the ‘Cloud Service’ tab to the right and then click the ‘New Service’ button at the bottom. This will open a new window into which the appliance details are entered.
Choose ‘Wasabi Ball’ in the ‘Cloud Service Provider’ dropdown menu in this window, additional fields will be displayed below. You’ll now enter the four items of information above, including the ‘access key’ and ‘secret key’ that were noted down. Always enter this information by way of copy/paste, otherwise errors are easy to make!
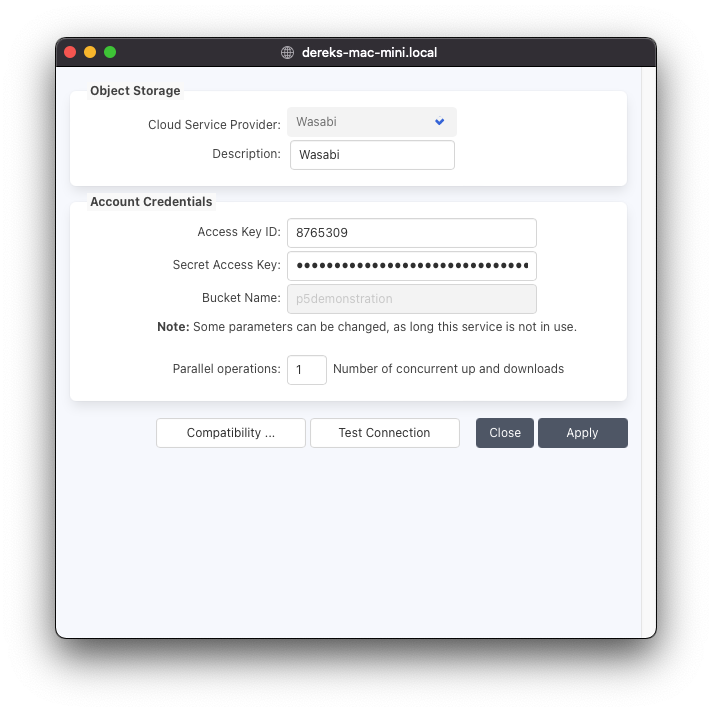
Leave the ‘Parallel Operations’ field set to the default value of ‘1’. Your configuration should now look approximately like this:
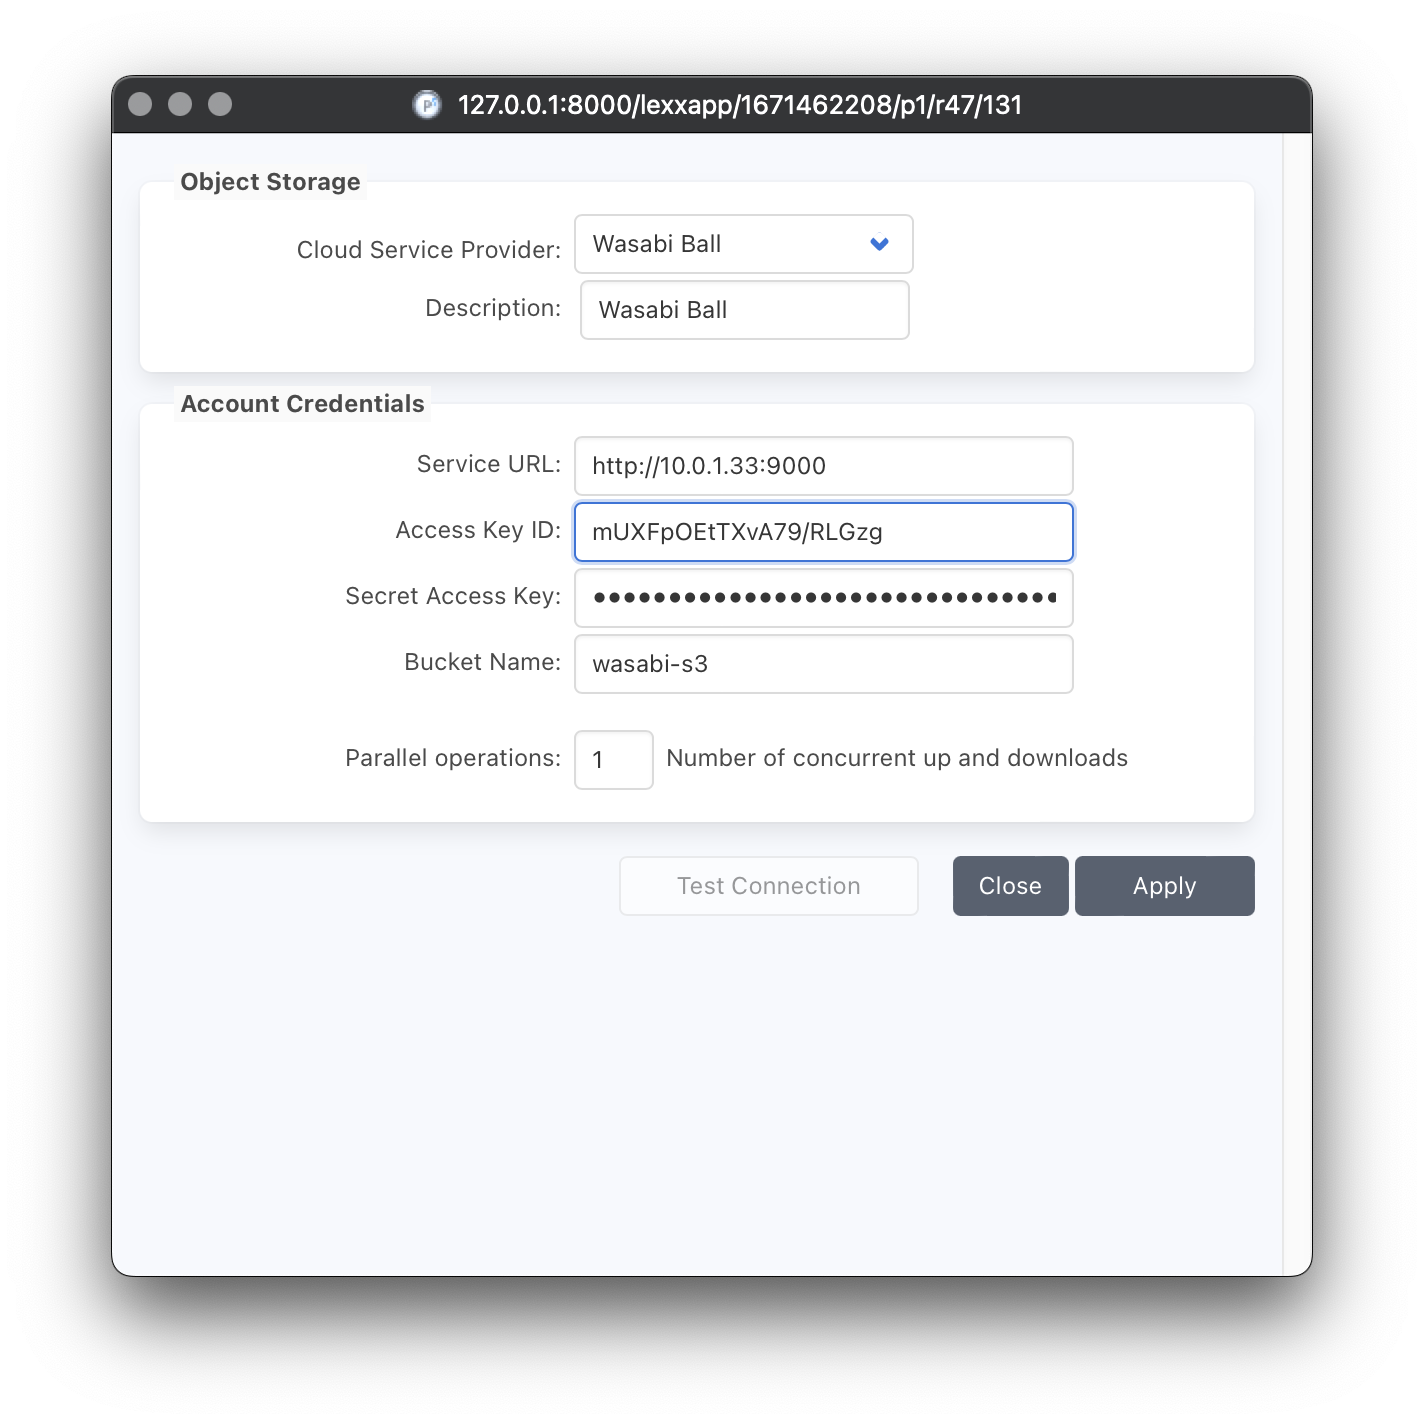
Click ‘Apply’ to save and then click the ‘Test Connection’ button to confirm that P5 can connect to the appliance. Click the ‘Compatibility…’ button to have P5 perform further tests against the S3 connection to the appliance. All these tests should pass successfully, as in our example below.

With P5 now able to write data to the appliance, we will now configure a ‘P5 Container Volume’ to receive Archive data.
Step 4 – Configure P5 Container Volume
Again, within the ‘Archive’ tab, under ‘Storage Manager’, this time in the ’Container Storage’ tab, click the ‘Add Cloud Storage’ button.
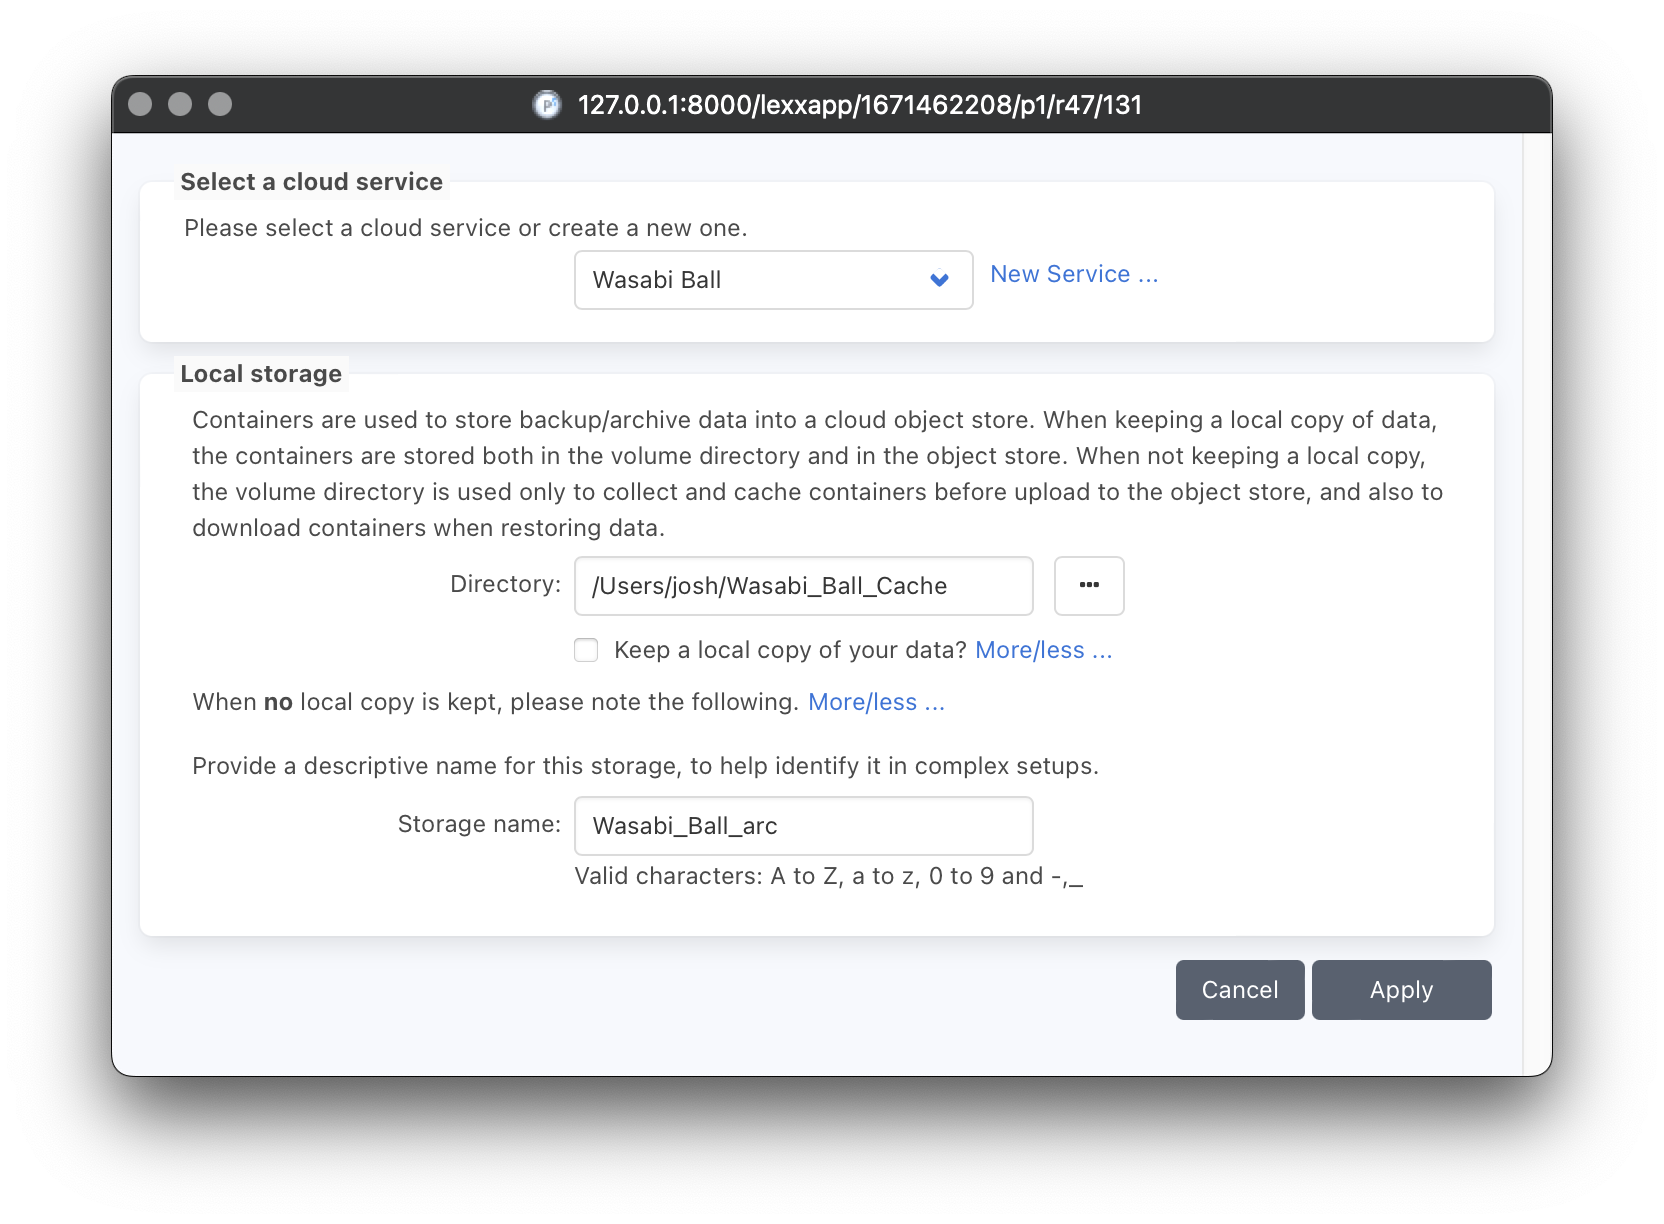
If not pre-selected for you, choose the ‘Wasabi Ball’ cloud service added in the previous step from the dropdown menu at the top of this window.
Under ‘Local Storage’, browse for a directory on the local host (where P5 is installed). This directory will be used to compress and assemble archive data into compressed files/objects ready for writing to the appliance. Later when data is copied to the cloud, the same directory will be used to prepare data to be uploaded to the cloud. See P5 documentation for more information on how local storage is used, and guidance on sizing.
Use the ‘Keep a local copy of your data?’ checkbox to choose whether you want your archive data to be written both to local disk storage and cloud storage. When using a transfer appliance, it’s unlikely a local copy will be retained.
A default ‘Storage Name’ will be provided for this storage container, you can edit this if you wish or leave as-is. This name will be used as the Pool name for this storage.
Click Apply. P5 will create a Storage Pool and a Container Volume to allow Archiving to commence.
Step 5 – Configure a P5 Archive Plan
The appliance is now configured ready to write archive data. You should now configure your archive workflow by creating an archive plan to write to the newly created pool.
Please see P5 documentation for details of how to setup an Archive Plan, since it is beyond the scope of this guide.
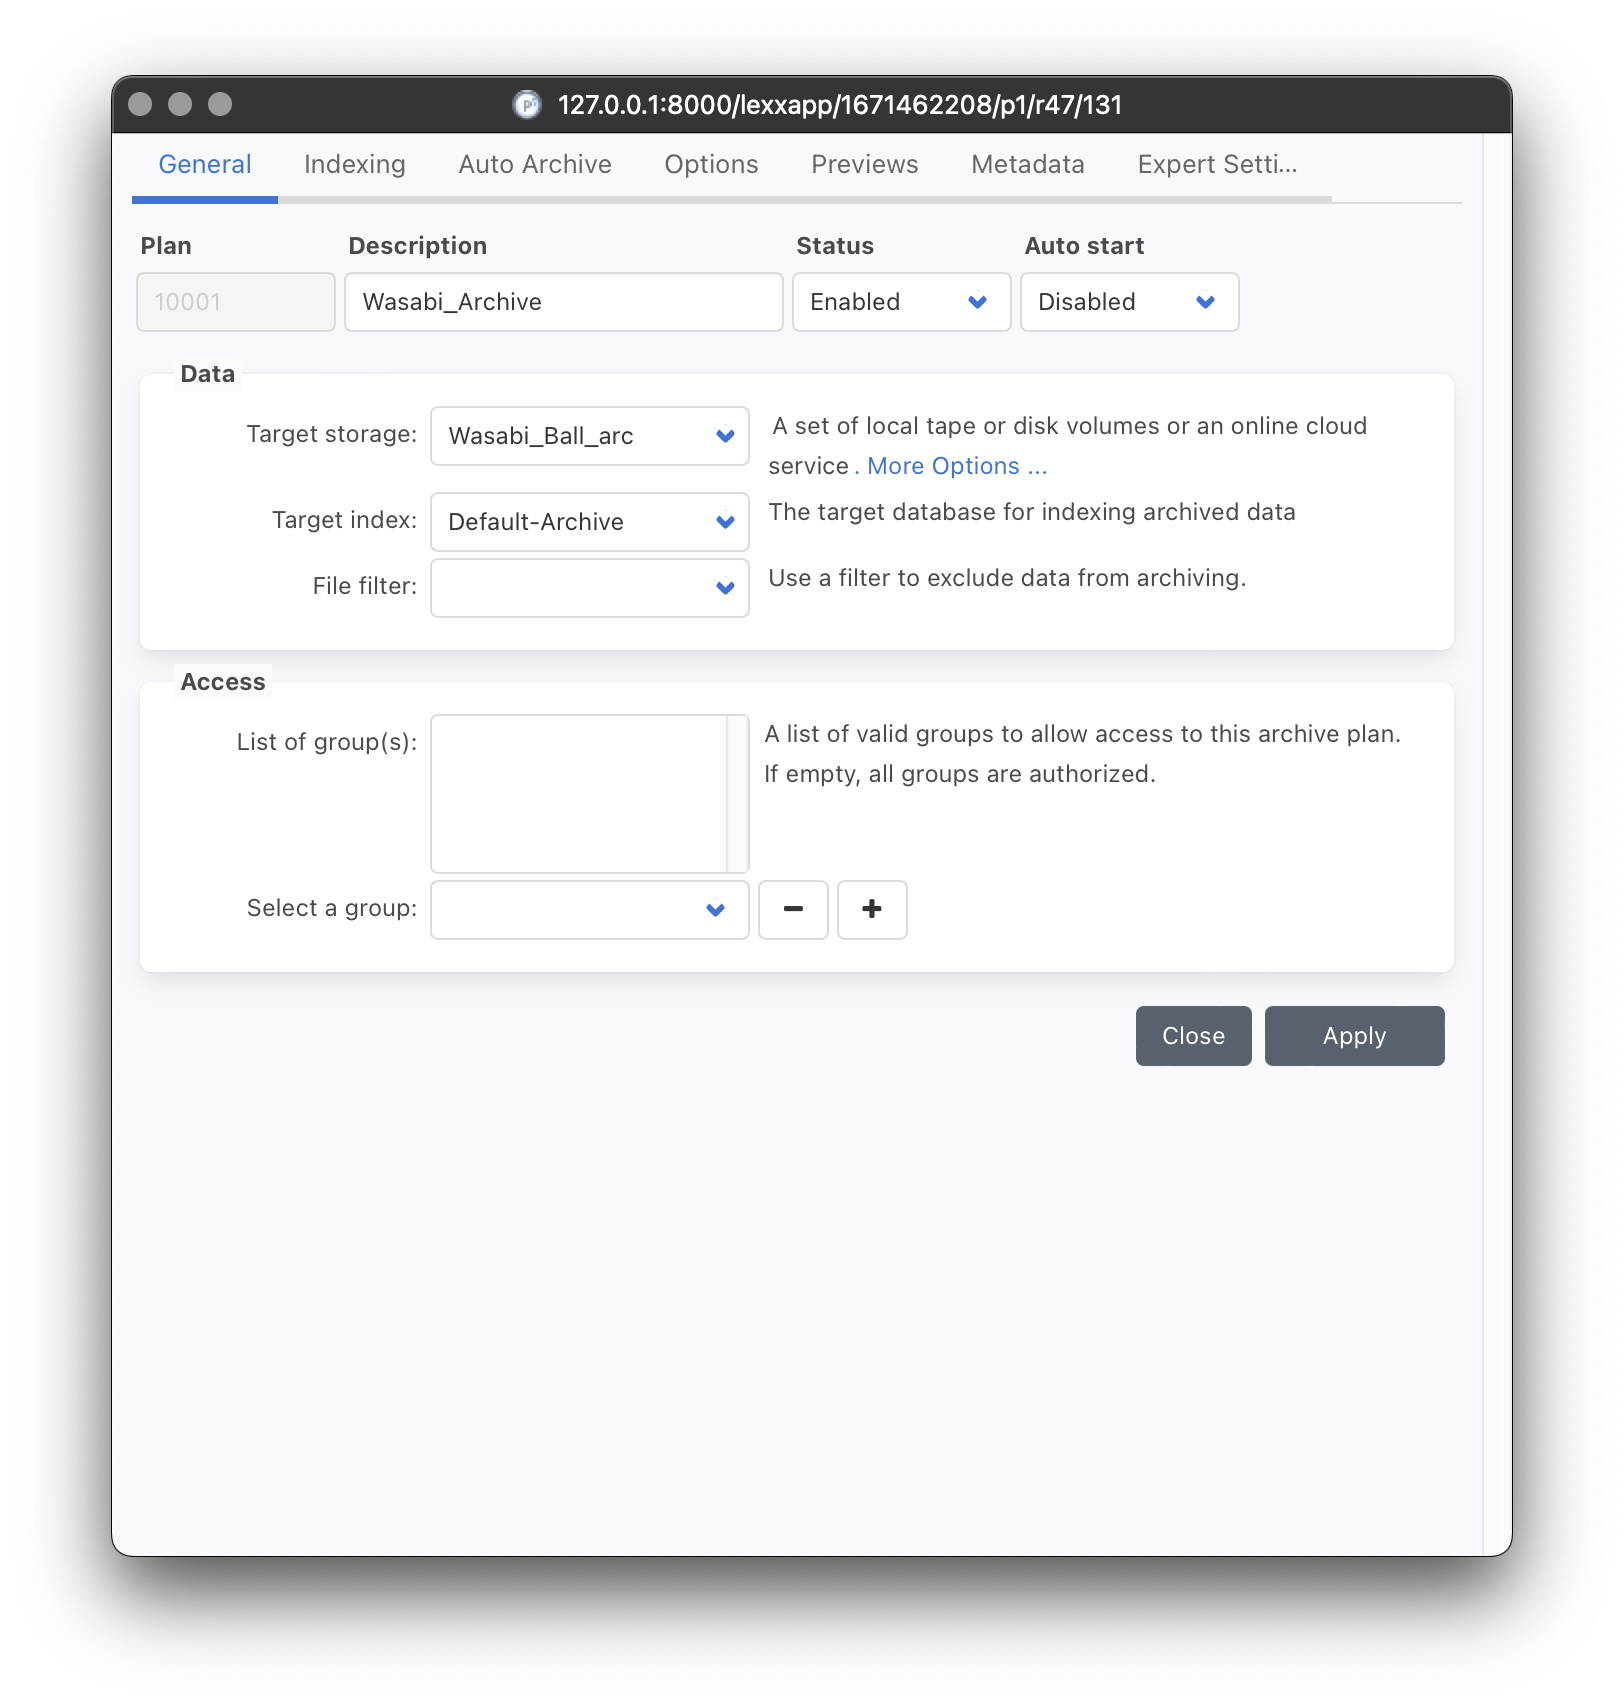
Ensure that the ‘Target Storage’ within the General settings for the Archive Plan is set to the Storage Pool created in the previous step.
Step 6 – Archive data to the appliance
Now run your Archive Plan, manually selecting a small amount of data. Let the job complete. Your archived data will be written to the Wasabi Ball appliance.
You can verify that folders/files are being written to the appliance. Look for files under a path like the one below to confirm P5 is writing data. The numbers on your installation will vary from the ones in this example.
config/volumes/10001/containers/01/02/03/04/cf0360334000000028p5b
If everything looks good, continue to archive all data using the same method. Archive everything that you wish to have stored on Wasabi cloud storage. Note the total size of storage available on the appliance so that you don’t run out of space.
Using multiple Wasabi Ball appliances
At the time of writing, each appliance has 100TB of raw capacity, resulting in around 87TB of usable space, according to our experiences. If you have more archive data than will fit on a single appliance, you can order more than one appliance and archive to them in sequence. In order to connect to a new appliance, adjust the credentials in the ‘Cloud Service’ to match the new keys that will be unique to each appliance.
Run separate Archive jobs, so that each appliance is filled in turn. When returning the appliances back to Wasabi, the data from all appliances should be written back into the same bucket.
Step 7 – Return appliance to Wasabi
Once all archiving has been performed, and everything has been written to the appliance(s), they should be returned to Wasabi, according to the instructions provided.
Once received, the contents of each appliance will be written to a cloud bucket as specified when the appliances were originally ordered. You’ll receive email notification that this is complete. If using more than one appliance, a single bucket should receive the data from all the appliances.
You should be aware of the credentials required to access the data in this cloud bucket once it’s available. Use the Wasabi web control panel to create access keys that provide access to this bucket if you don’t already have them. Multiple sets of access keys can be created. Make a note of the Access Key ID and Secret Access Key.
Step 8 – Reconnect P5 to the Wasabi Cloud Bucket
Our final step will be to create a new Cloud Service in P5 that points to our cloud bucket, and edit our Container Volume to use this storage to access the archive data in the cloud.
Visit the ‘Archive’ tab, then click ‘Storage Manager’ on the left hand side. Select the ‘Cloud Service’ tab to the right and then click the ‘New Service’ button at the bottom. This will open a new window into which the appliance details are entered.
Now choose ‘Wasabi’ (not Wasabi Ball) in the ‘Cloud Service Provider’ dropdown menu in this window, other fields will be displayed below. Keep the ‘Description’ as ‘Wasabi’. This will later distinguish this cloud service from the one named ‘Wasabi Ball’. Now enter ‘Access Key ID’ and ‘Secret Access Key’ as provided by the Wasabi web control panel. Finally enter the name of the bucket where your appliance data was copied.
The ‘Parallel Operations’ field determines how many separate transfer streams are used when copying data to and from the cloud service. The optimal setting is best obtained by experimentation and dependent upon the nature of your internet connection.
As in the previous steps, apply these changes and perform both ‘Test Connection’ and ‘Compatibility…’ test to confirm your P5 host is able to communicate with the cloud storage.
Reconfigure Cloud Volume
Visit the ‘Archive’ tab, then click ‘Volumes’ on the left hand side. Locate the container volume relating to the Wasabi storage. This volume will show the ‘used capacity’ which should match your expectations, based on the quantity of data previously archive to the Wasabi Ball appliance.
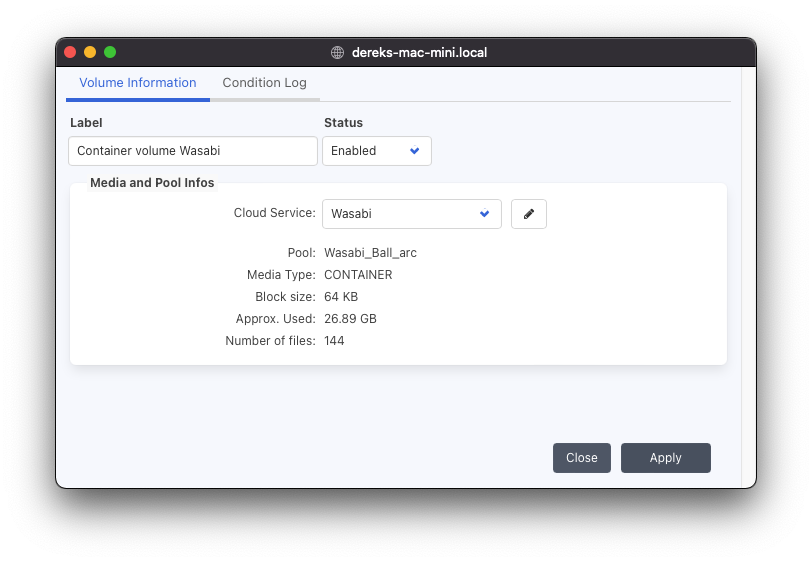
Double click on this volume, you will be presented with a window similar to the one below. Note the Cloud Service is currently set to the ‘Wasabi Ball’. Edit this item using the button with the pencil icon. P5 will display a warning, stating that the data on the new cloud service needs to be identical to the old one. This will be the case since the contents of the appliance(s) has been copied to the cloud bucket.
From the dropdown menu, select the ‘Wasabi’ cloud service. This is the one that points to the cloud storage, rather than the local appliance. Apply the changes.
Step 9 – Test by restoring and archiving
Our configuration to point to the cloud storage is now complete. Now test everything is working as expected by first restoring some data from the archive, using the archive index. This should result in data being copied from the Wasabi Bucket back to the local P5 host and then the restored files appearing at the location specified for the restore.
Test further by archiving more data using the same Archive Plan. Data will be transferred up to the cloud bucket in order to perform this archive.
Once satisfied these tests were successful, continue to use the archive plan to archive more data as required.
Should issues arise, contact Archiware Support to obtain assistance.