Note that this article refers to P5 version 7, released July 2021. For previous versions of P5, refer to this article for configuration of the AWS Snowball and this article for configuring P5 for use with a Backblaze Fireball.
In this article, we explore how to use Fireball ‘transfer device’ from Backblaze B2, to quickly seed backup or archive data into cloud storage. Instead of beginning a backup or archive workflow by sending a large quantity of data to a cloud bucket using your WAN connection, use of a transfer device will speed the process up. The device is ordered via the same web-administration interface through which the cloud storage is managed. For a fee, you will be shipped a device containing disk storage and network hardware that you can connect up to the P5 host on your LAN. At the time of writing, Backblaze employ a Synology NAS device as their Fireball, with a capacity of 96 TB.
Our instructions below assume that you already have an account with Backblaze B2, have setup payment, you know how to create a ‘bucket’ and you have general familiarity with the platform. Cloud storage can be used with both P5 Backup and P5 Archive, the same technique can be used for either.
1. Create cloud storage bucket and request data transfer device from cloud vendor
Using the Backblaze B2 web-admin interface, begin by creating (if it doesn’t already exist) the bucket that will be used for the data transfer using the transfer device. This will be the bucket that the transfer device will be linked to. The data copied to the transfer device will be copied to this bucket once returned to Backblaze.
Having created the bucket, you’ll be able to request the Fireball transfer device. Order more than one if the capacity of a single device doesn’t cover your requirement. You’ll be charged for the loan of the device, which will be couriered to you.
2. Configure transfer device on local network
Upon receipt of the Fireball transfer device, follow the vendors instructions to make the storage available as follows:
For P5 running on Windows and MacOS host: Make share available via the SMB protocol, to the host where your P5 Server runs. You will create an SMB share on the Fireball, and mount this share on the host where P5 runs. Make a note of the local directory where the SMB volume is mounted.
For P5 running on Linux/FreeBSD hosts: In our testing we encountered issues running SMB/CIFS client reliably on Linux and FreeBSD hosts. Data transfer was not reliable in some cases, resulting in incomplete P5 volume data in cloud object store. Therefore make the share available from the Fireball using the NFS protocol and mount this on your Linux/FreeBSD host where P5 is installed. P5 will then write data onto the Fireball via the NFS mount.
A good explanation of configuring Linux to mount NFS network shares is available here: https://linuxize.com/post/how-to-mount-an-nfs-share-in-linux/
3. Configure P5 to work with the transfer device

Within P5’s web-admin interface, visit the Backup or Archive tab to begin connection to the transfer device.
Click through Storage Manager ➜ Container Storage ➜ Add Local Storage and enter the ‘mount point’ path. This allows your backup/archive data to be written directly onto the Fireball transfer device. Additionally specify the ‘storage name’ to make it easy to identify this storage in future.
Click ‘Apply’ and both the Container Volume and a corresponding Pool are created in P5.
Now you may create your P5 Backup / P5 Archive jobs as required to write data to the transfer device via the SMB/NFS connection. Configure the job to write to the pool that was created in the previous step.
Note that the amount of data being written to the transfer device must not exceed the remaining capacity on the device. You should be aware of how much backup/archive data you have to transfer and order additional transfer devices from the cloud vendor if necessary.
You can control how much data will be written by a backup job by using the ‘Start Now’ button to manually start a job. You’ll be prompted to enter a size limit for the job. In order to control how much data an archive job will write, limit the contents of the source folders selected according to the remaining capacity of the transfer device.
Connect each transfer device in turn. If the SMB/NFS share name remains the same for each device, P5 will not require any reconfiguration, since the mount-point directory stored in the Pool setting, will remain the same. Repeat Backup / Archive jobs to each transfer device until all data is stored.
4. Return transfer device(s) to Backblaze
When all data is written by P5, return the transfer device(s) to Backblaze according to their instructions. Await confirmation that the data written to the Fireball transfer device(s) is now available in a single cloud bucket, note the credentials required to access the cloud bucket.
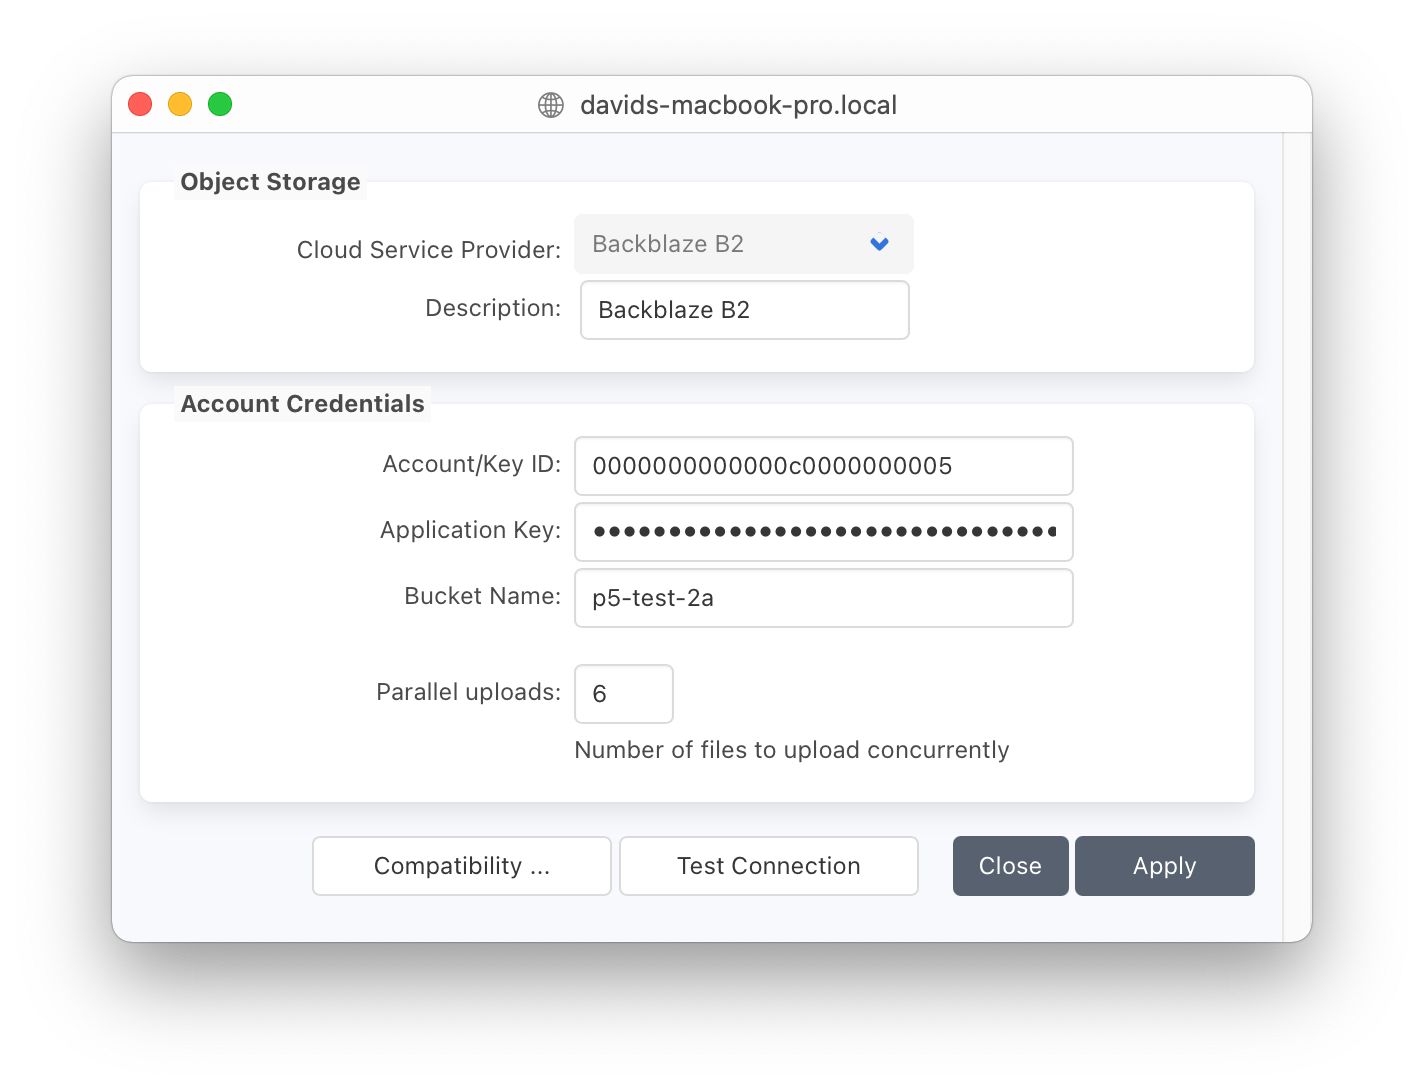
In P5, Storage Manager ➜ Cloud Service ➜ New Service, add new service with ‘provider’ set to Backblaze B2, using credentials for the cloud bucket where your data now resides. Use the ‘Test Connection’ button to check everything is working.
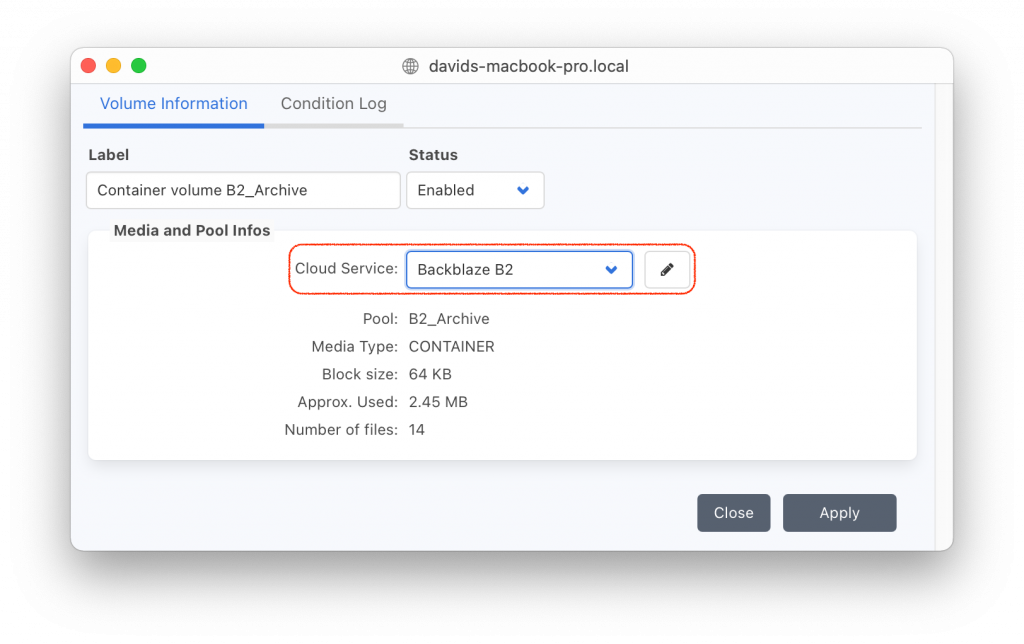
In P5, Volumes ➜ Tab <Volume Name>, Edit the ‘Cloud Service’ field by clicking the ‘pencil’ button to the right. Select the BackBlaze B2 Cloud Service created in the previous step.
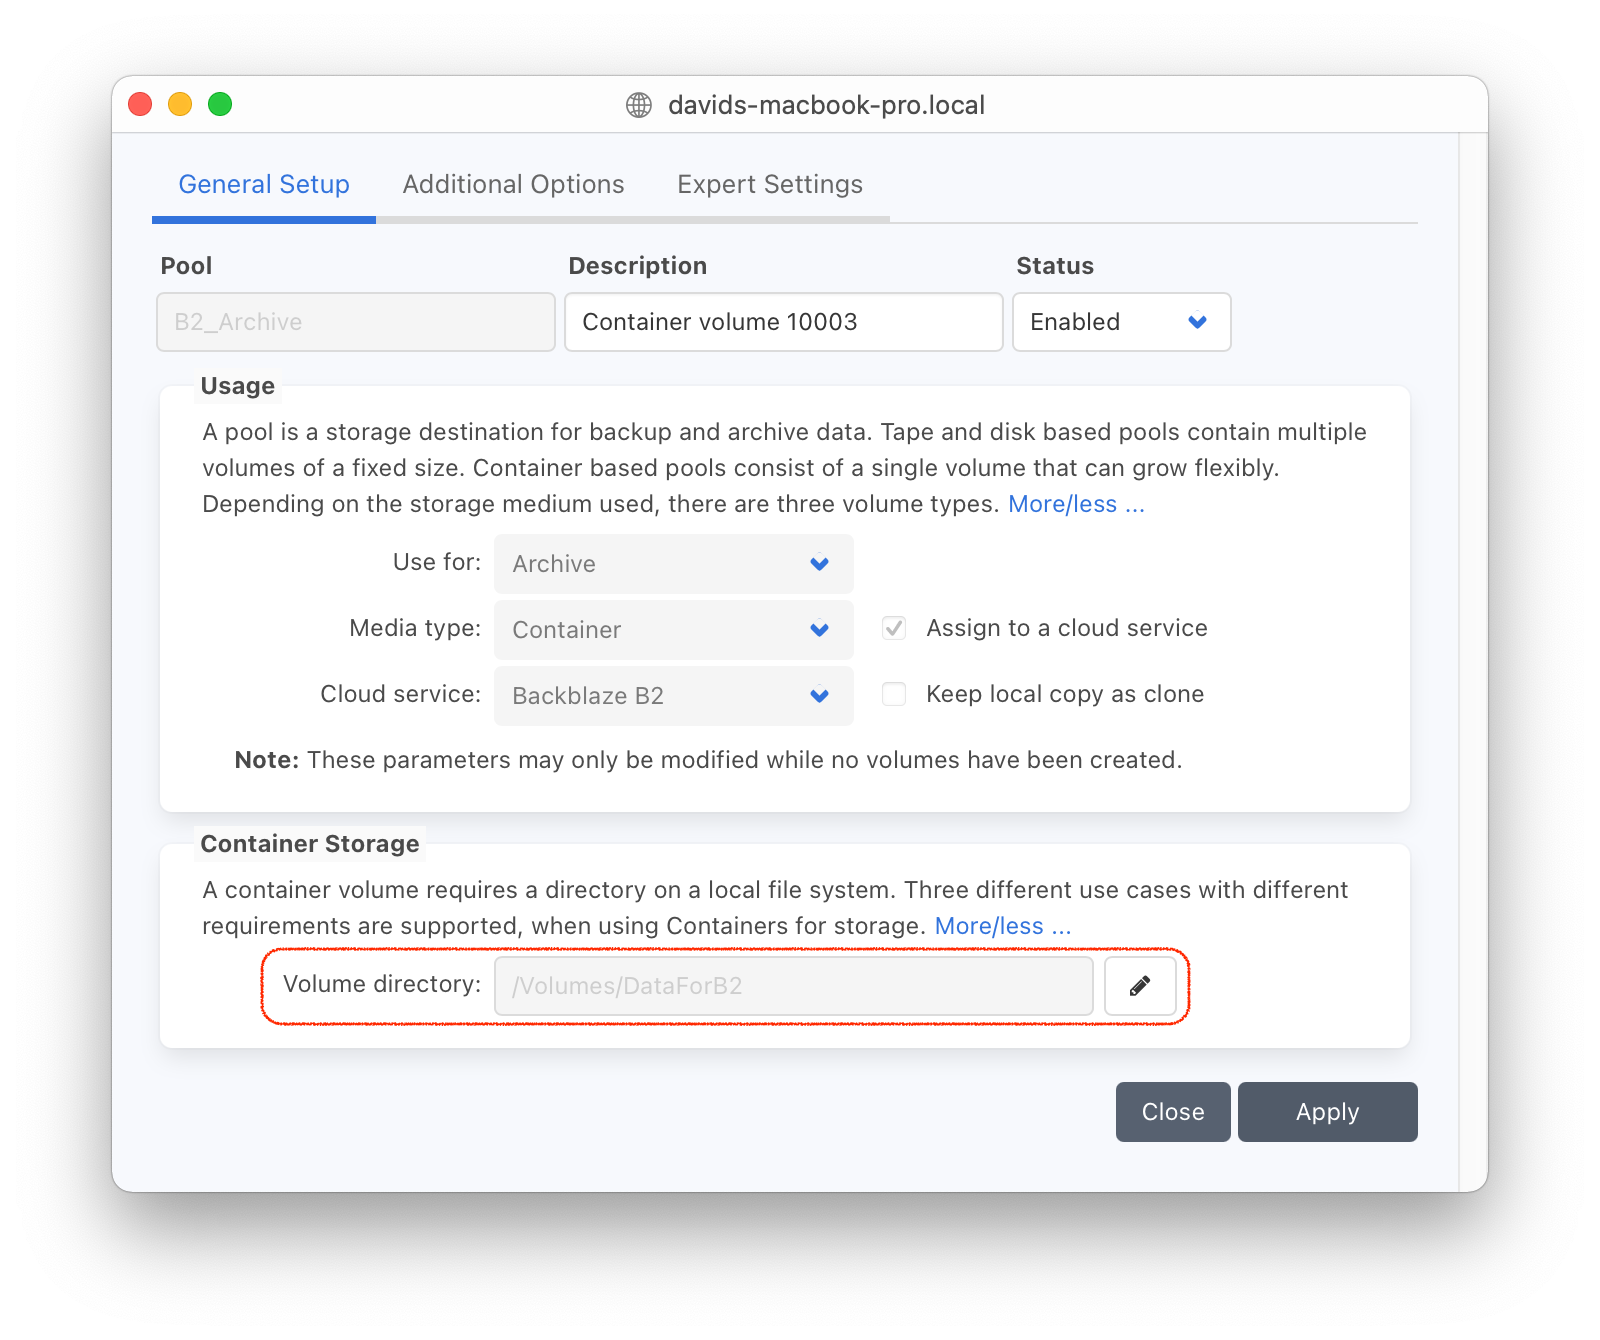
In P5, Pools, Edit the pool, by double-clicking on it. Modify the ‘Volume Directory’ entry by clicking the ‘pencil’ button to the right. This directory should be changed, from the location of the SMB/NFS share, to a new local folder that will be used for caching data while reading/writing to the cloud bucket.
5. Test connectivity by performing a restore.
Select some data from your P5 Backup / P5 Archive index and restore back to disk. Your restored data will be downloaded from the cloud bucket, small container objects within the container volume will temporarily be stored in the local storage directory and then deleted once the job completes. Further backup / archive data will now be saved directly to the cloud bucket.